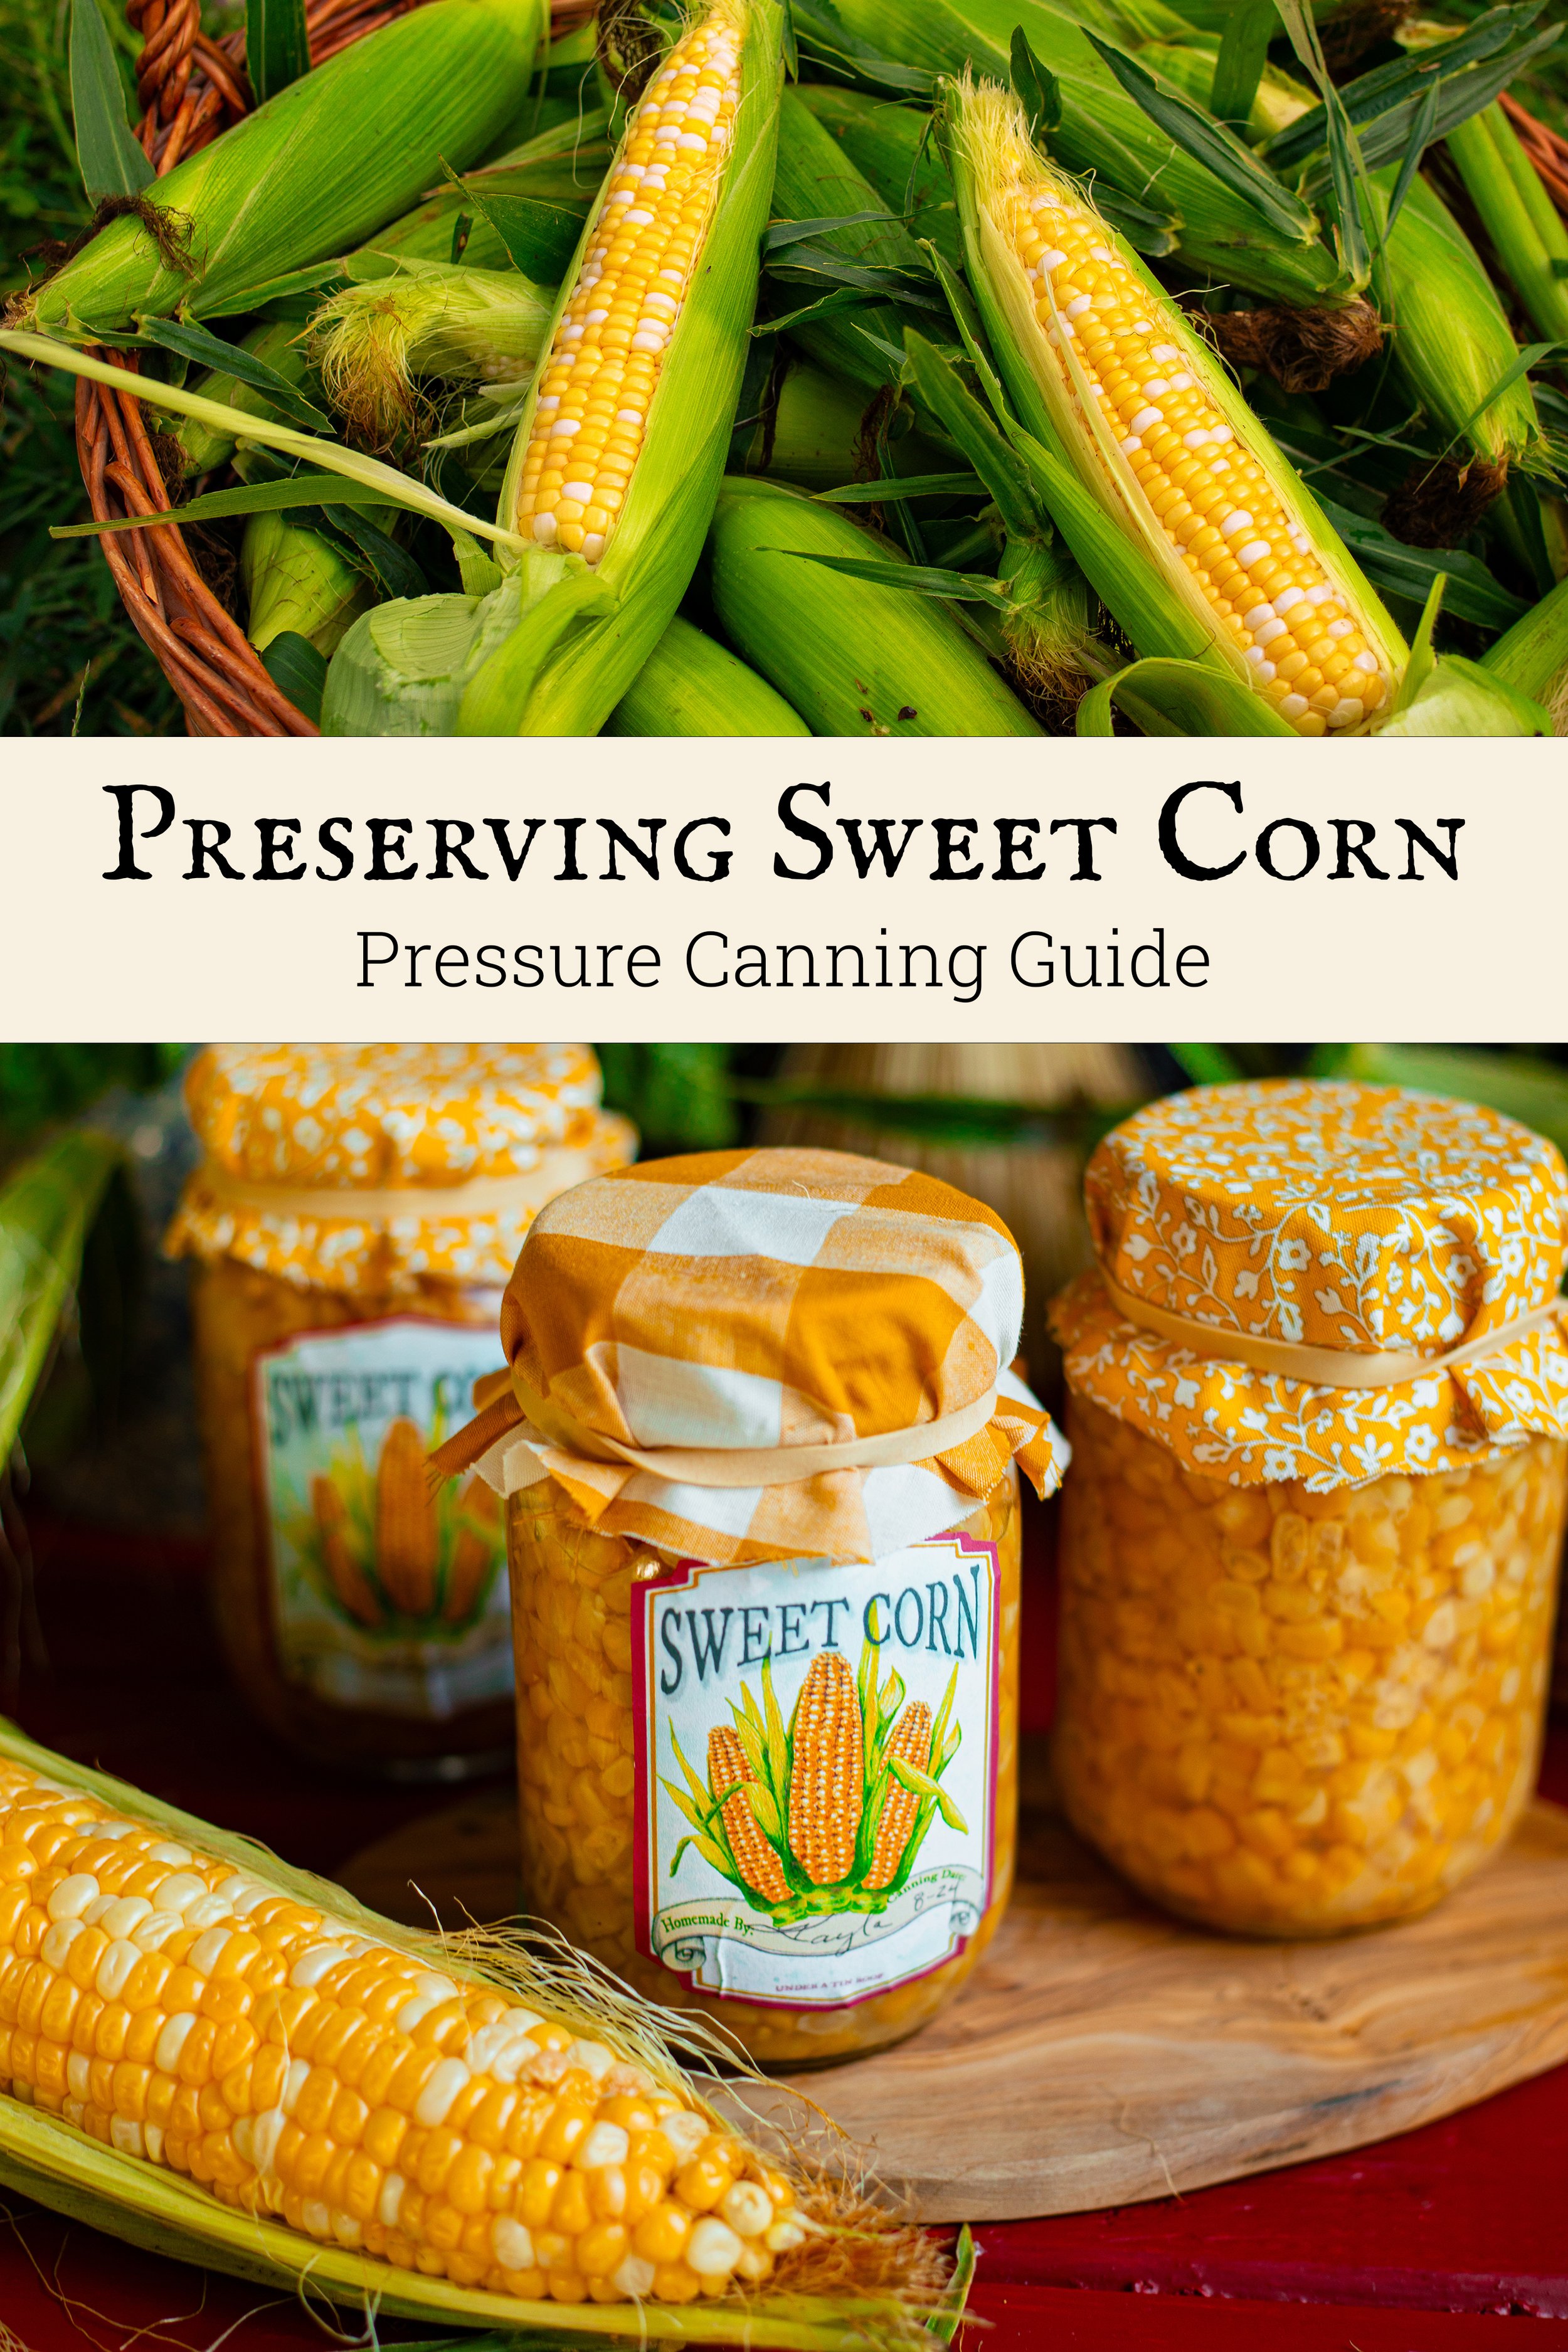
How to Preserve Sweet Corn: Pressure Canning Guide
This post may contain affiliate links, please see our privacy policy for more information.
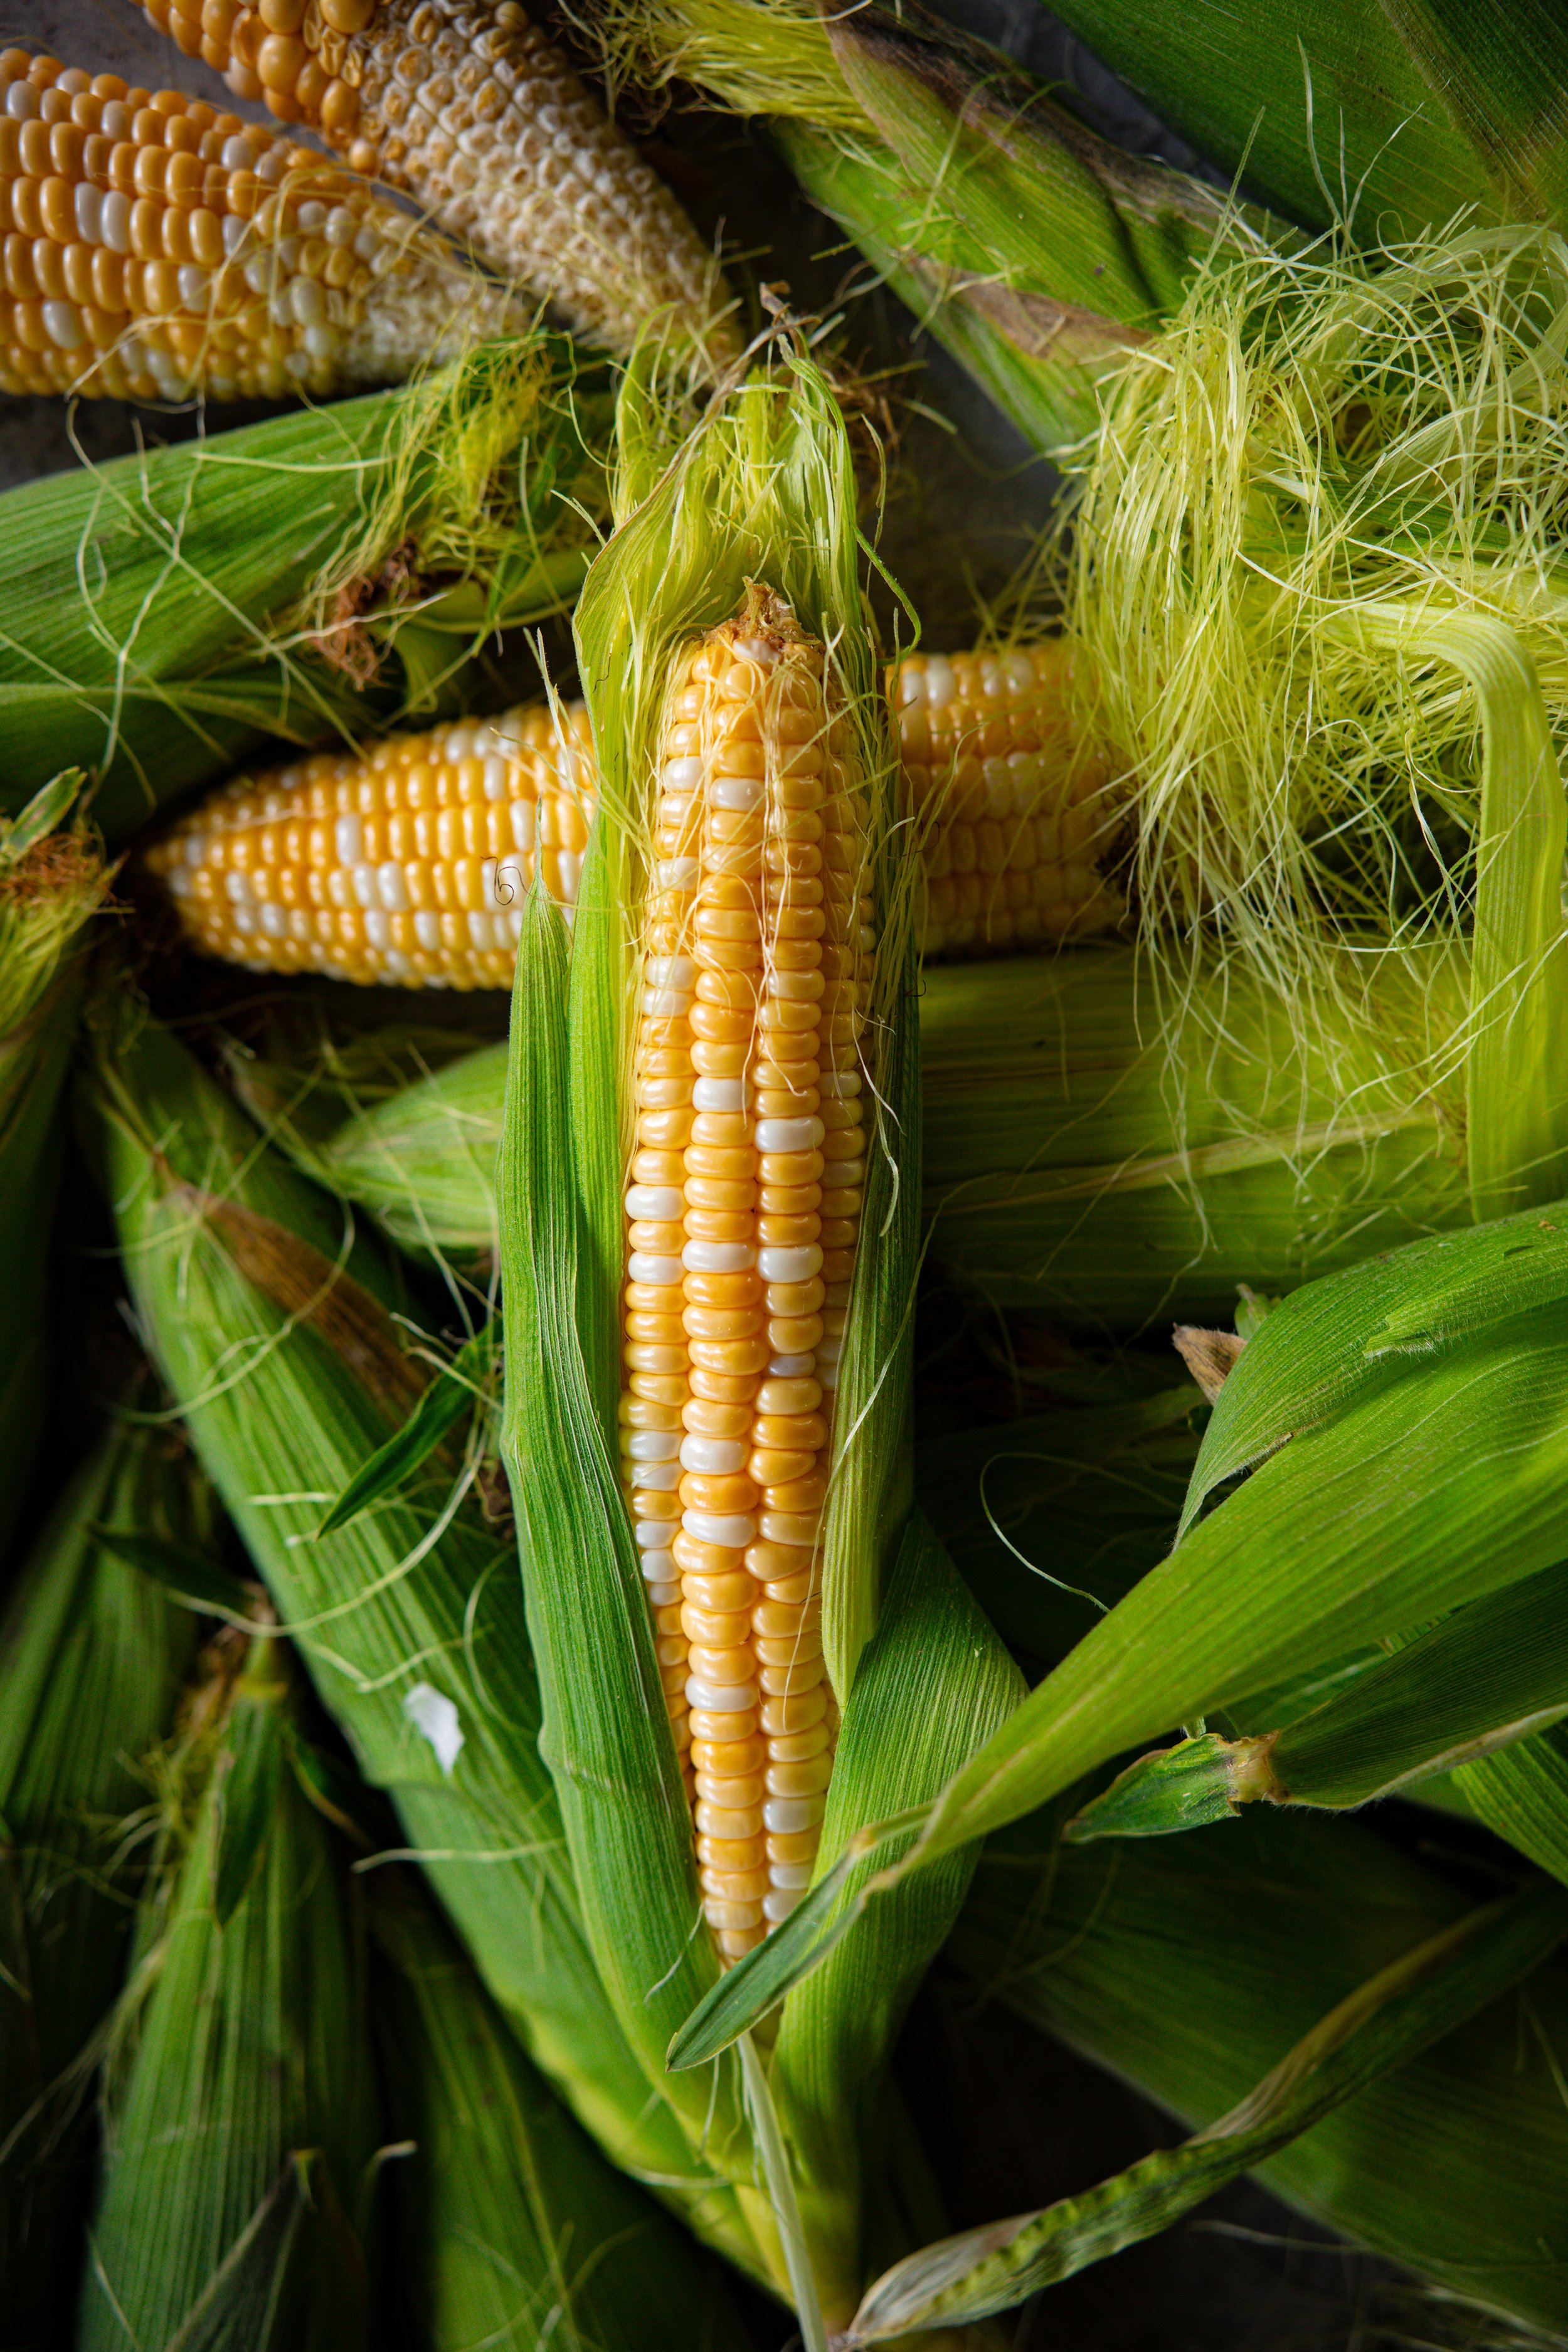
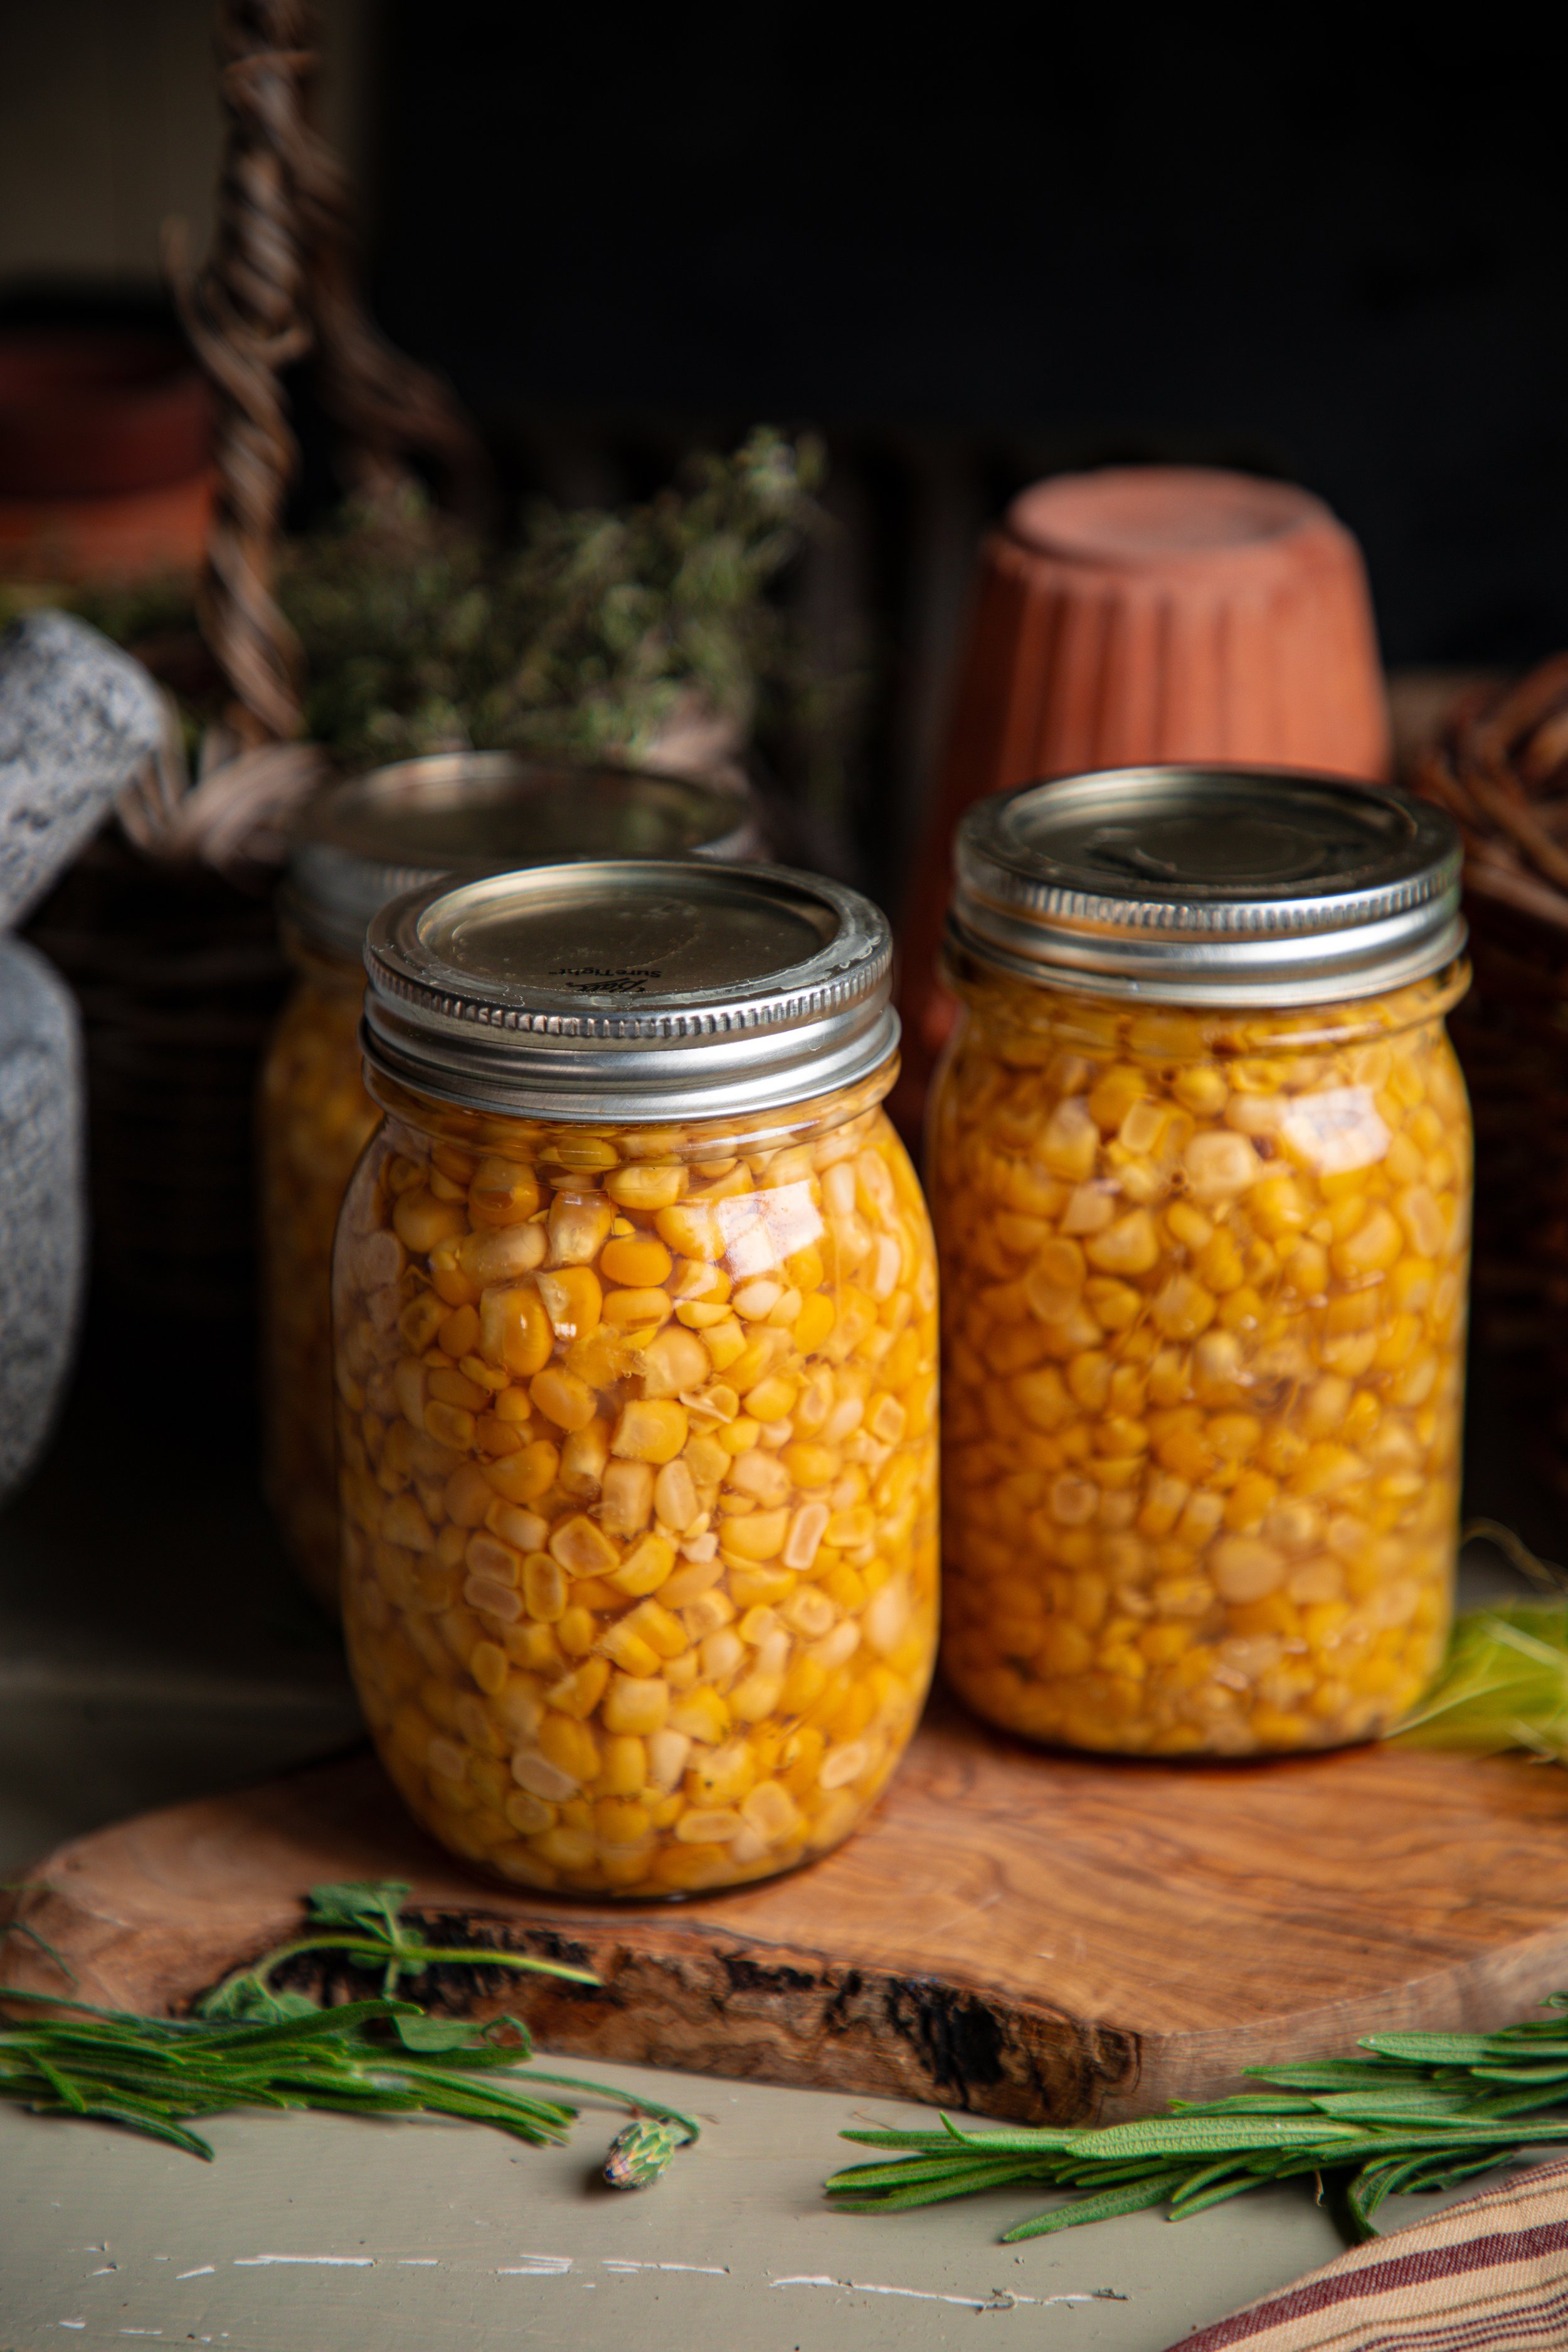
Sweet corn is an Iowa staple. While I much prefer to eat sweet corn fresh, either just picked from the stalk, boiled, or roasted, there is often so much on the farm that it needs to be preserved for winter storage. If you purchase cans of sweet corn in water from the store to eat throughout the year, you can easily store your own homegrown or locally bought sweet corn the same way. In this canning guide, I will be sharing with you exactly how to pressure can sweet corn for storage that lasts over a year!
Why I prefer to can my corn:
There are several different ways to preserve sweet corn, and the way that you choose to save yours is entirely up to you! There is not right or wrong way to preserve corn (except you have to pressure can it, if you are canning). You can easily freeze or dry your corn instead, if that is the better option for you.
For me, I prefer to pressure can my corn. Why? I don’t have a lot of room in my freezer to store all of the vegetables from my garden! We raise and butcher our own meat, or purchase meat from local farmers near us, so our deep freezers are mainly dedicated to storing meat. To save space, I try to can or dry as much of our food as possible!
why sweet corn has to be pressure canned:
Is it safe to hot water bath can sweet corn? Unfortunately, no. Corn is a low acid food and must be pressure canned to be safe. Pressure canning is something that always frightened me for years, but I have come to learn that it’s really not that scary. If you use a pressure cooker, you can certainly use a pressure canner. The big thing that can go wrong is not making sure that all of the pressure has been released before opening the lid, and this is easy enough to do. You just have to be patient!
PLEASE READ HERE FOR THE USDA GUIDELINES ON PRESSURE CANNING VEGETABLES.

what is the best sweet corn for canning?
When it comes to canning sweet corn, you really can’t go wrong with which variety that you choose. Some varieties hold up better under the heat than others. Generally, it’s really up to your preference for flavor and color. Most people recommend the varieties Bodacious, Incredible, Peaches and Cream, and Delectable.
This year, we planted Montauk, Sweetness and Signature XR. I have to say, the best tasting variety out of the them was Montauk. It’s so incredibly sweet, and the size is large and beautiful! They all canned beautifully, though they did make the water a bit milkier than past varieties I have used.
My best tip for choosing a sweet corn variety to can is to mix them together. This will ensure a good balance of flavor and sweetness to your mix!
how to use a pressure canner:
To pressure can, you will first need a pressure canner. I use this one.
To pressure can, a lot less water is involved. For my pressure canner, it only needs 3 quarts of water inside or the jars need to be standing in about 2-inches of water. This is very unlike hot water bath canning where the jars need to be completely submerged in water.
Then, the lid is put on. The steam is released for 10 minutes, then the pressure gauge is set onto the lid. This builds the pressure anywhere from 0 to 20 pounds. Every recipe will have different pressure and timing recommendations and this will also vary depending upon which elevation you live at. After the processing time is up, simply turn off the heat and let the pressure drop down to 0 on its own. This take a little bit of time. Once all of the pressure has been release, the pressure gauge is removed and then steam is released for 10 minutes.
The lid is then removed and the jars sit in the water for 10 extra minutes before they are removed from the canner. Simple!
CANNING TIPS:
If you have never canned before, please read this post all about using a hot water bath canner. It is always good to be refreshed on canning safety!
Use New Lids. Canning lids are really only meant to be used once! I have tried all sorts, and while I am a Ball® Ambassador, I have only really had success with the Ball® lids. They seal for 18+ months, keeping your food fresh and shelf stable. As the seals become indented after their first use, it is safest to use new lids each and every time that you can.
Assembly Line Can. When I first started canning 10 seasons ago, I would pull all of my jars out of the canner and onto the countertop. Then, I would fill all of the jars and place them back into the canner. It wasn’t until a year or two later that I learned this was a big no-no! As you want all of your jars and the food to stay hot, the best method is to assembly line can your food. This means to fill up one jar at a time, put on the lid and band, and then place it back into the canner. Then, pull out and fill the next jar.
Use Plastic Utensils. To prevent possibly cracking your jars, use plastic or wooden tools to remove air bubbles and ladle in the jam.
Begin Processing When the Water is Boiling. Do not start counting the processing time of the jars until the water is boiling. Then, do not uncover the pot until the processing time is over!
Check Seals After 12-24 Hours. After the jars have been removed from the canner, leave the rings on for at least 12 hours. Remove the rings and use the fingertip test to see if the lids are sealed. Lift the jar by the lid 1-2 inches from the countertop with your fingertips. If the lid stays attached to the jar, then the jar is sealed! Store the sealed jars in a dark place without the rings on to ensure the seal stays true.
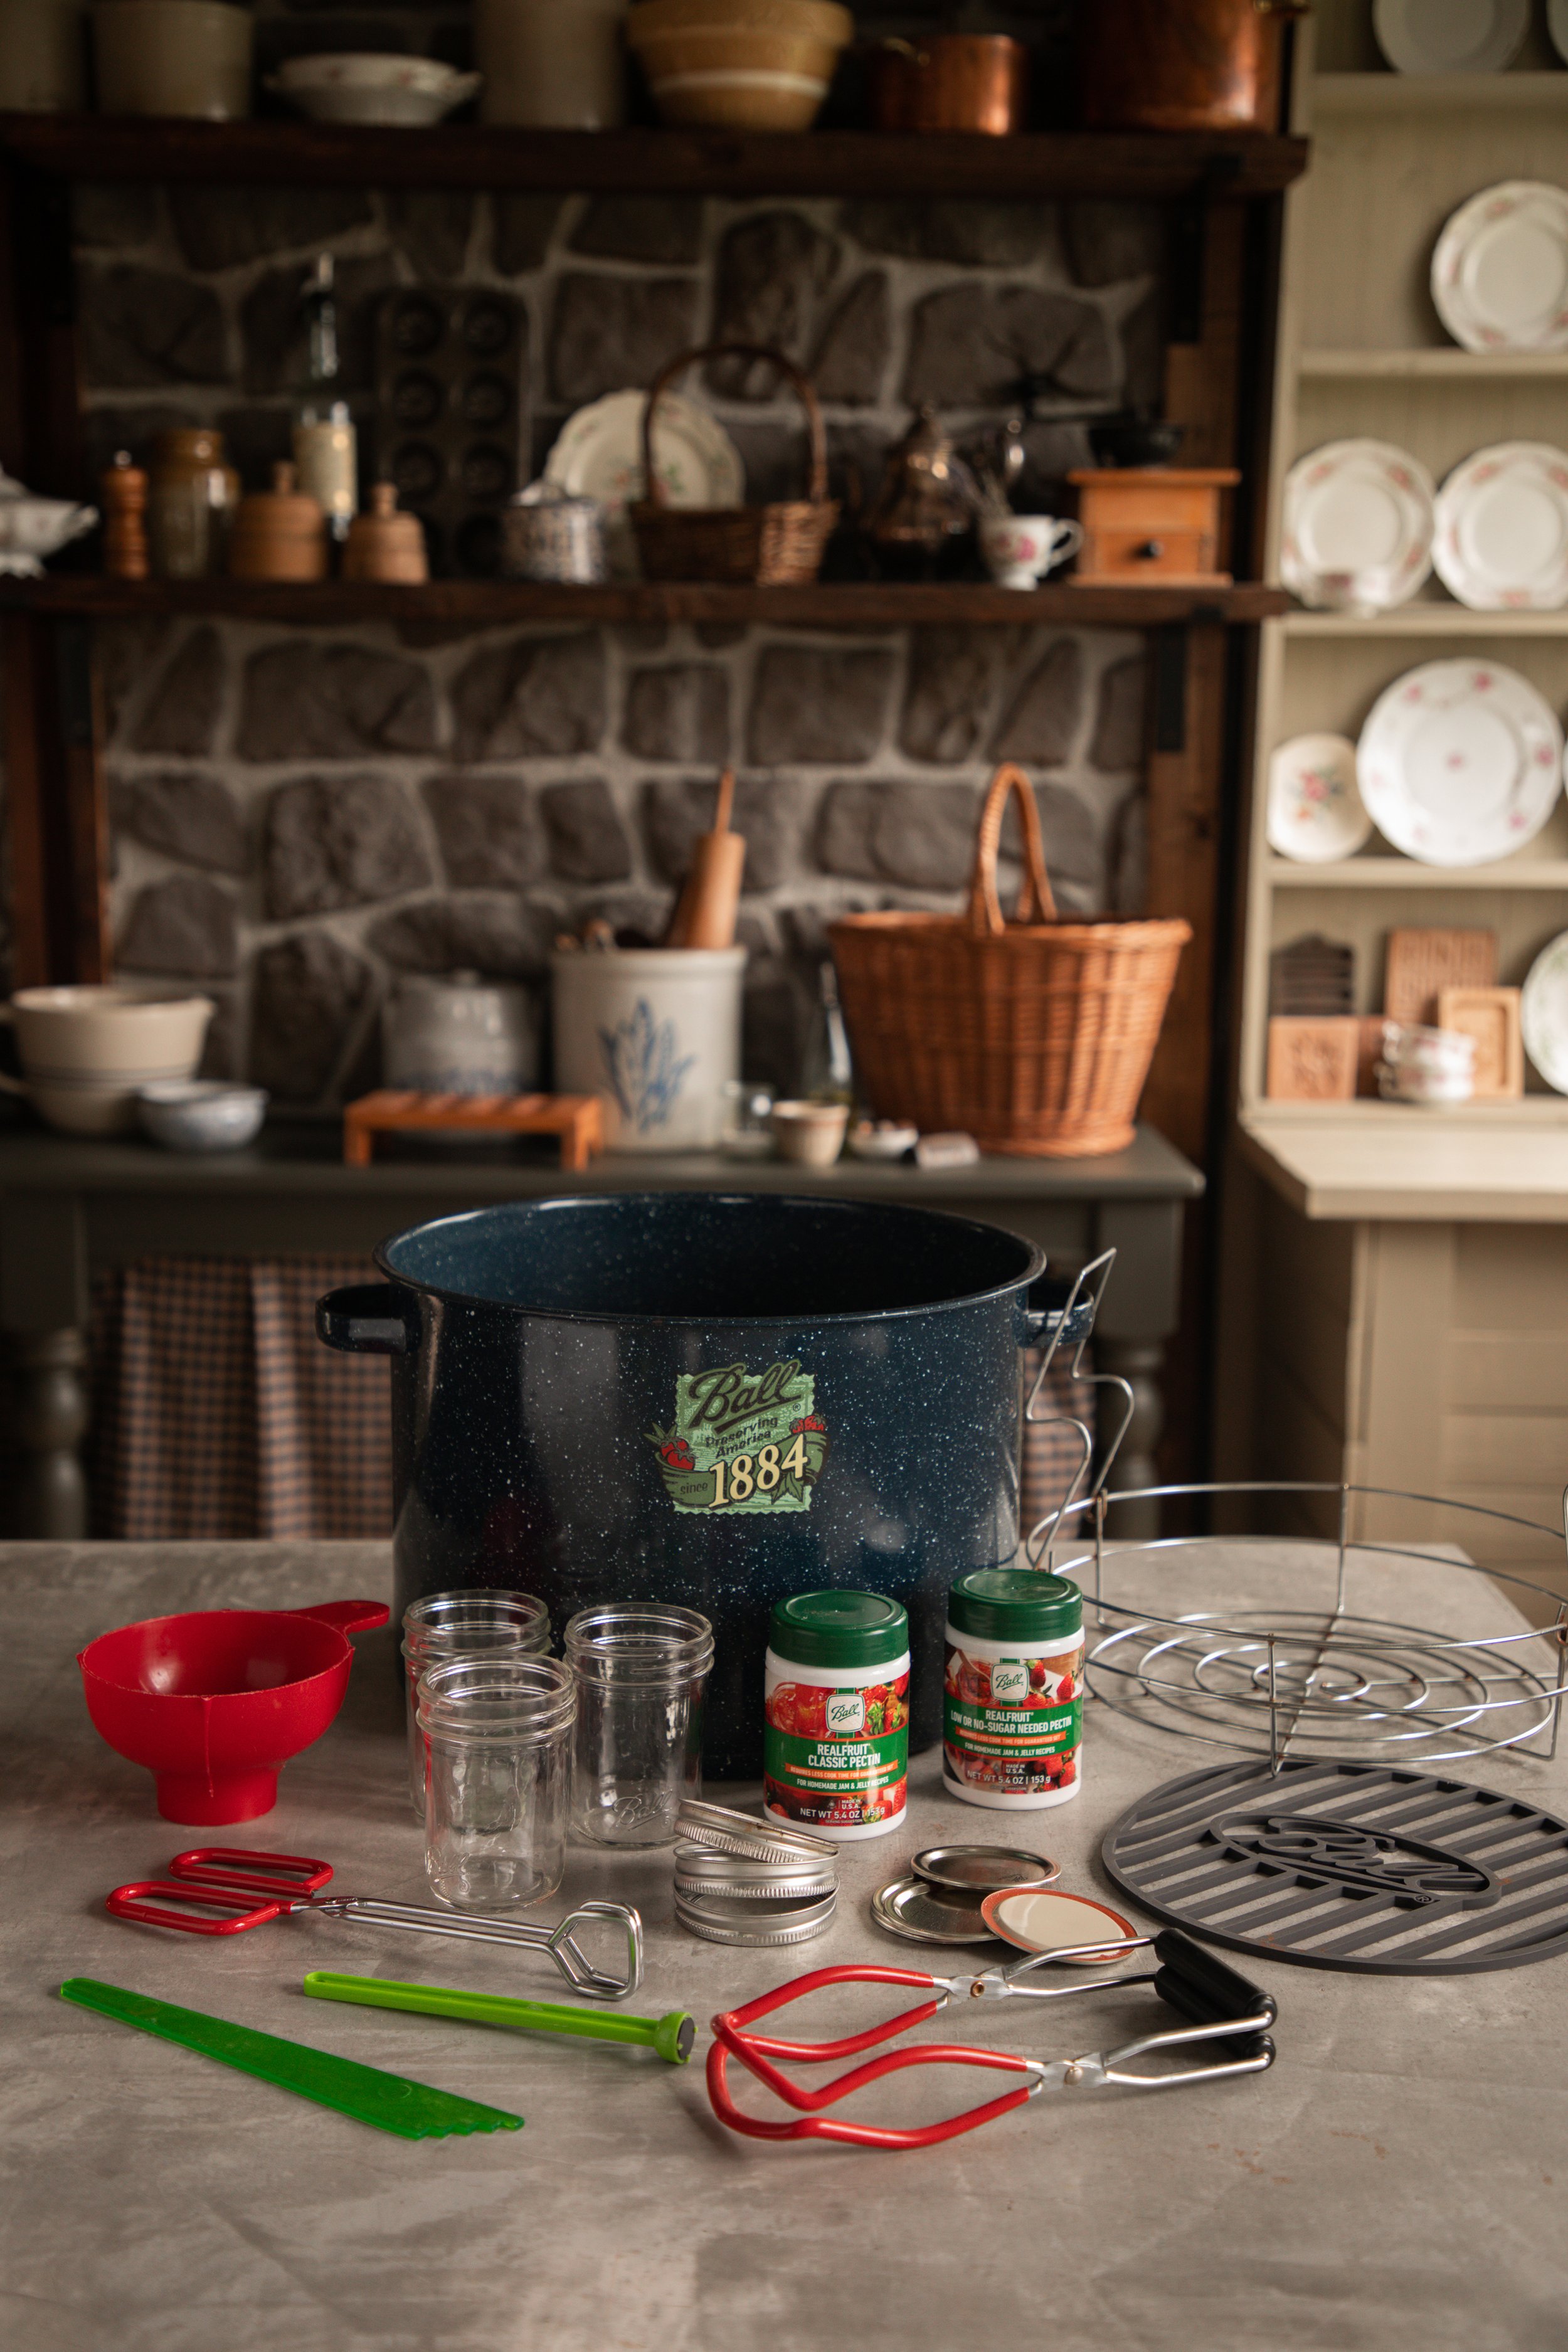
SUPPLIES YOU WILL NEED:
To make tomato sauce for canning, you will need to gather some supplies. You can easily make your own homemade tomato sauce without these tools, but they do come in handy, especially if you plan to start canning or preserving your food using other methods!
Pressure Canner. To safely can green beans, you will need a pressure canner. Any brand works, and it really depends on your preference! I have a Presto pressure canner, and I like it just fine.
Canning Jars, Lids, and Bands. I prefer to use Ball® jars, lids, and bands. You will need NEW canning lids to safely can your green beans. Do not can with used lids, as the seals can be damaged.
Canning Funnel. A funnel can be nice to have to avoid spills. Use a nonmetallic funnel to avoid breakage.
Nonmetallic Spatula. Another tool that can be helpful to avoid breakage of your jars, and it can be great for removing air bubbles.
Headspace Measurer. This tool is made to easily measure the headspace of your food, which is necessary for low-acid canning to avoid siphoning! It can also double as an air bubble popper.
Magnetic Lid Lifter Wand. This tool is absolutely not necessary, but it can be really helpful if you accidentally drop your lid into a pot of boiling water!
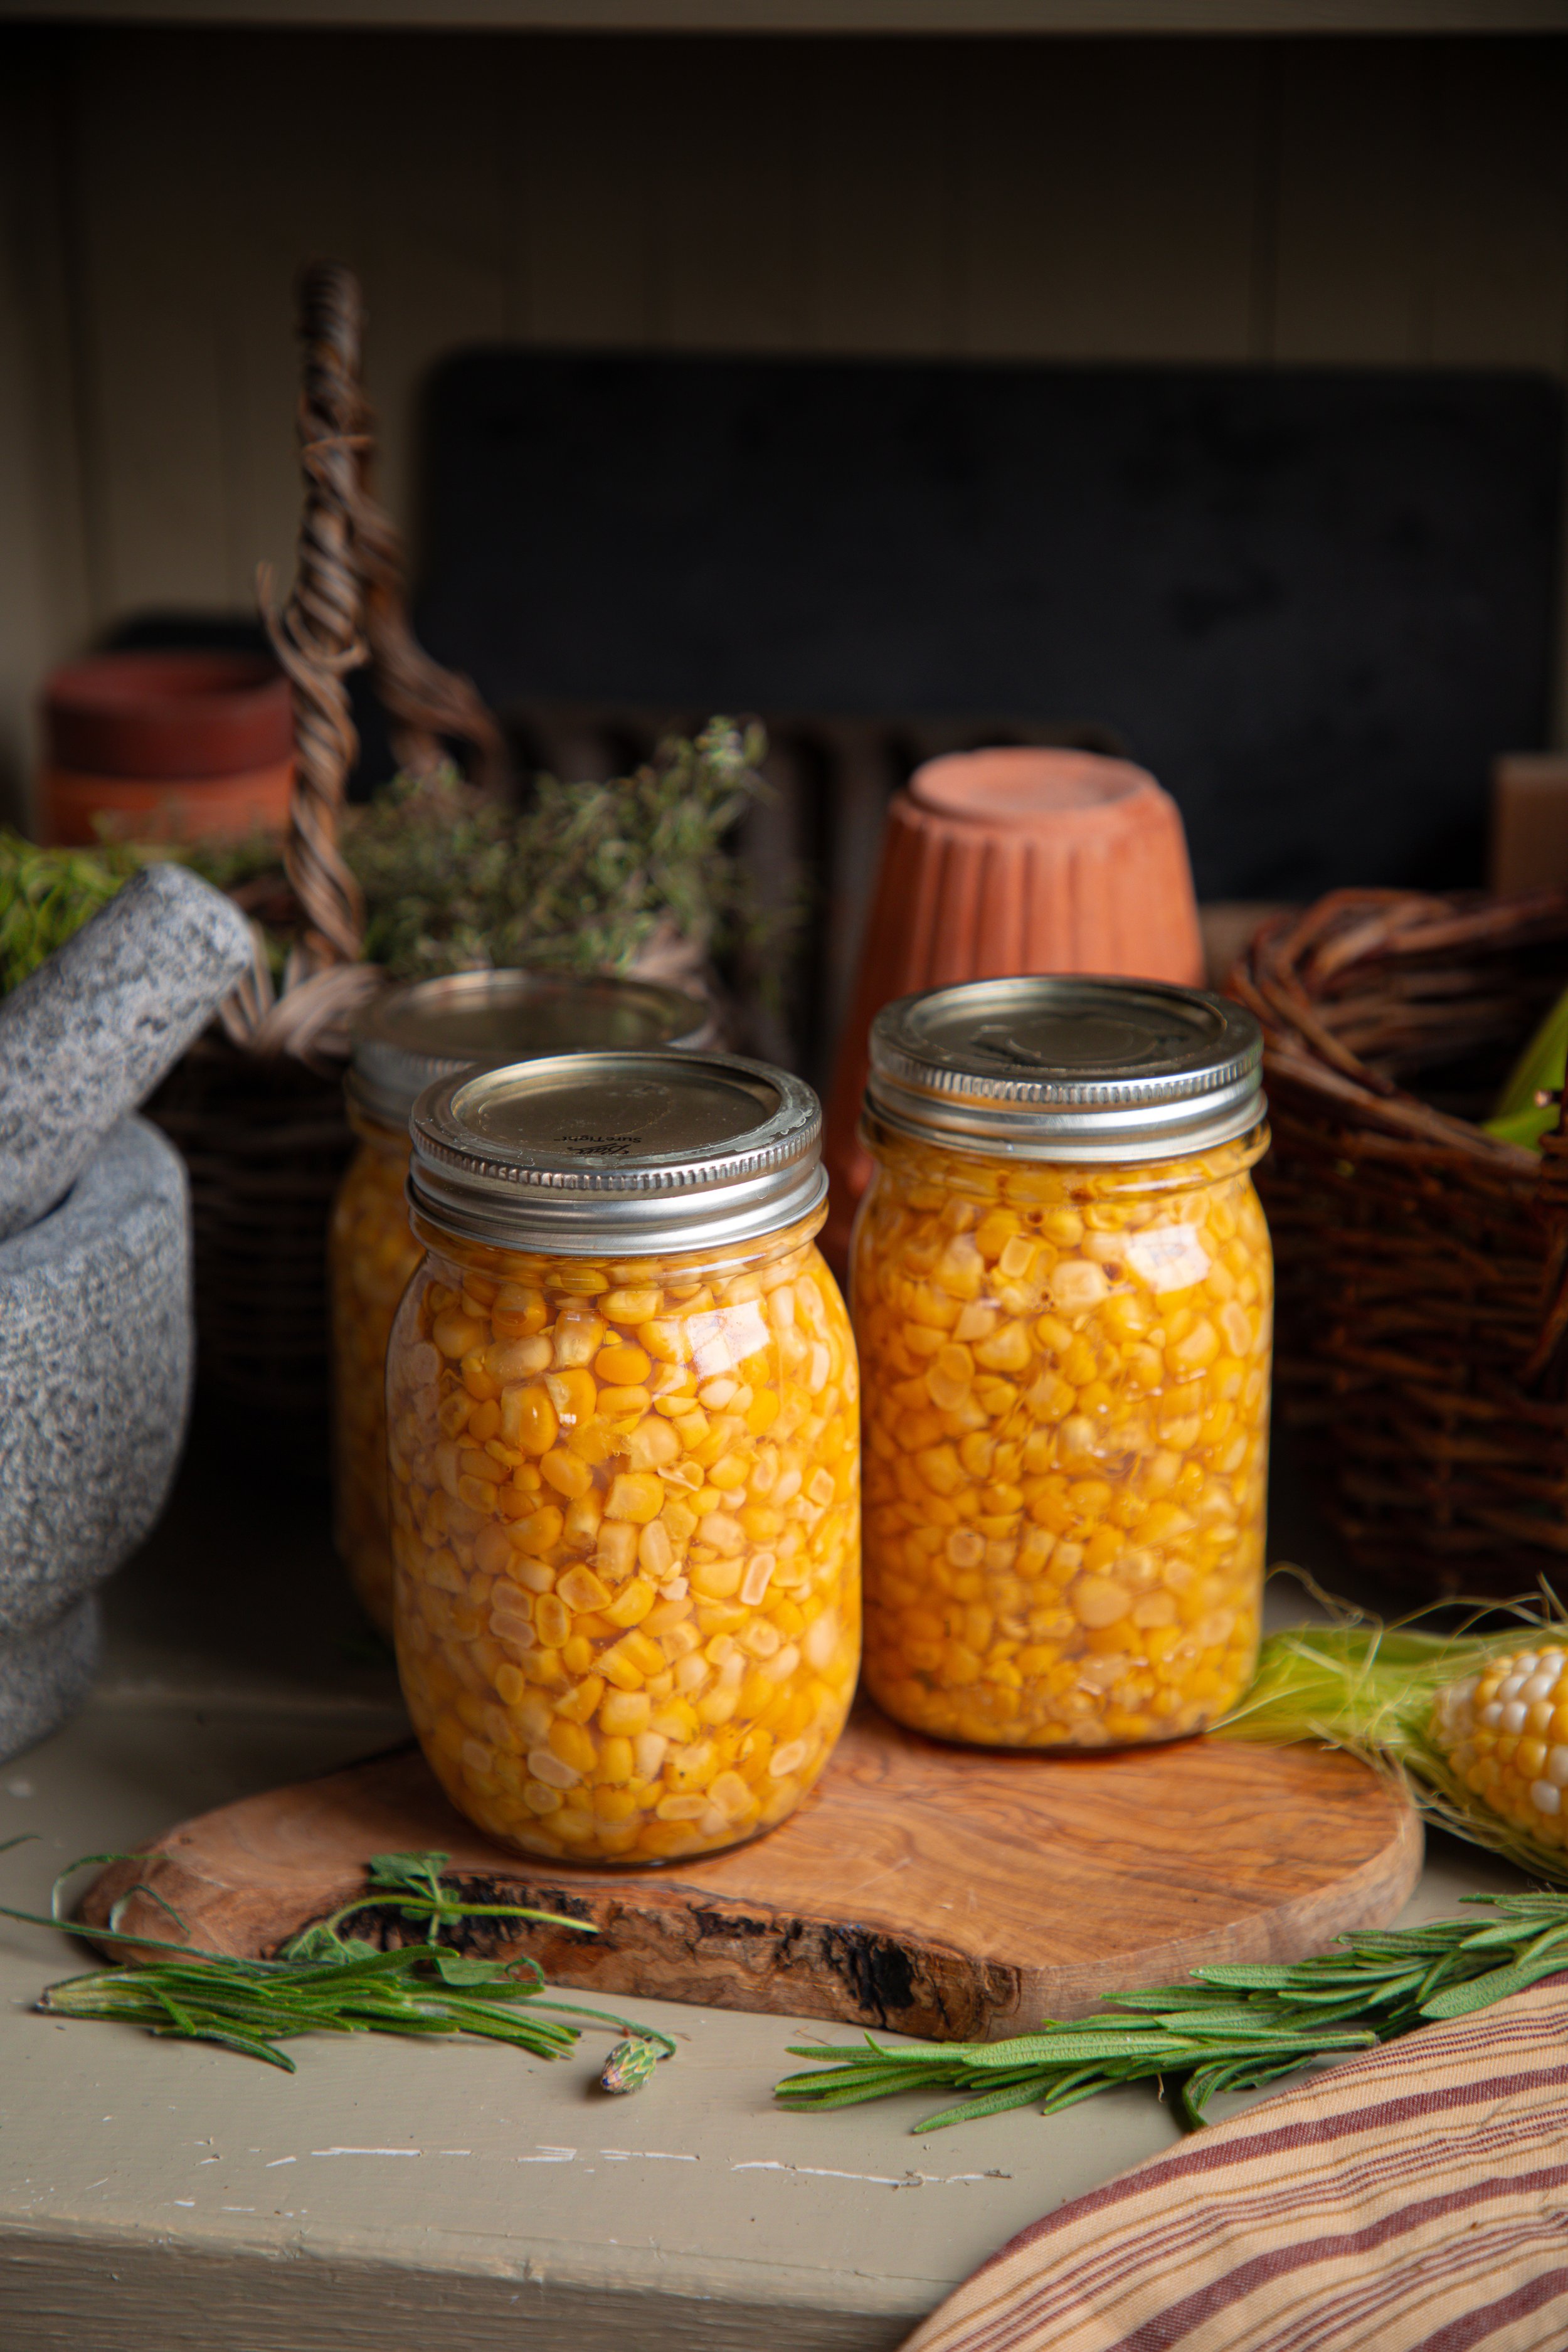
How to can sweet corn:
Canning corn is quite simple. You might find that canning raw vegetables in water is your new favorite. There are a lot less steps involved and very few ingredients. This recipe only requires two ingredients: corn and water. You can also add salt to the jars, if you like, though its not necessary. This fact alone makes canning your own corn desirable, I think. You get to control the amount of salt in the jars!
Step One: To can corn, you will need about 8 pounds of corn with the husks on to make 5 pints of canned corn, give or take. This is my personal measurement. The USDA suggests that 20 pounds of corn is needed to make 9 pints.
Step Two: Remove the husks and silks from the corn, then wash it thoroughly. Once the corn is washed, the kernels are sliced from the corn with a serrated knife. You want to cut the corn below the tip about 3/4 of the depth of the kernel.
raw pack method:
Step Three: While the jars warm up, bring a large pot of water to a rolling boil. You will want to use a pot that can hold at least 6 quarts of water for 7 quarts/9 pints.
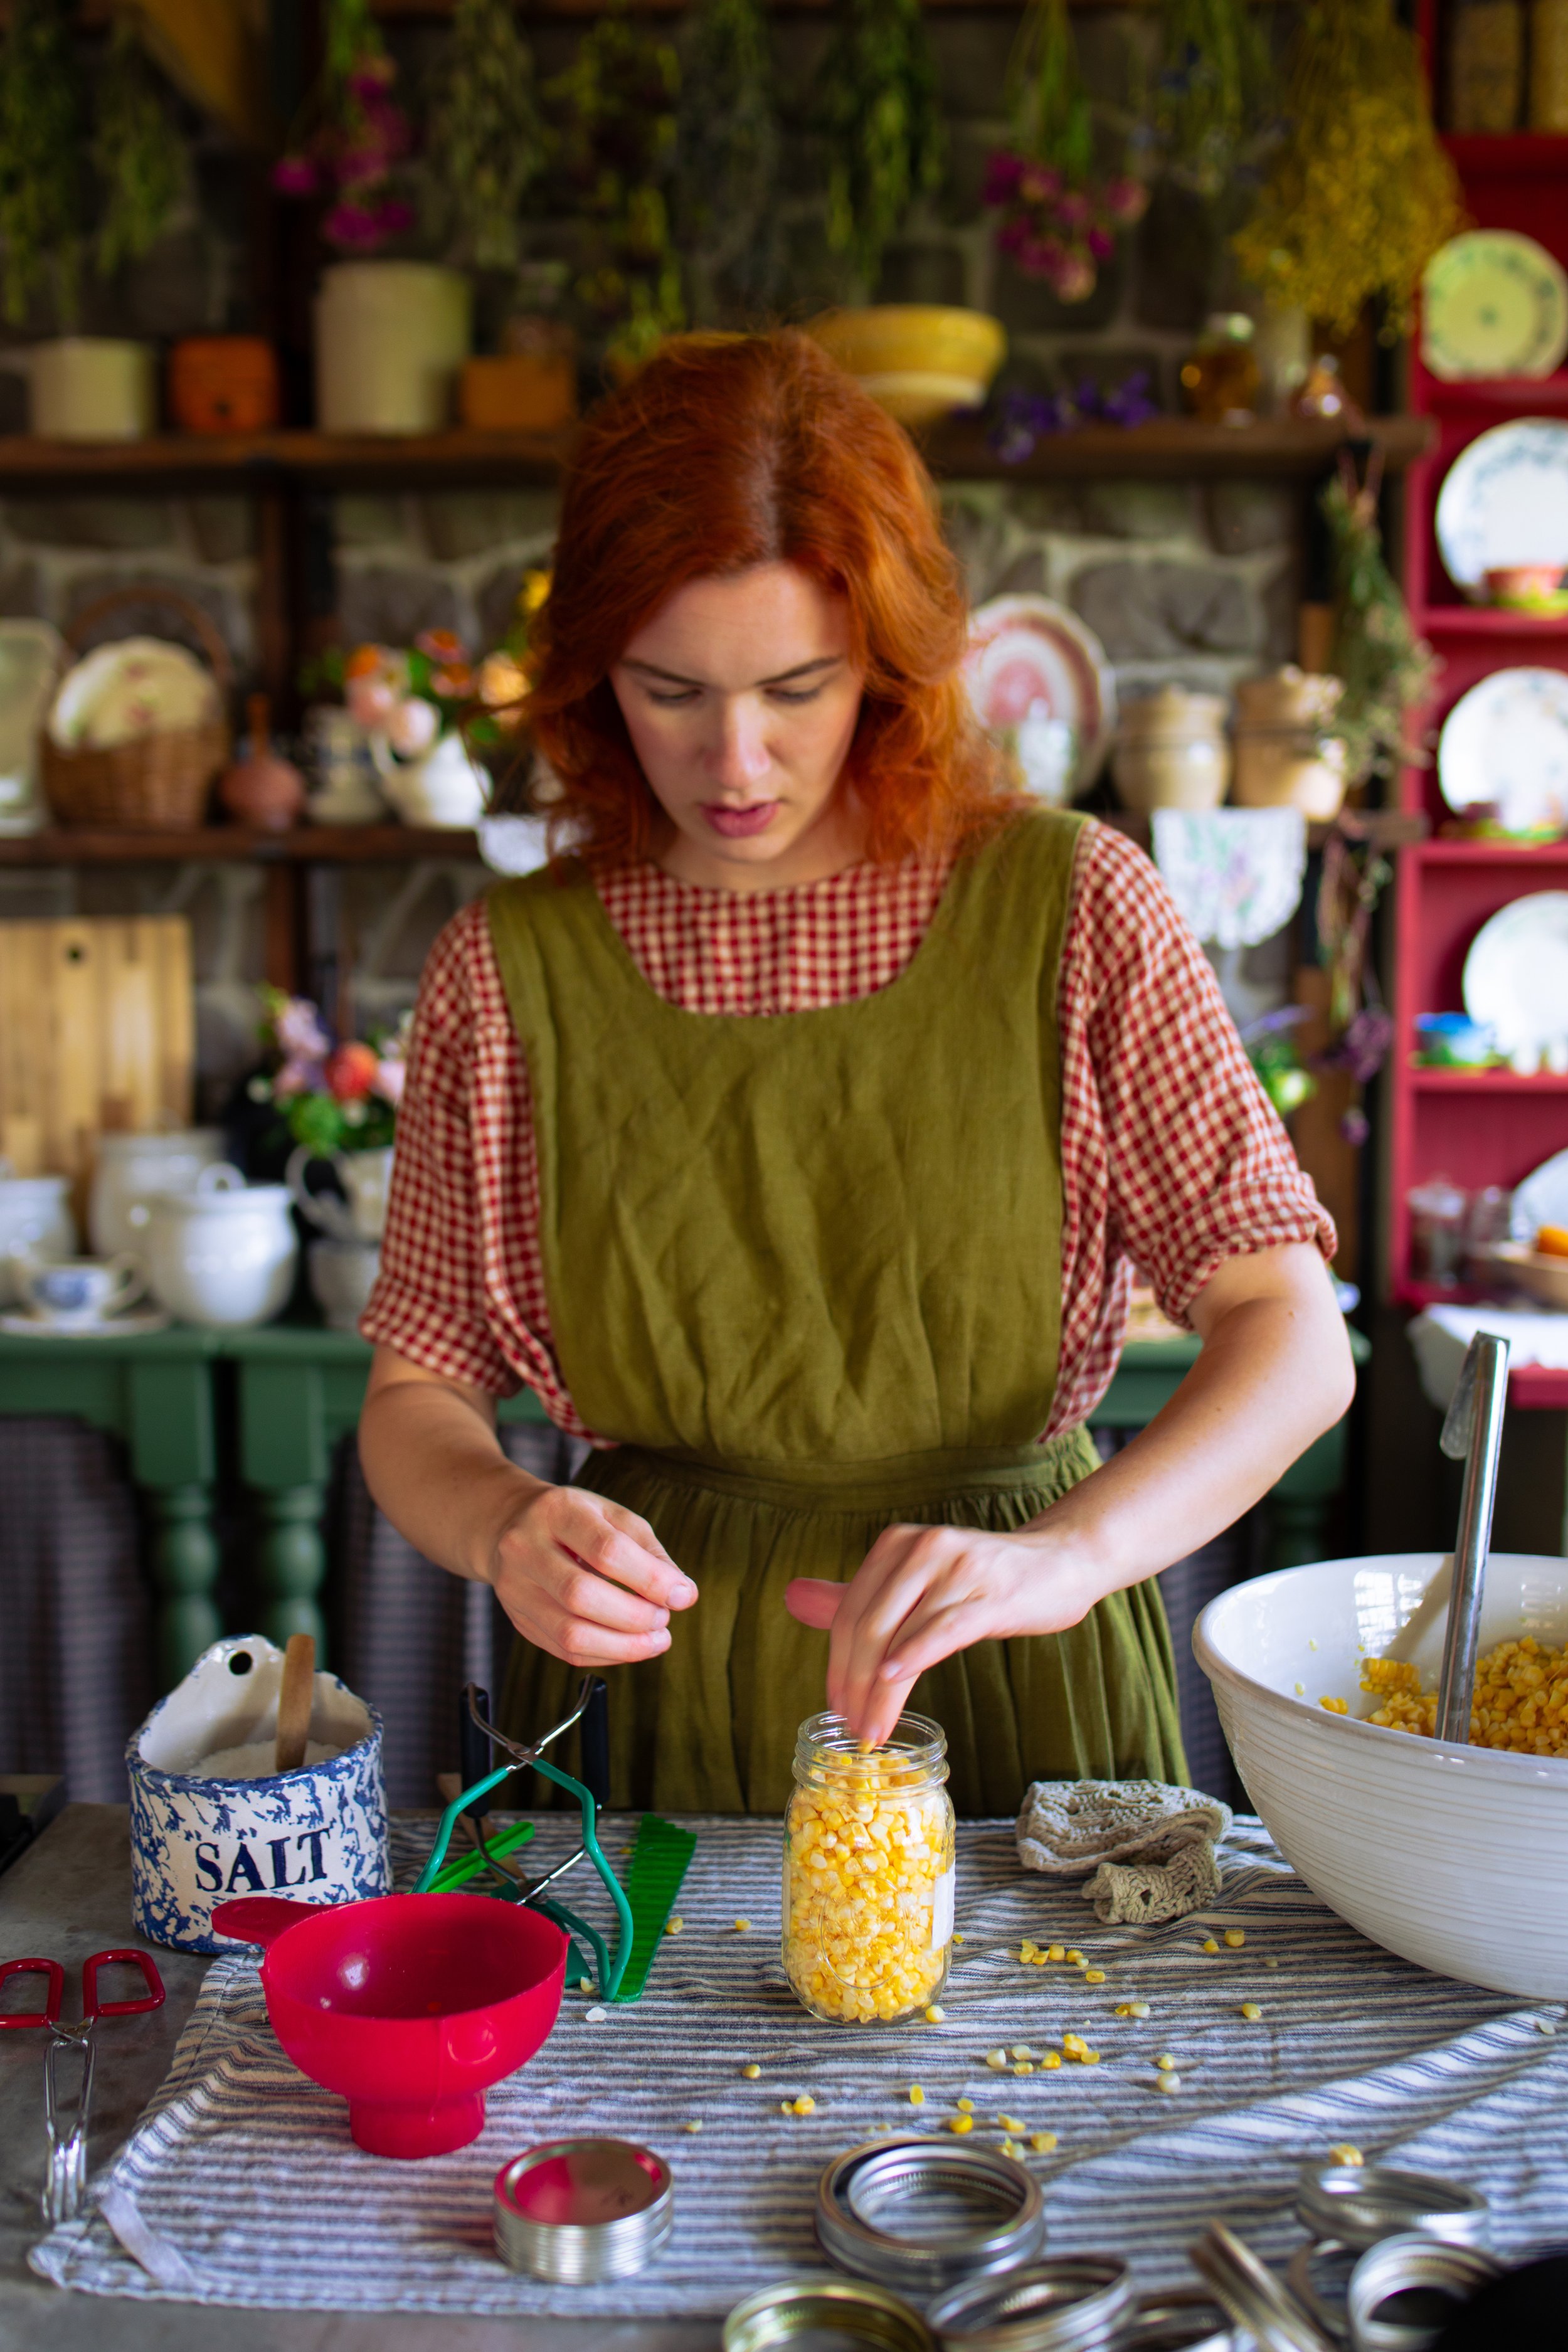
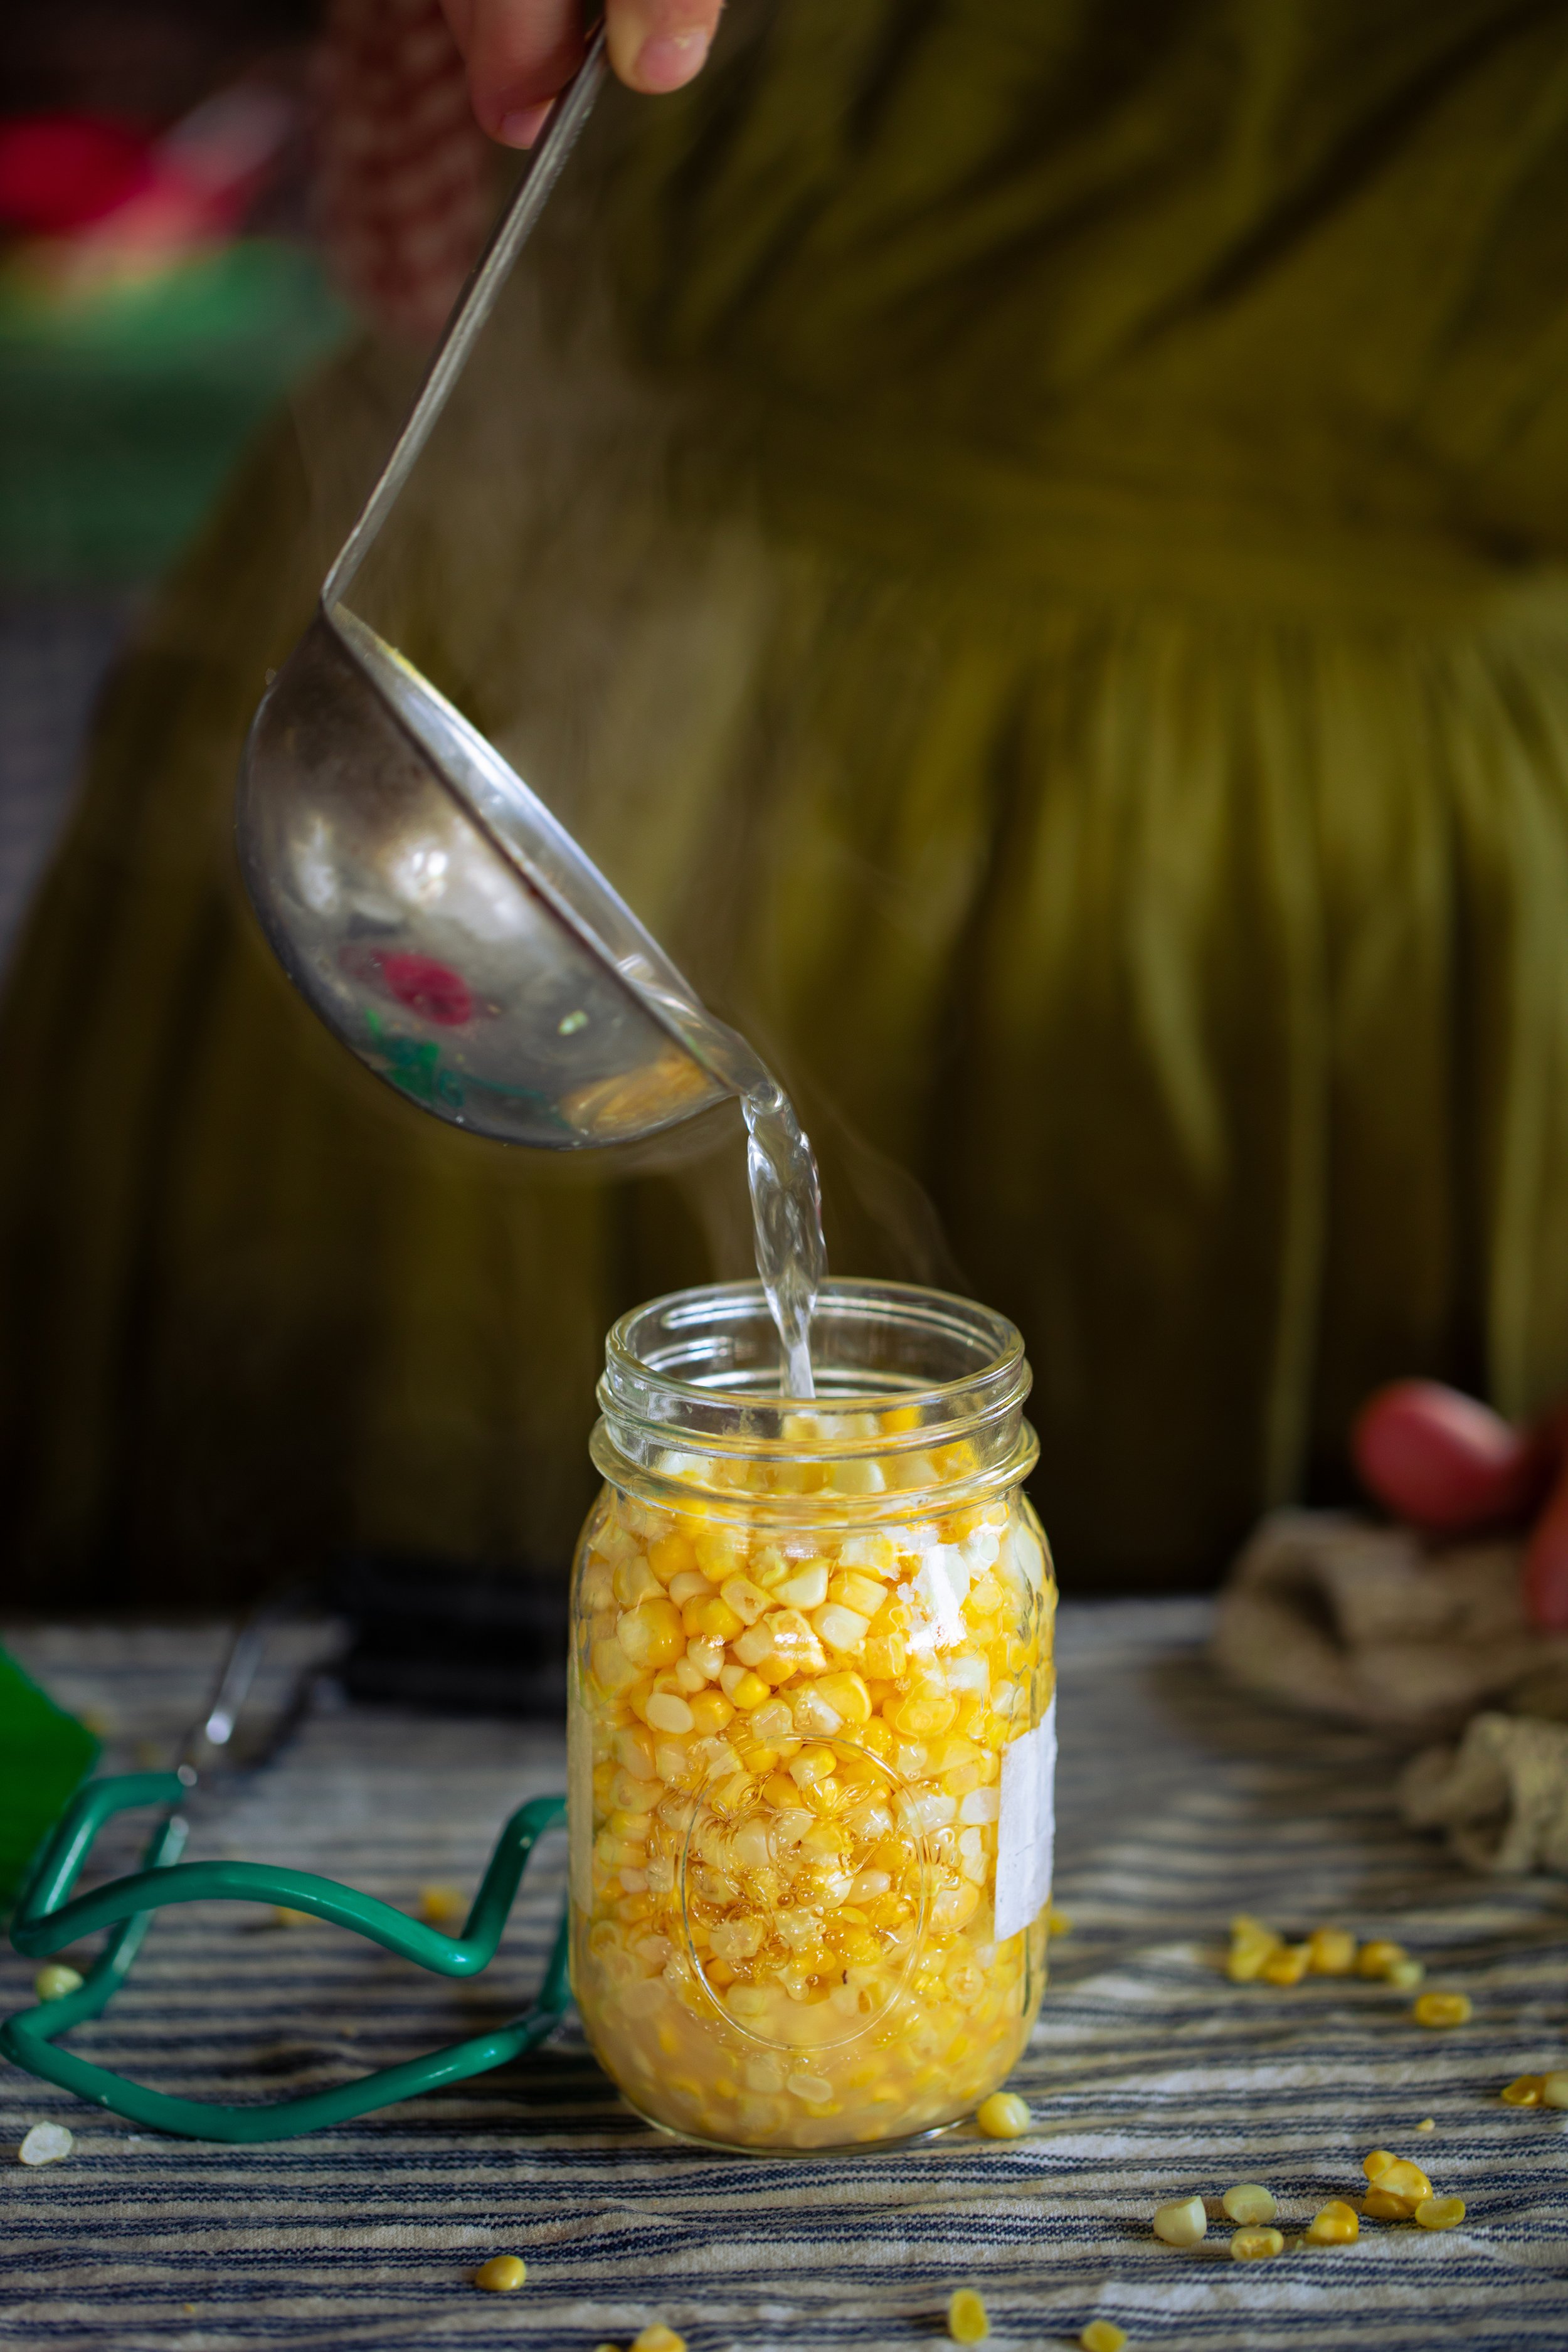
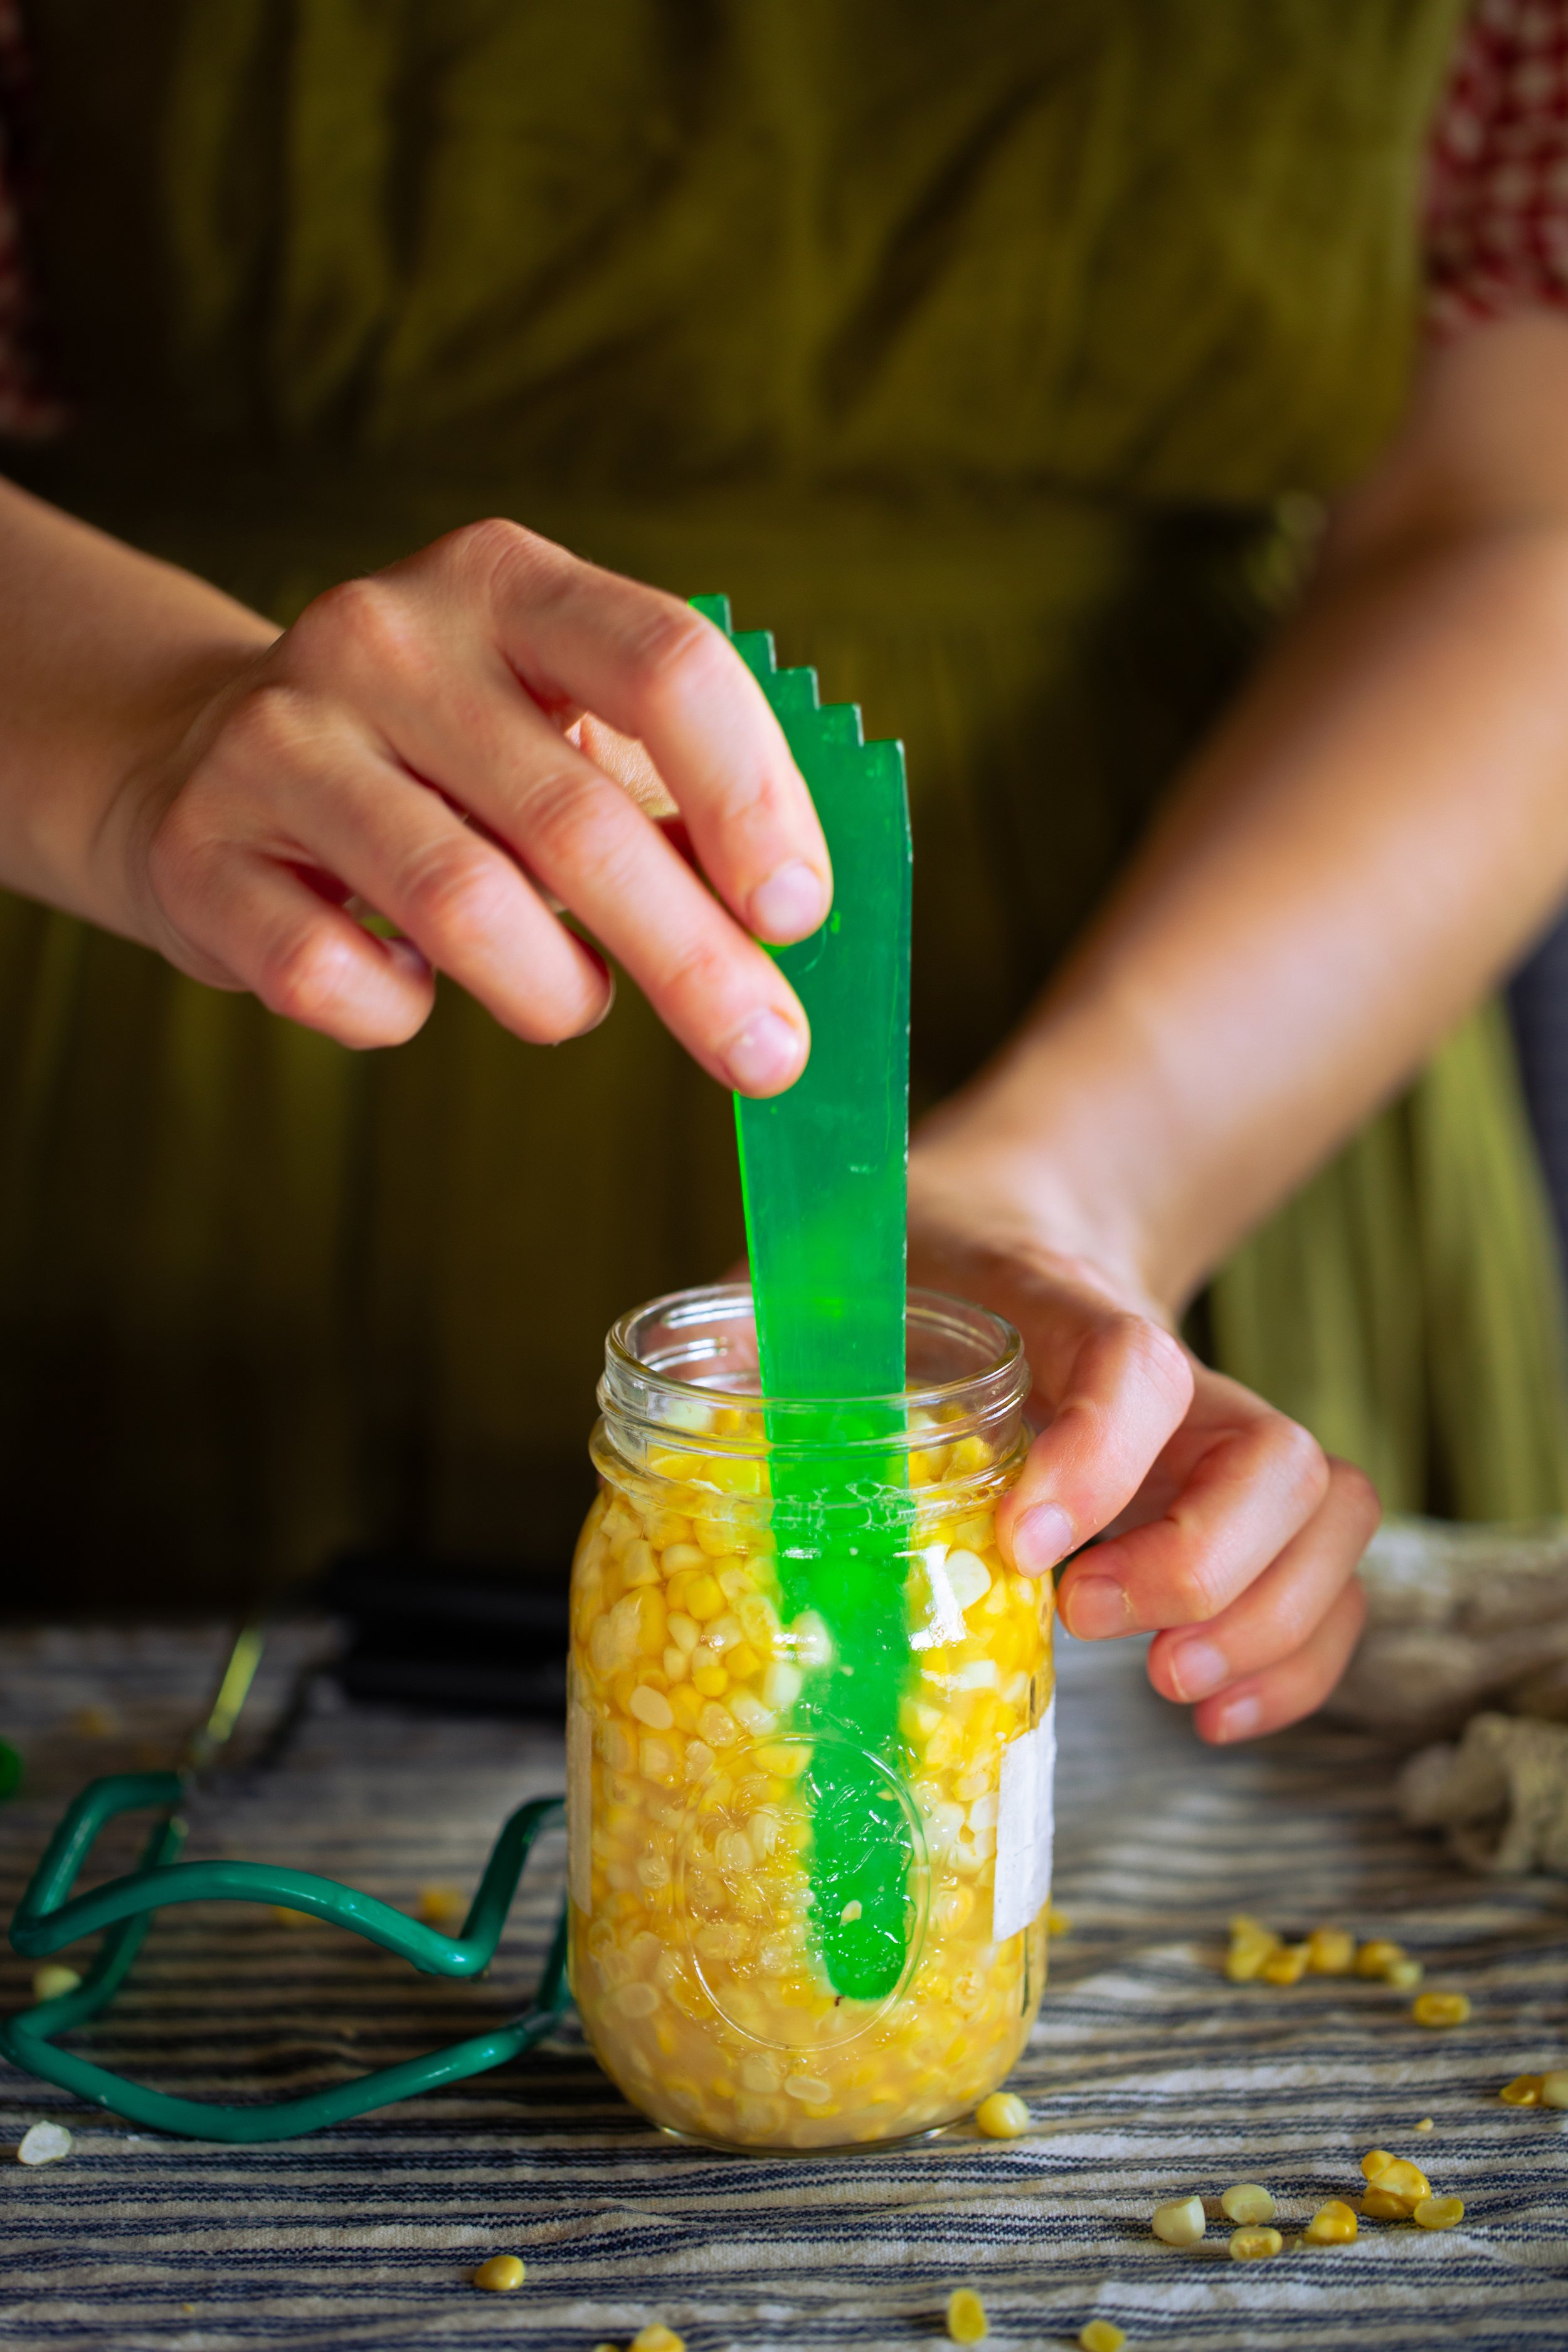
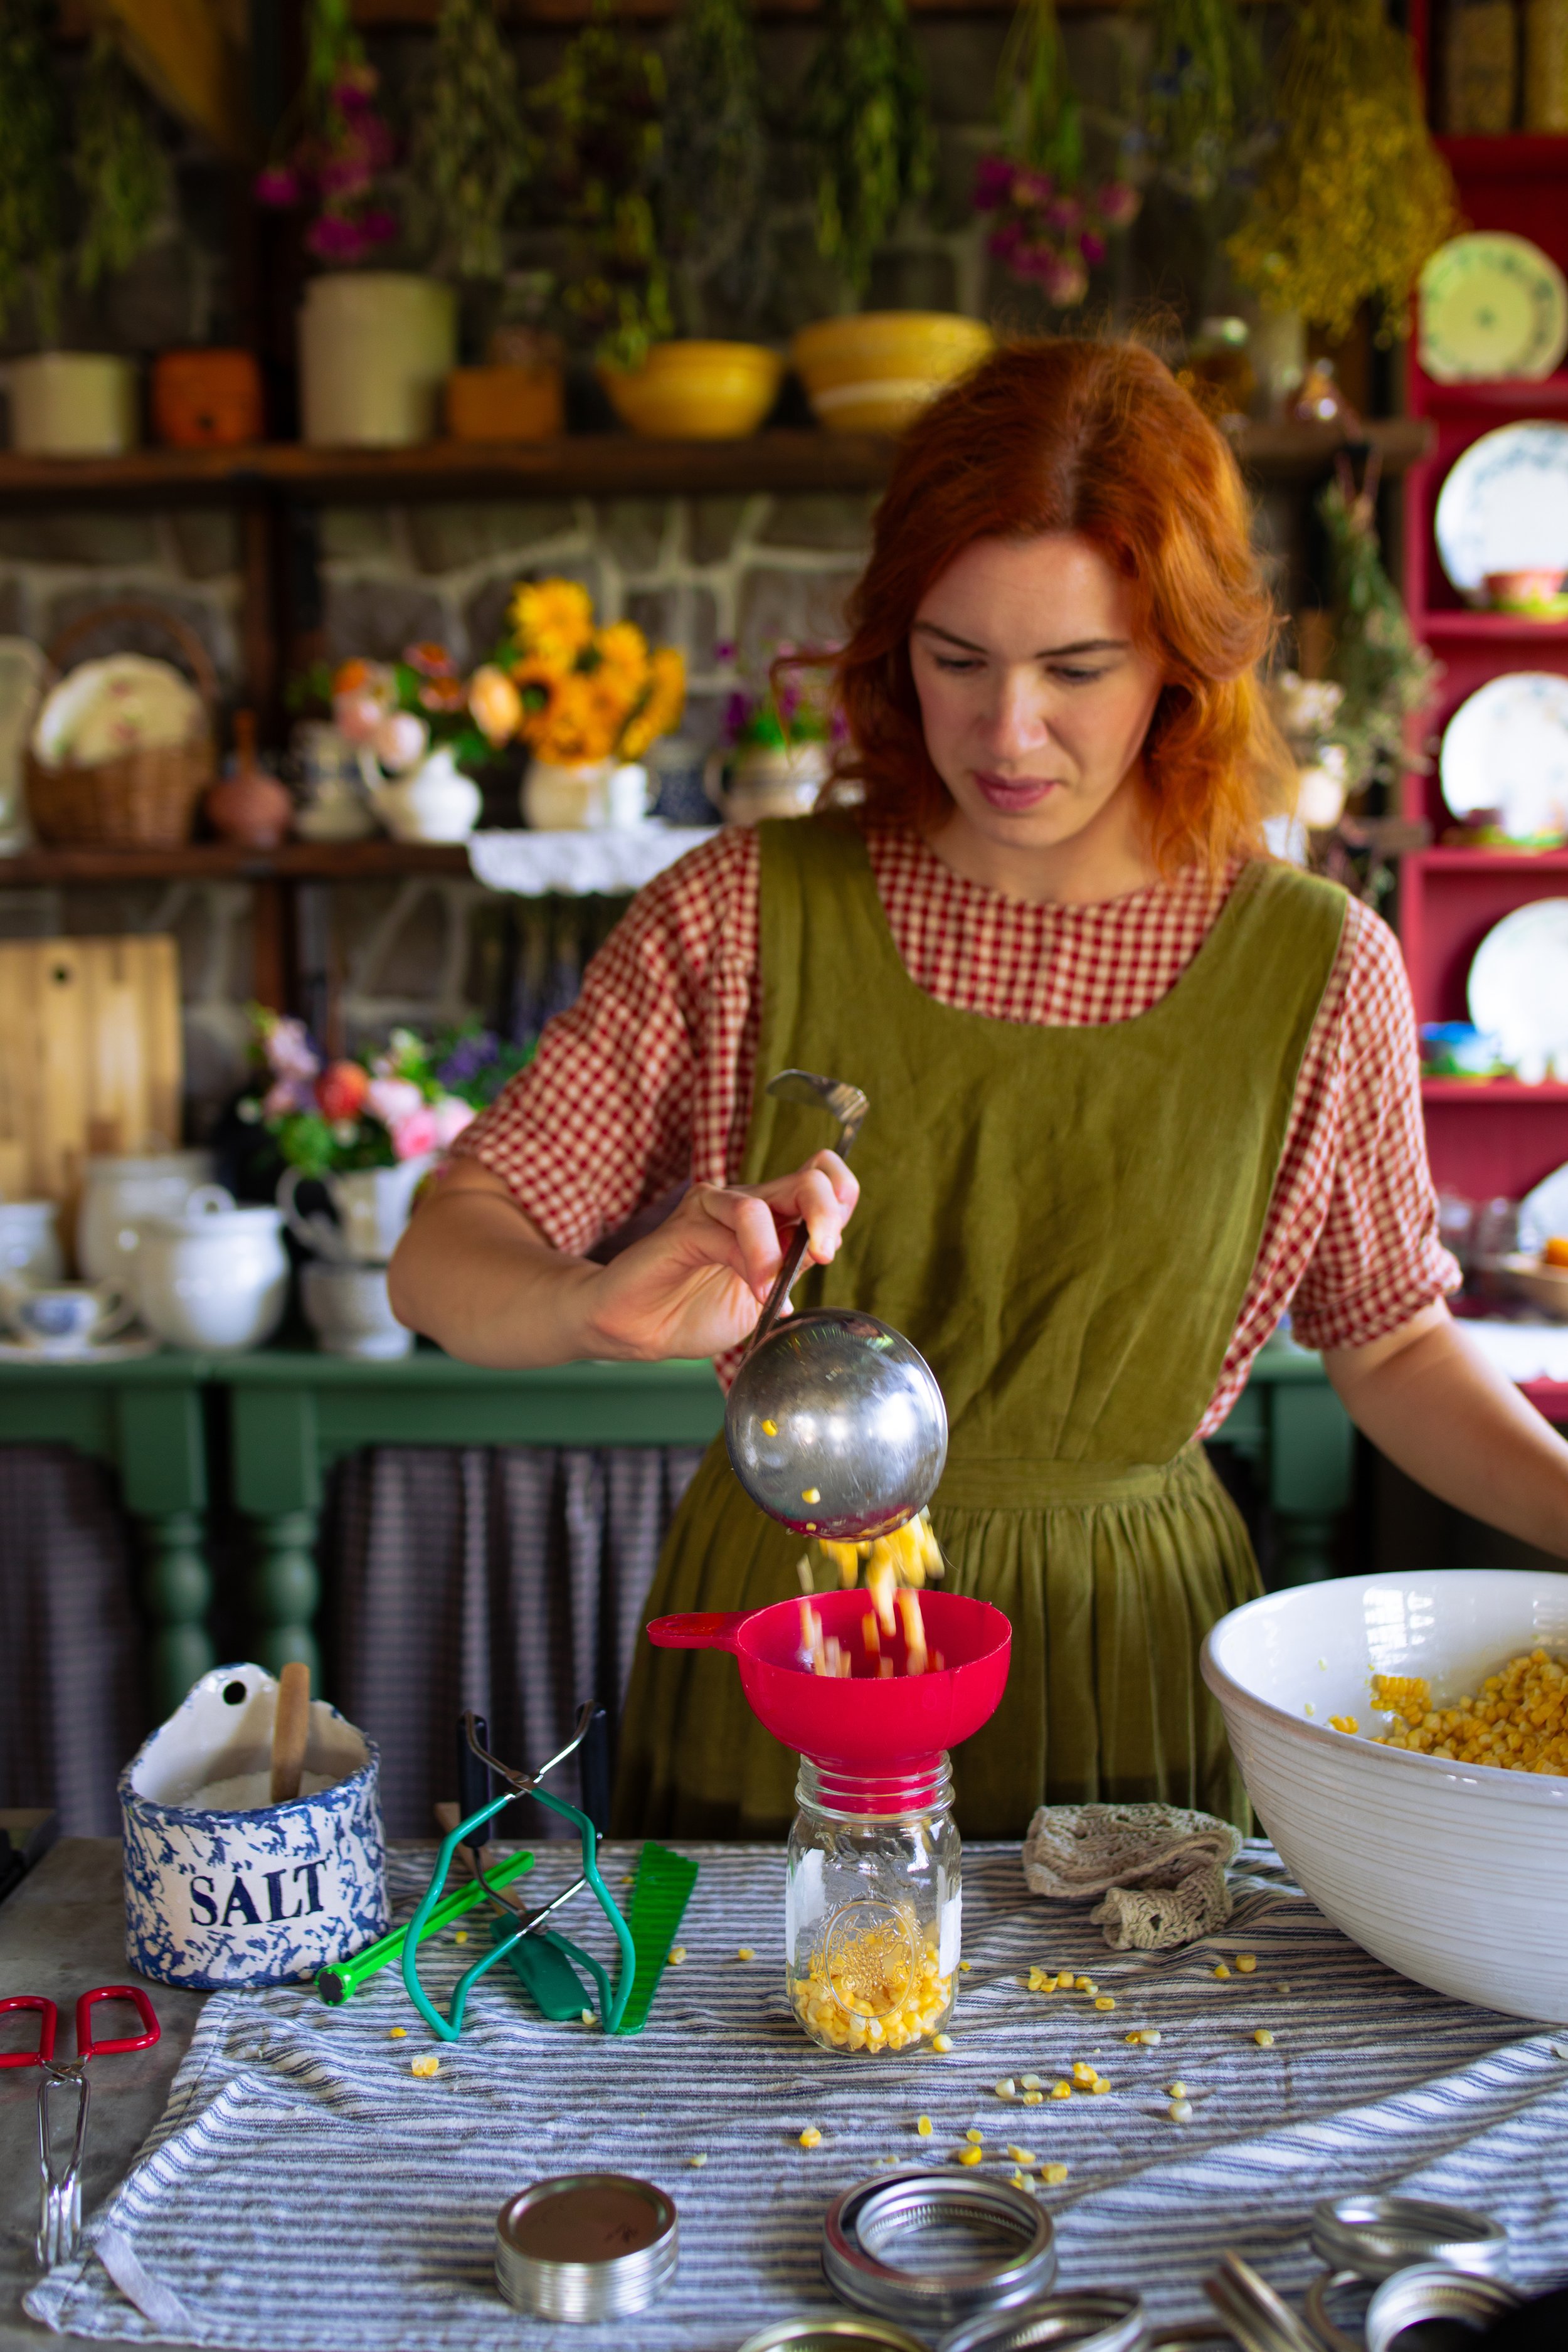
Step Four: Once the water is boiling, begin filling the jars. Lay a clean towel on the countertop, and place one jar from the canner onto the towel. Pack the jar tightly with corn kernels, leaving 1-inch (2.5-cm) headspace. Add 1 teaspoon of salt to each quart jar or 1/2 teaspoon of salt to each pint jar, if desired. Pour the boiling water over the corn kernels, leaving 1-inch (2.5-cm) headspace. Poke around to remove any air bubbles and adjust the headspace of the water as necessary.
**Read the recipe card below for the Hot-Pack Method.
Step Five: Wipe the rim of the jar clean, place the lid on the jar, and screw on the band to fingertip tight. Place the jar back into the canner and repeat the packing process with the remaining jars, filling them one at a time.
Step Six: When all of the jars are finished, adjust the water level in your canner as necessary. Put on the lid and follow the instructions for setting up your canner for processing.
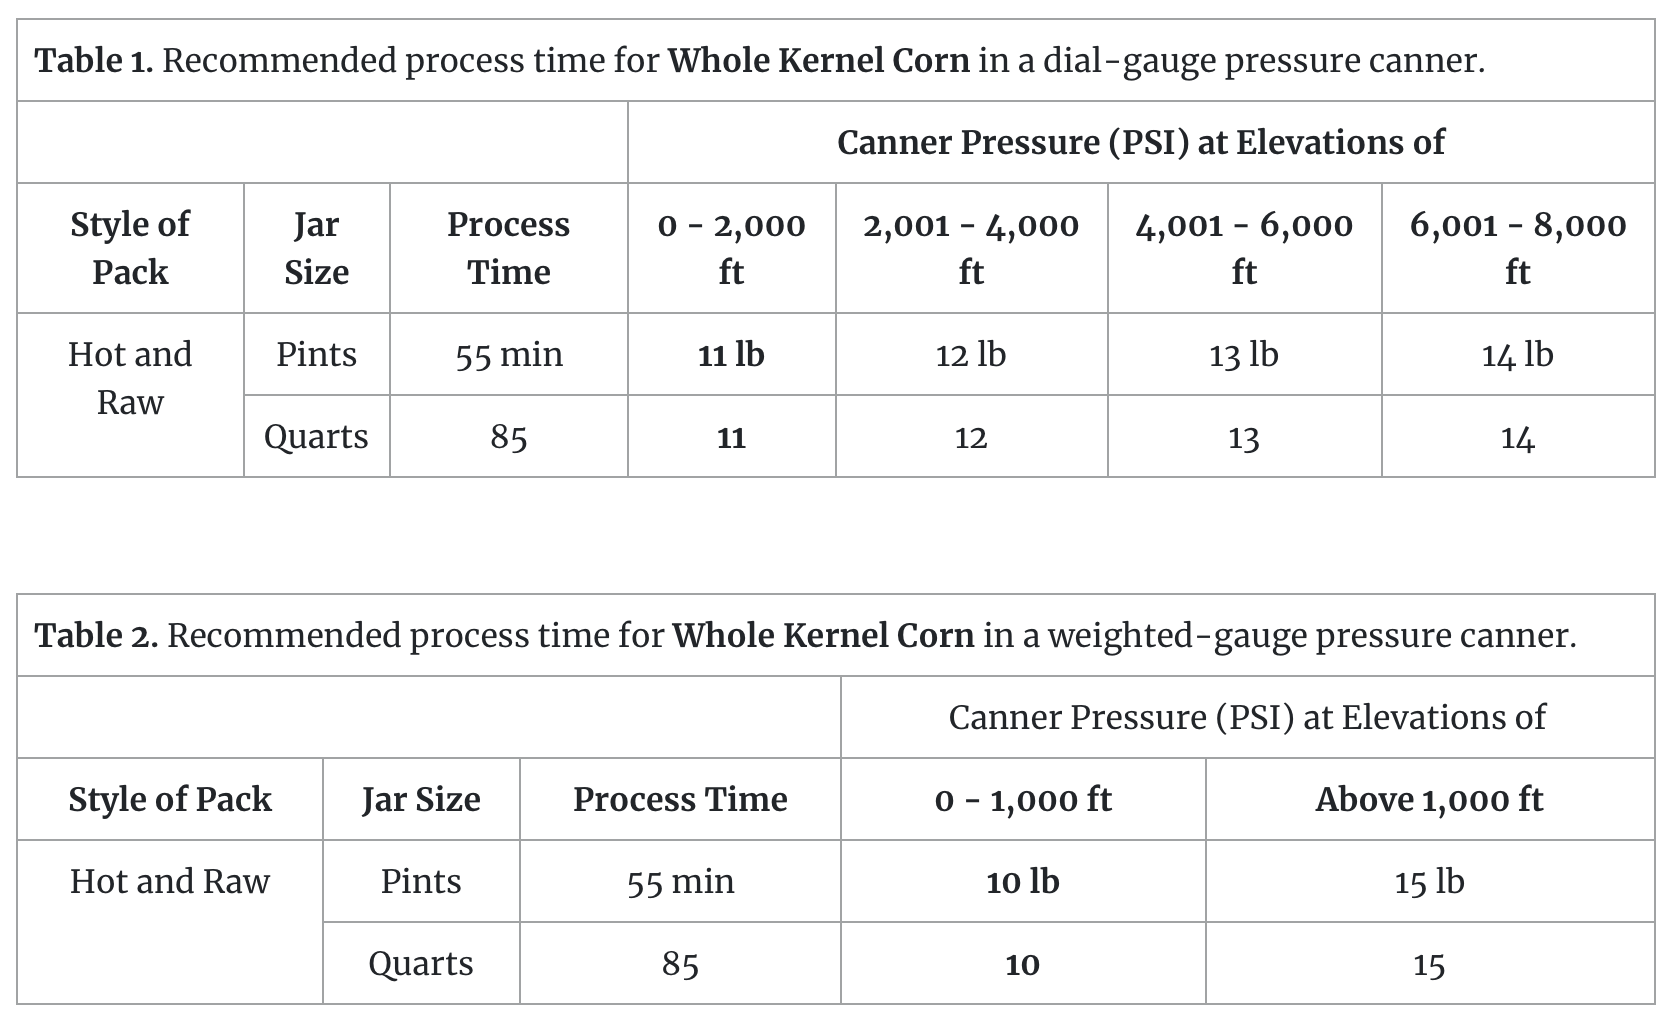
processing times for whole kernel corn:
The time and amount of pressure for canning corn varies depending on where you live! Different elevation levels cause these amounts to differ, so it’s a good idea to look into the recommended time and pressure for your area. Please use the chart below!
For more information about canning snap or Italian beans, please read the USDA guidelines.
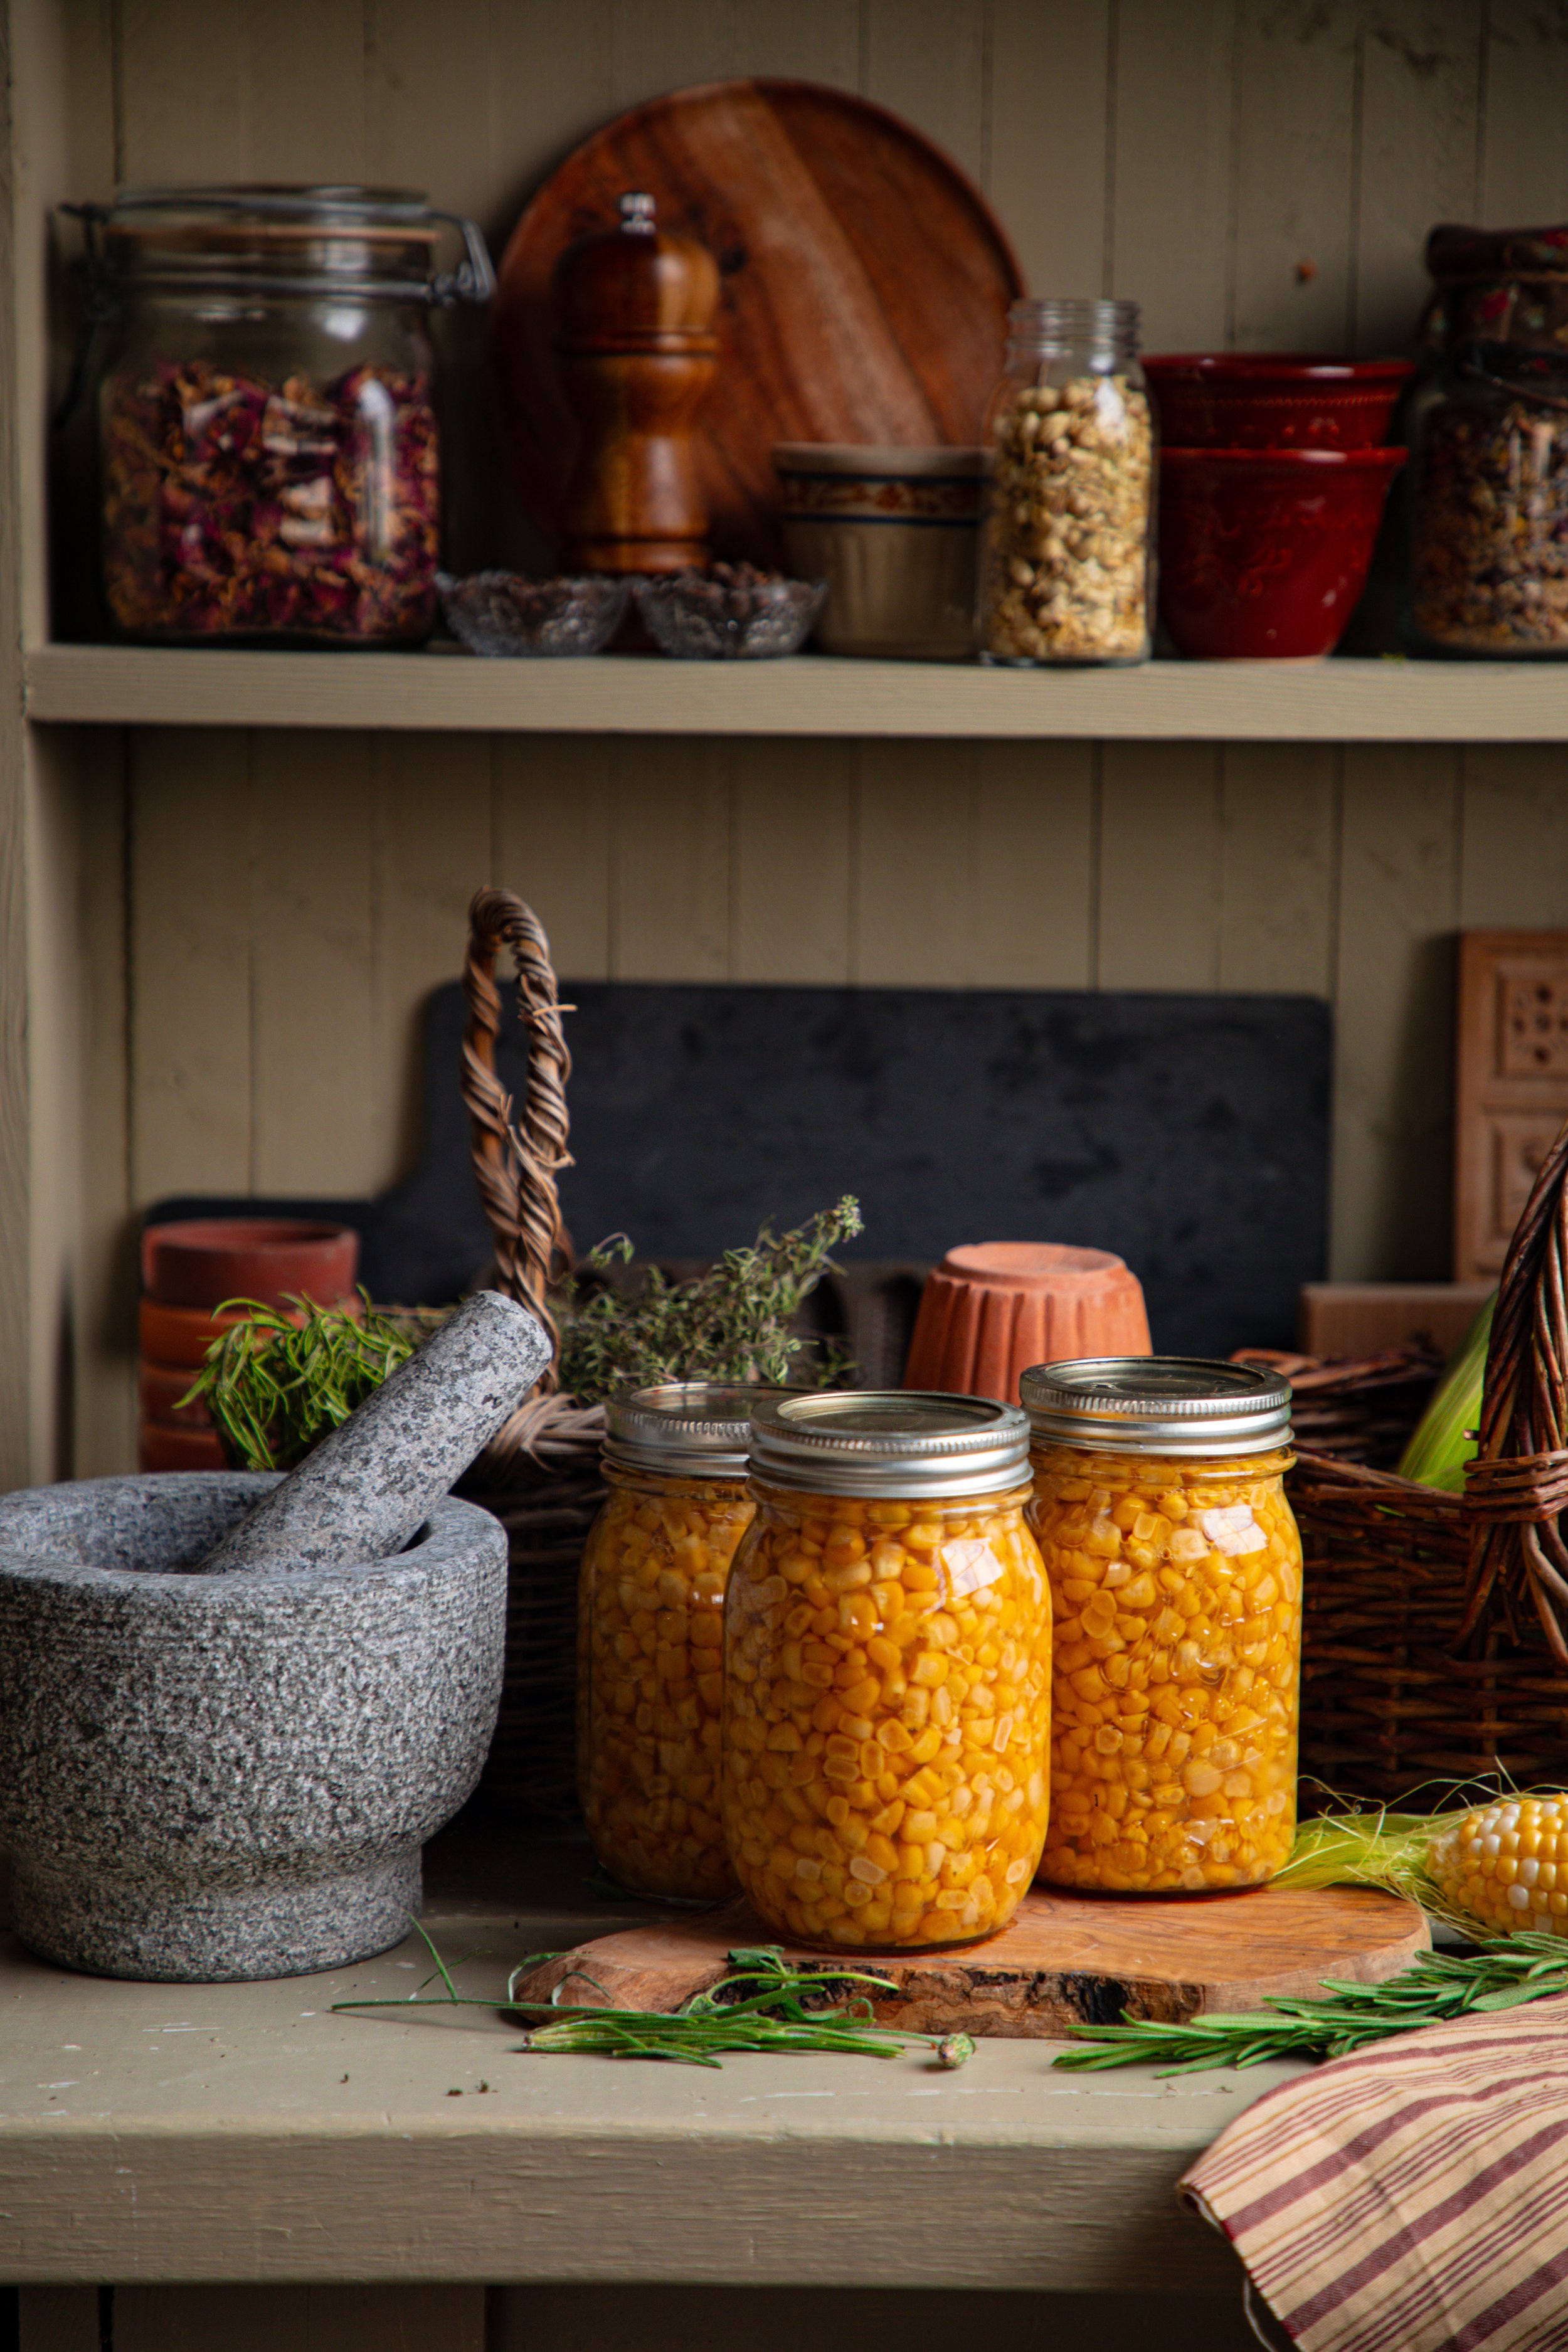
STORING YOUR CANNED sweet corn:
After processing the corn, release the pressure in your canner according to the manufacturer's directions. Remove the canner lid and leave your jars to sit in the water for 10 minutes. Then, place them onto a towel on the countertop to cool.
After 12 to 24 hours, you can safely remove the bands and check the seals of the jars. Lift the jar around the edges with your fingertips and lift it about an inch off the countertop. If the jar remains sealed, it’s good to store!
Store your jars in a place that remains at room temperature 60° to 80° F (16° to 26° C) that is out of direct sunlight to avoid discoloration.
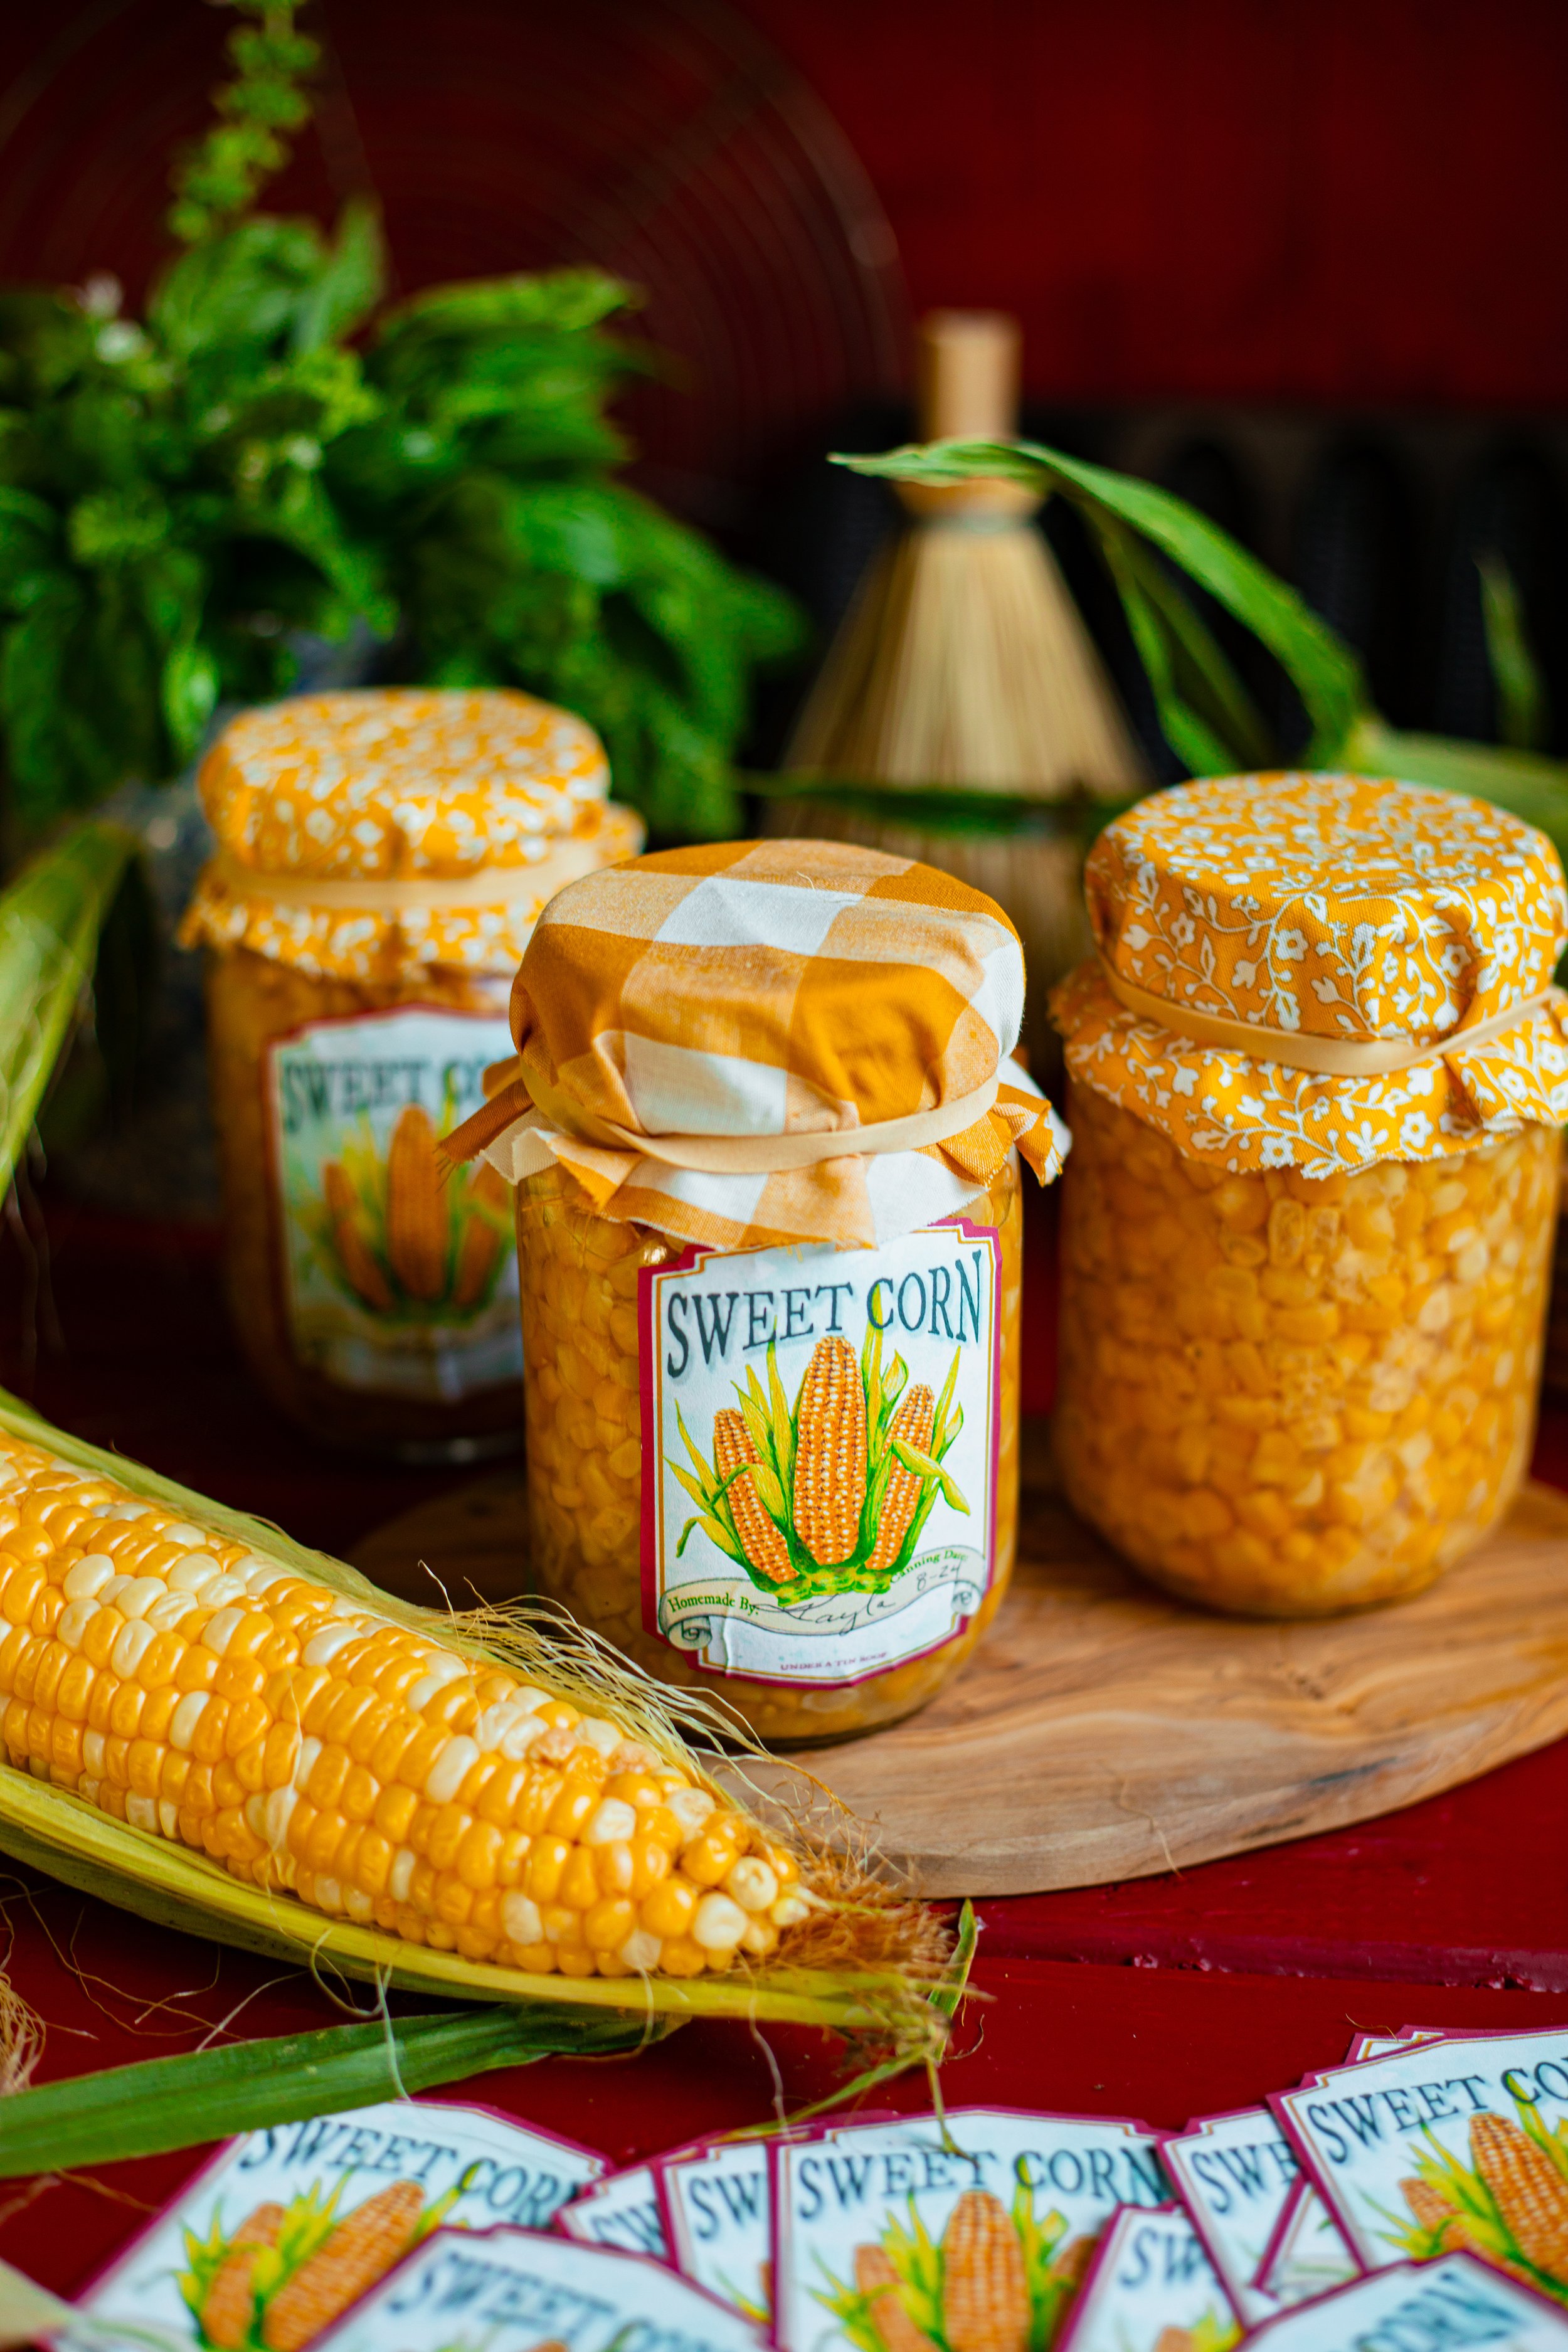
You can download and print these cute Vintage Grocery Store inspired labels by joining my Cozy Kitchen Companions subscription! The labels were hand illustrated and designed by my mom. When you join, you get access to our entire digital library collection, which continues to grow each month.
final thoughts:
I just love being able to can my own corn at home! I find it truly satisfying to see all of the jars of vegetables line up. My other favorite pressure canned vegetable is homegrown green beans.
I hope that wherever you are on your canning journey, that you enjoy this recipe!
xoxo Kayla
Pressure Canned Sweet Corn

Ingredients
- 8 lbs (3.6 kg) fresh sweet corn
- 3 tsp kosher salt
- Water
Instructions
- Prepare your pressure canner. Check to make sure there are no blockages and apply a thin coat of oil to the rubber ring and rim of the canner. Fill your canner with water according to the manufacturers instructions (mine is about 3 quarts of water) and a splash of white vinegar to help with cloudiness on the jars.
- Wash and sanitize your jars, lids, and rings. Place the jars in the canner and simmer them in the water until ready to use.
- Meanwhile, remove the husks and as much of the fine hairs from the ears of corn. Wash the ears. With a serrated knife, cut off the corn kernels just below the tip. Do not use the kernels from the tip top of the corn. This is more easily done by setting the ear of corn in the center of a tub pan flipped upside down. Then the corn just falls into the tube pan and the ear doesn't slip or slide.
- Bring a large pot of water to a boil. The amount you will need will vary, so fill up a large pot.
- Once all of the corn is cut, it is time to pack the jars. This is the raw pack method. Remove a jar from the canner. Pack it tightly with the corn kernels to 1-inch headspace. Then, add 1/2 teaspoon of salt to the jar. Pour water over the kernels until it reaches 1-inch headspace. Poke around in the jar to remove air bubbles and adjust the water level as necessary.
- Wipe the rim of the jar, apply the lid and the band to fingertip tight. Then put the jar back into the canner. Repeat with the remaining jars until they are all filled.
- Put the lid on the canner and turn the heat up to high. Let the steam release for 10 minutes. After 10 minutes, put on the pressure gauge. Increase the pressure to 10 lbs, then turn the heat to low and keep the pressure on 10 lbs for 55 minutes. You will have to constantly watch the heat to make sure the pressure never goes under 10 lbs. If it does, you will have to start the timer all over again.
- After 55 minutes, turn off the heat. Let the pressure drop down to 0 lbs. Remove the pressure gauge. Let the steam release for 10 minutes. Then, remove the lid and leave the jars in the water for 10 minutes more. Remove the jars from the canner. Check the seals after 12 to 24 hours. Then store the jars without the rings for up to 18 months.