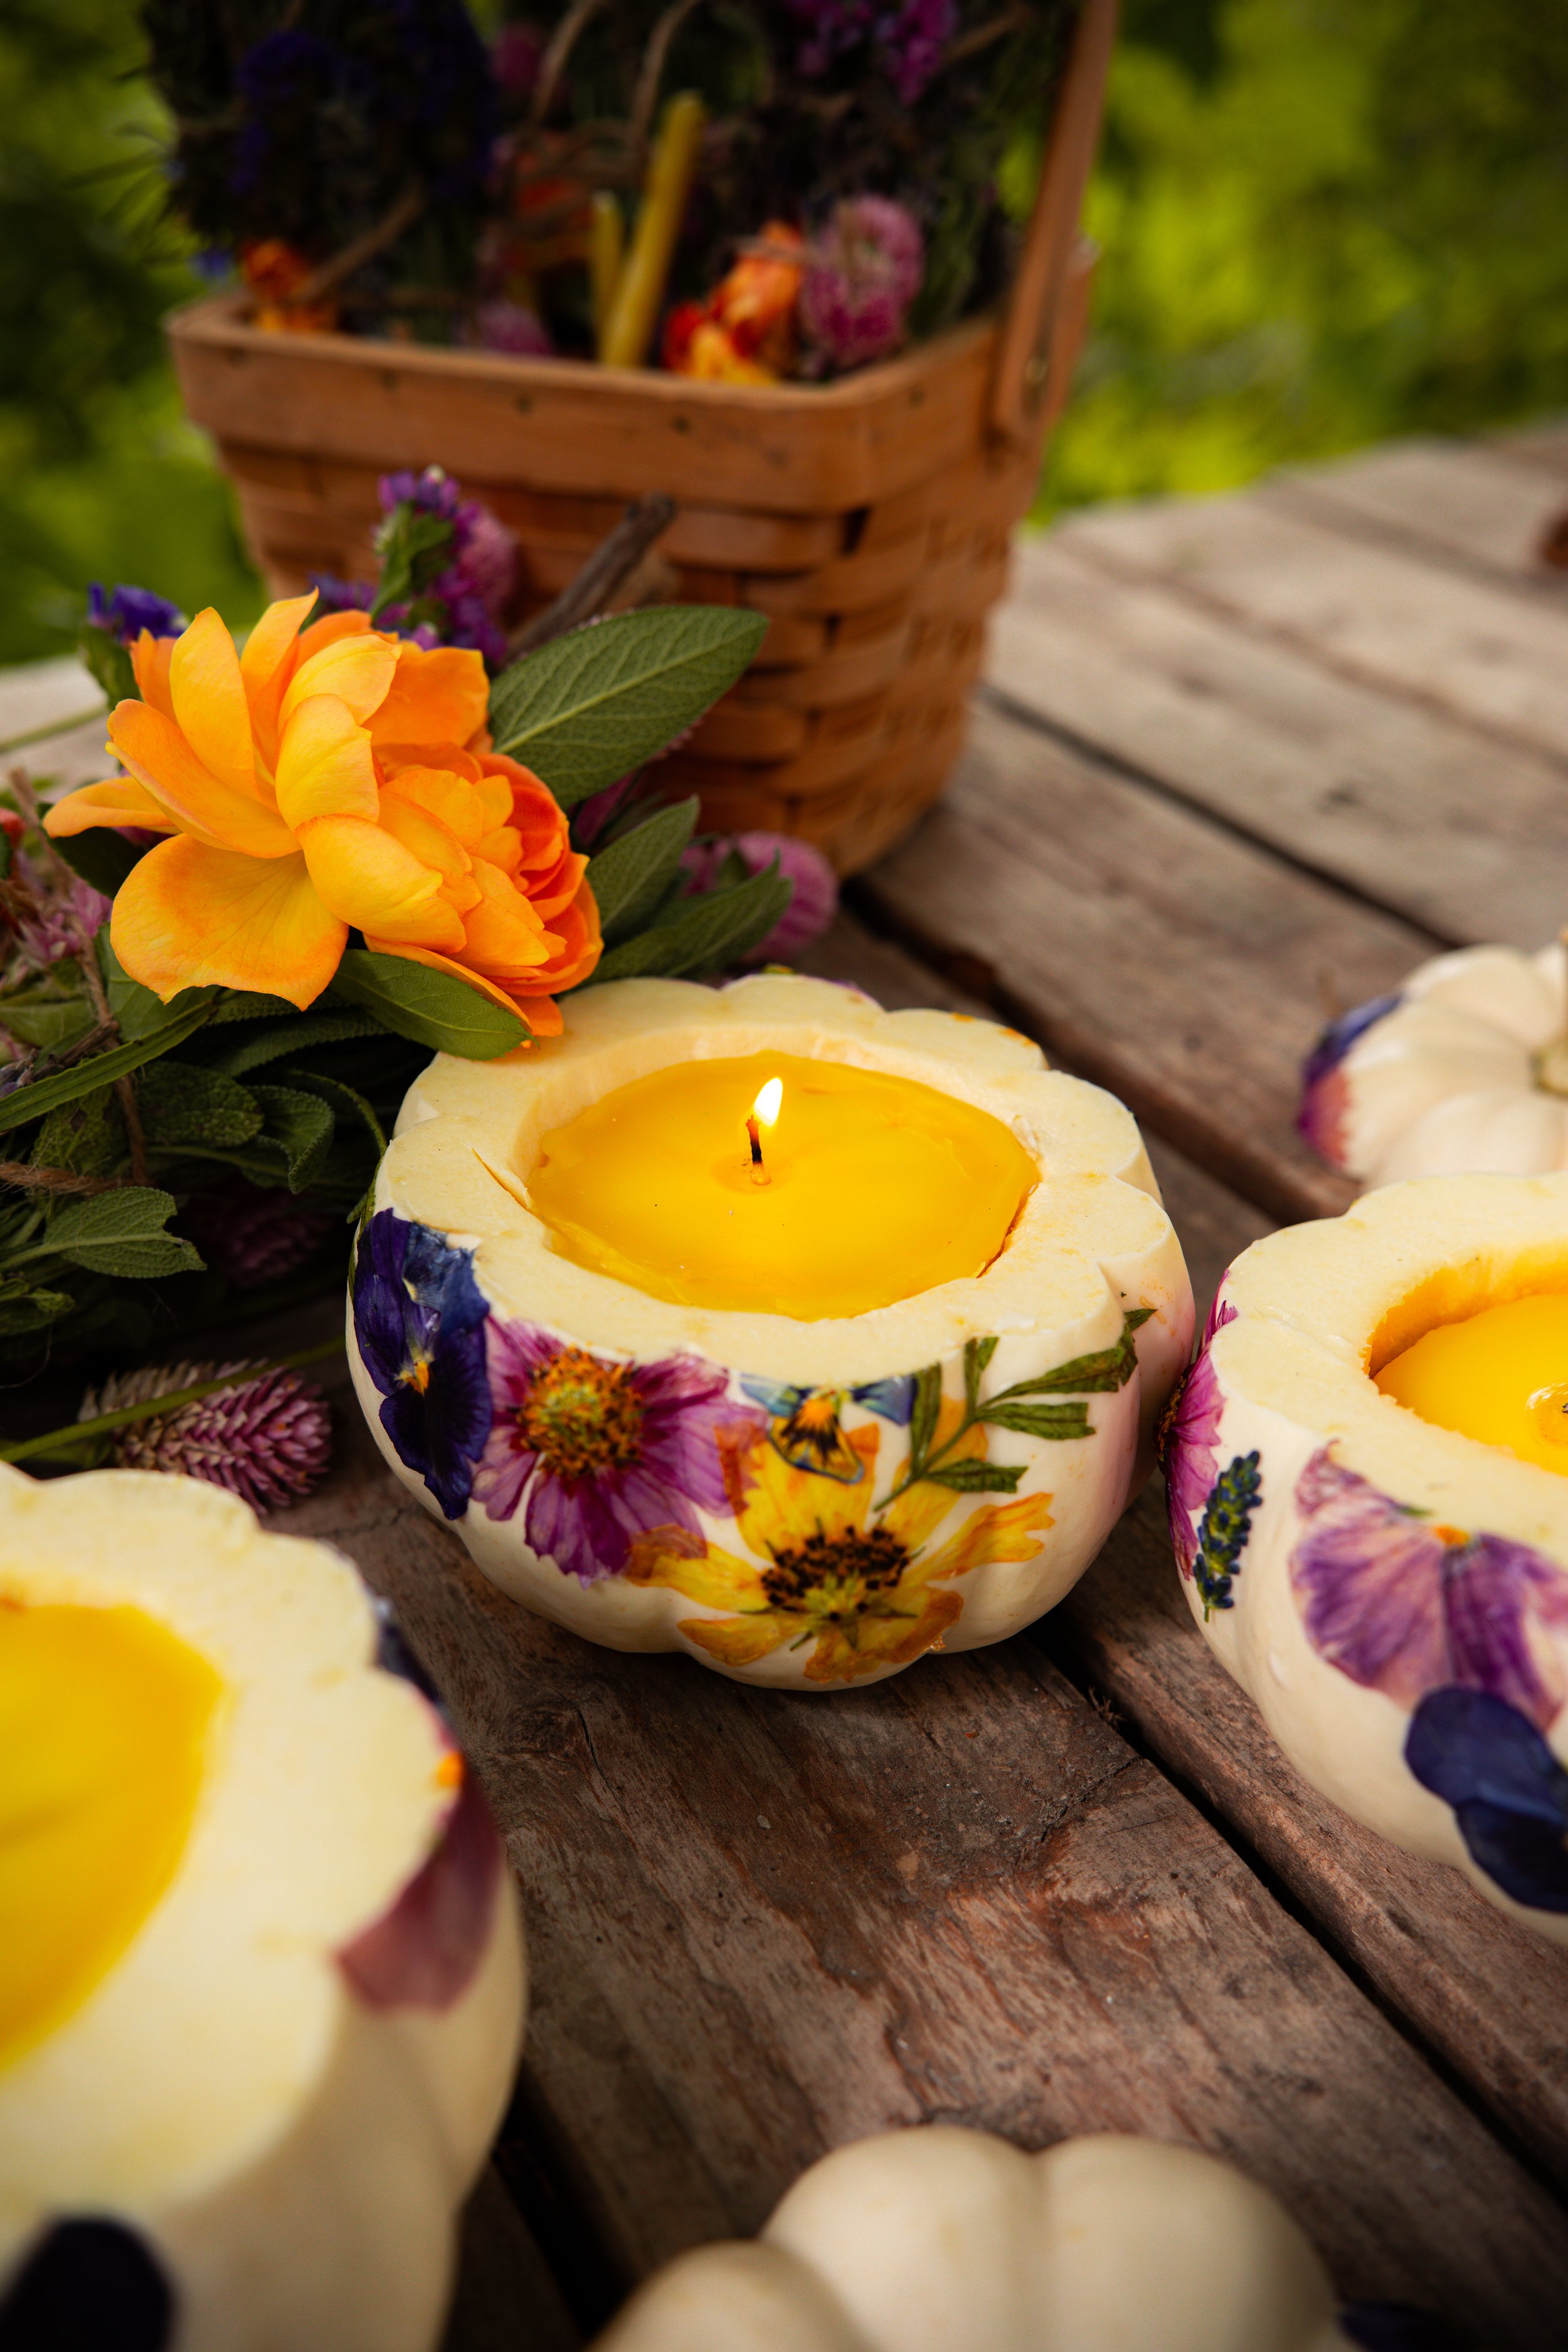
Pressed Flowers Miniature Pumpkin Beeswax Candles
This post may contain affiliate links, please see our privacy policy for more information.
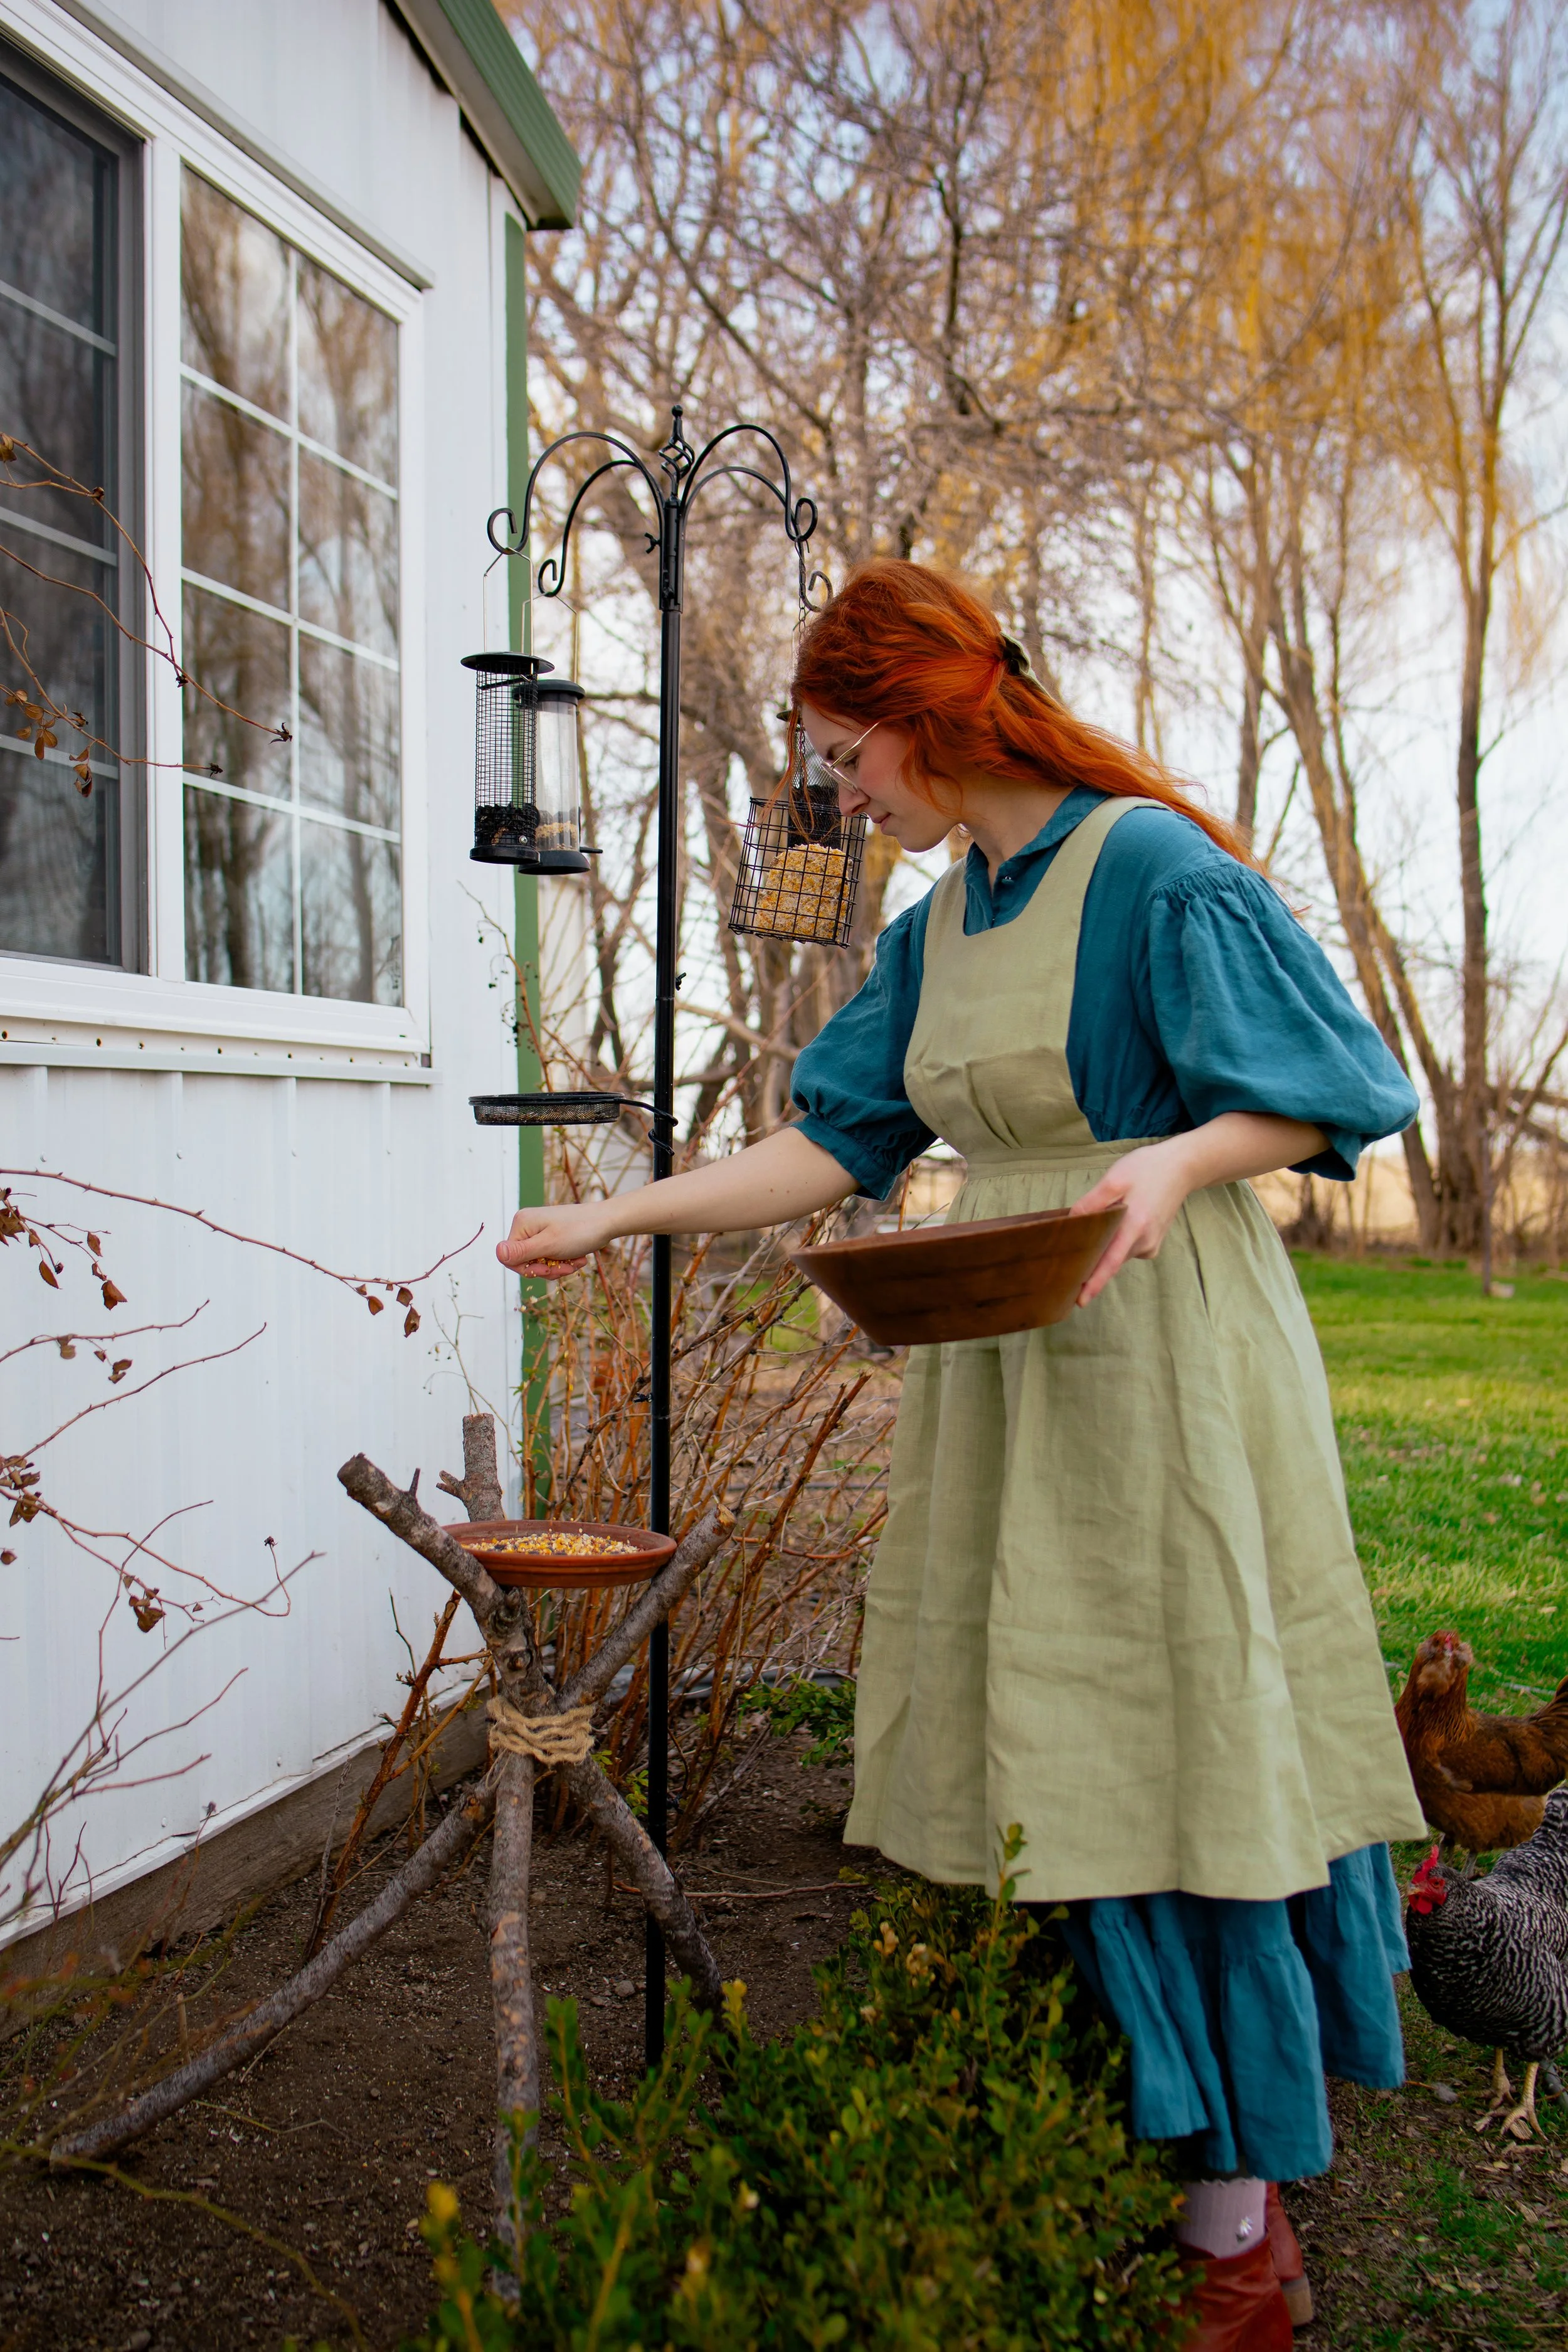
I am so excited to share with you a nature-inspired crafting experience with our Pressed Flowers Miniature Pumpkin Beeswax Candles Tutorial. This creative DIY project combines the beauty of pressed flowers, the charm of miniature pumpkins, and the warmth of beeswax candles. Learn how to craft these unique and decorative candles, perfect for adding a touch of nature's beauty to your home decor. Follow our step-by-step tutorial to create your own beautiful candles that capture the essence of the seasons.
This is a beautiful and easy-to-make centerpiece that can be featured in your home or during an outdoor gathering. Crafting with pressed flowers is so simple and creates a whimsical presentation!
what you will need:
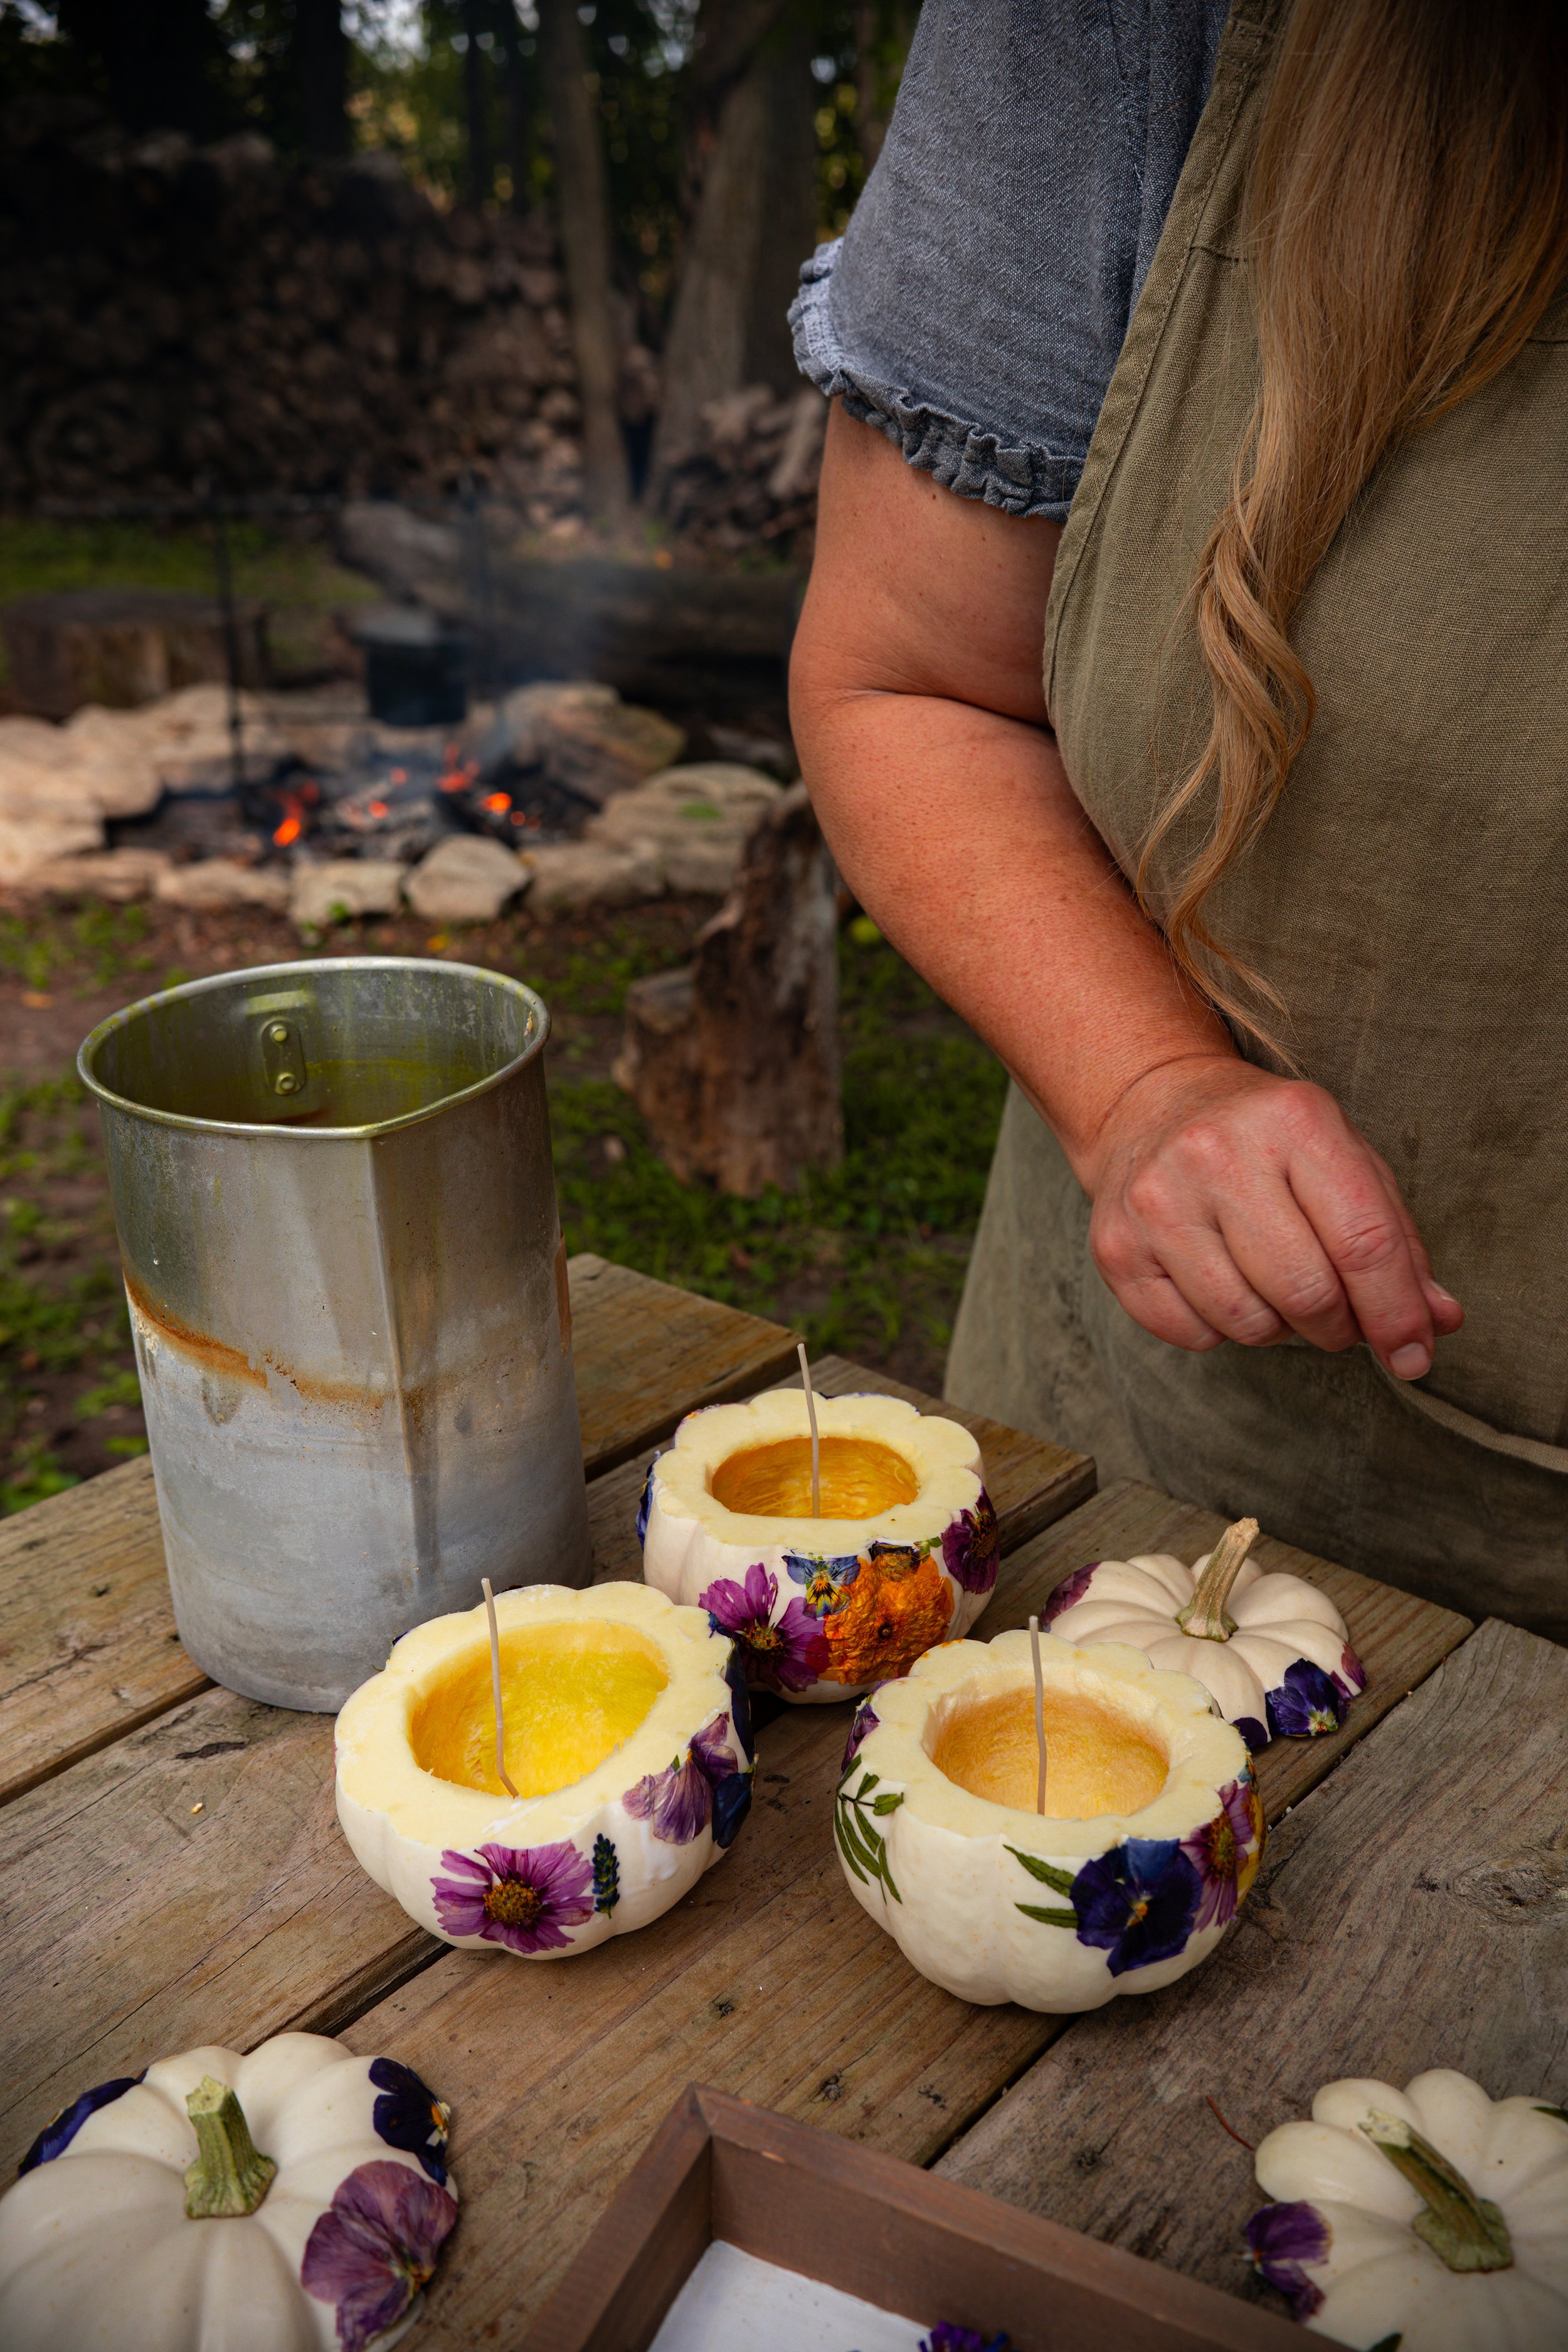
3 Miniature Pumpkins
Liquid Craft Glue (Homemade version by @northwoodsfolk)
Paintbrushes
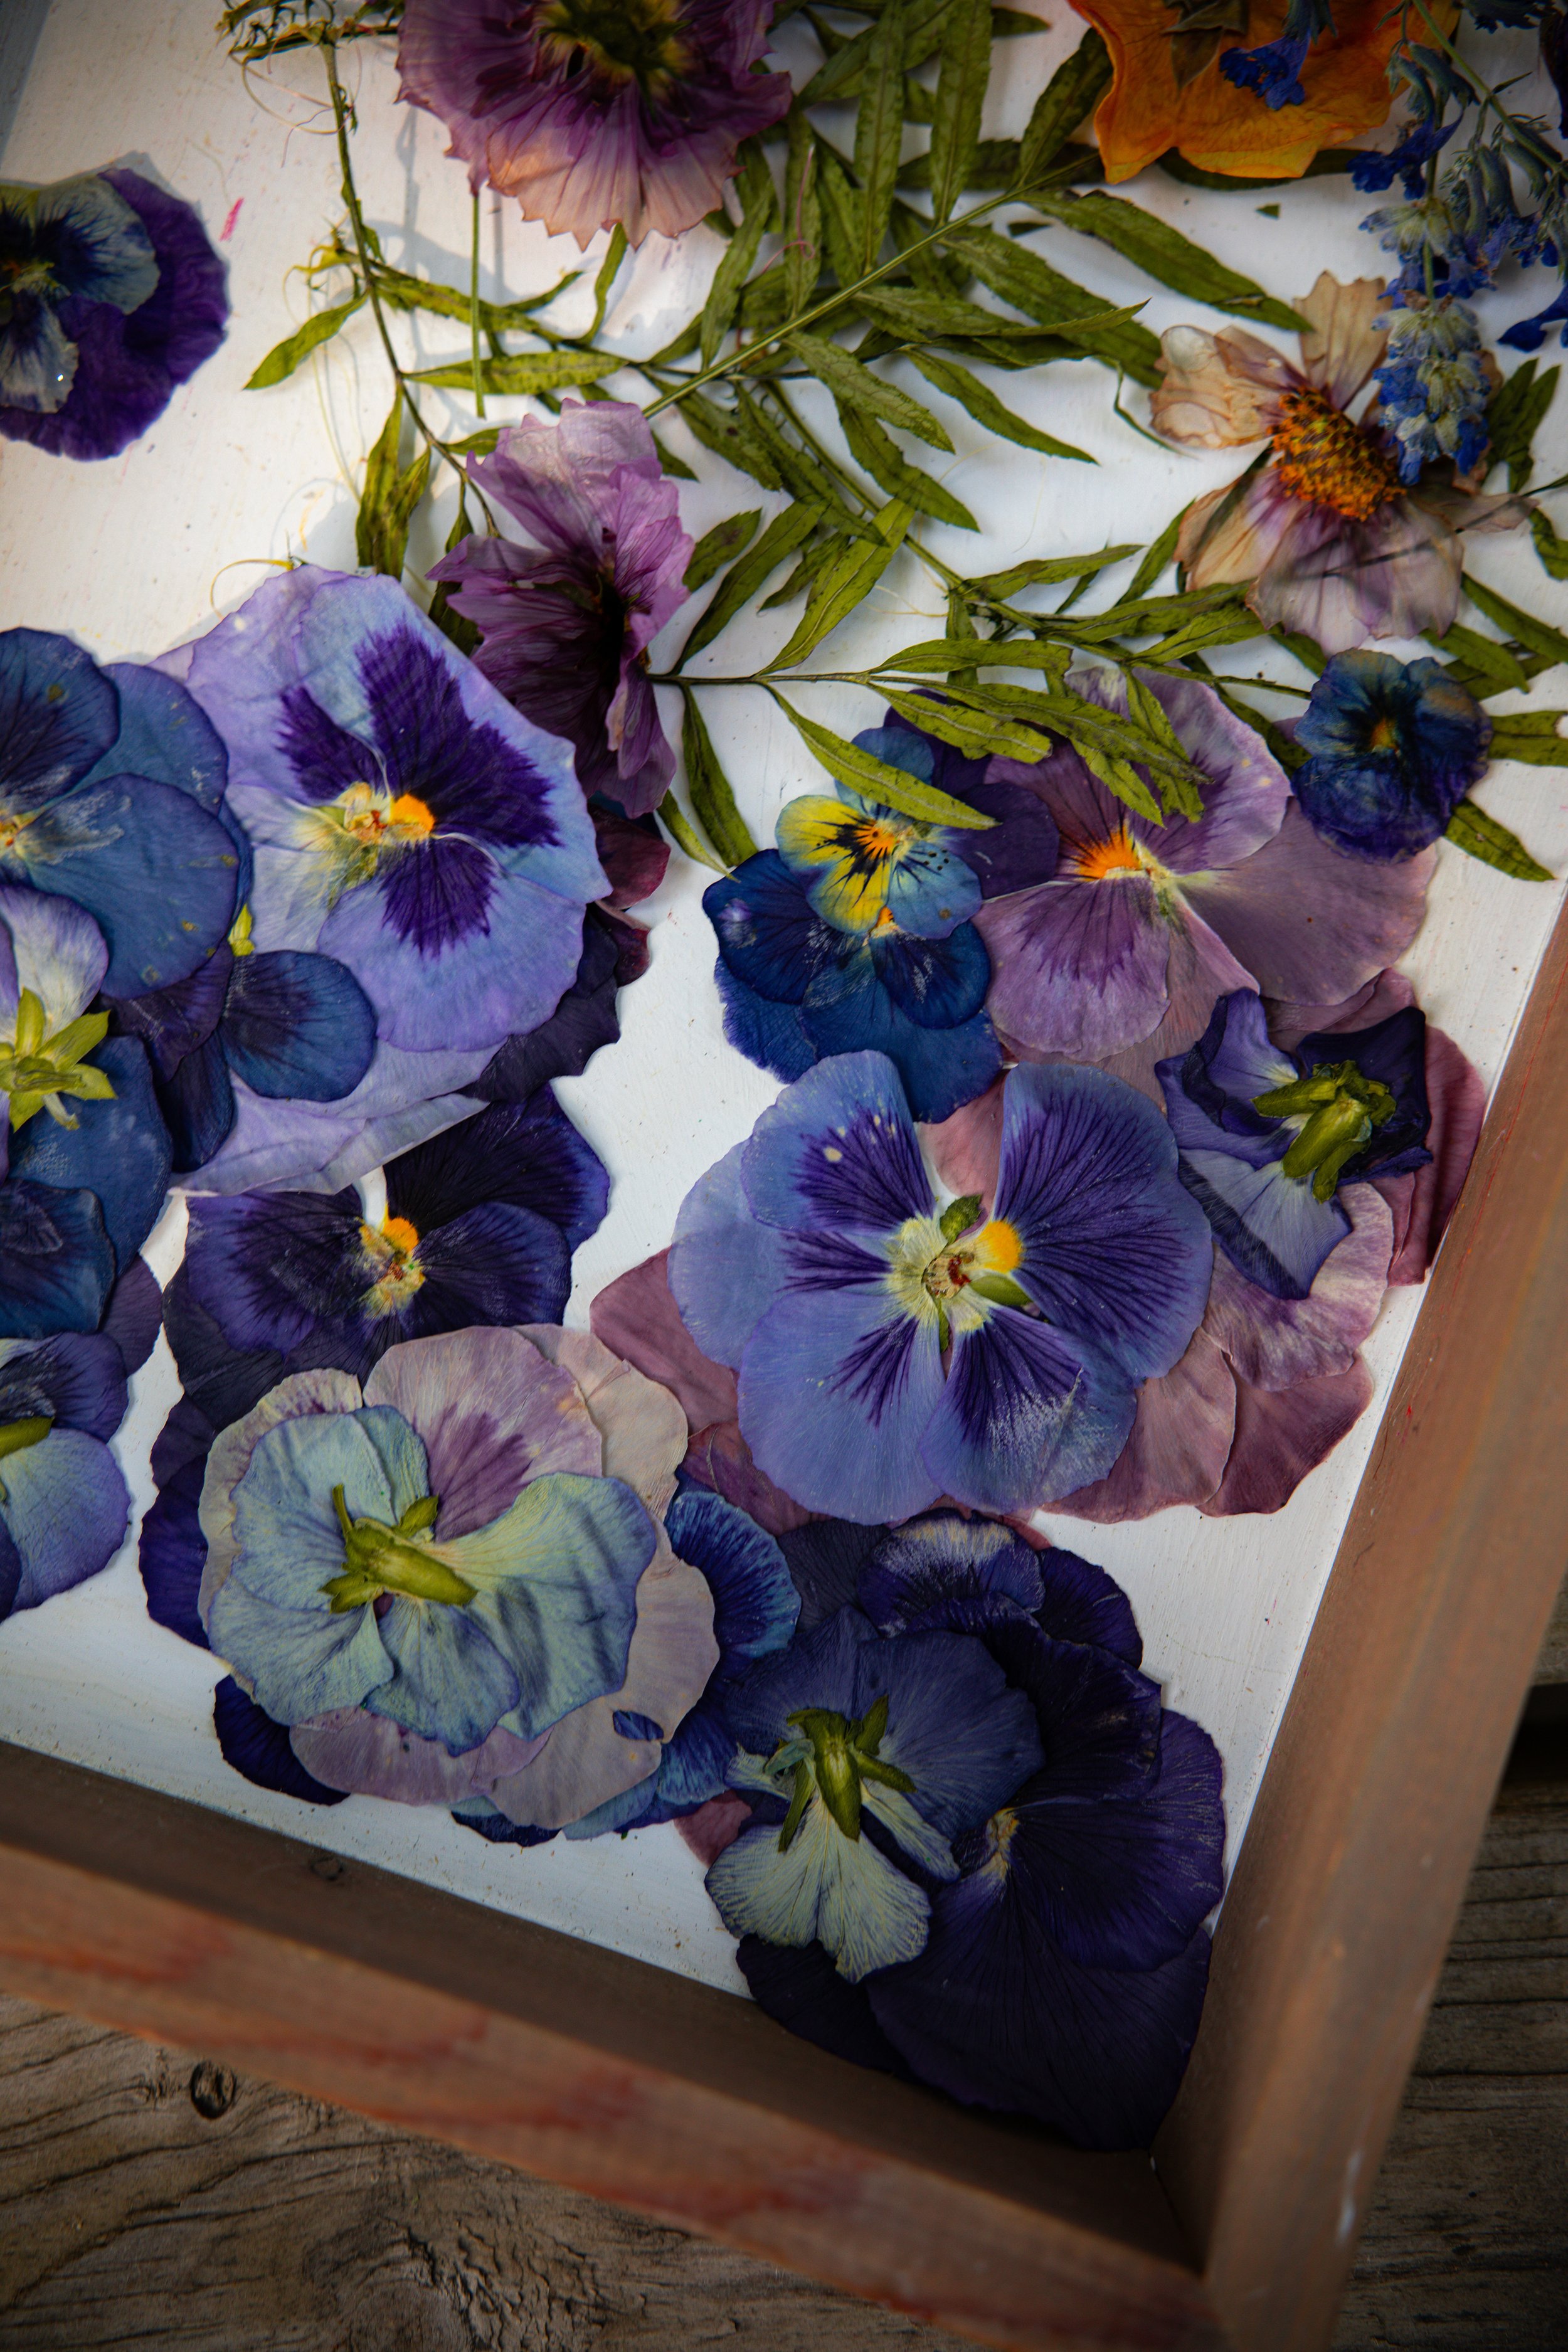
Pressed Flowers
Approximately 1 to 2 cups melted beeswax

directions:
STEP ONE: Hollow out your pumpkins. Cut off the tops and scoop out the seeds with a spoon. You may choose to remove some of the sides, but you will want to leave it fairly thick so that it can hold up the beeswax, otherwise the sides may cave in.
STEP TWO: Glue on the pressed flowers. You will want to use a liquid based glue, such as Mod Podge or this homemade version. Paint the glue onto the outside of the pumpkins with a paintbrush and attach a pressed flower. Then, layer over the pressed flower with more glue. Continue layering the glue and flowers in this manner until you are satisfied with the look of your pumpkin. Let the pumpkins dry completely, about 30 minutes.
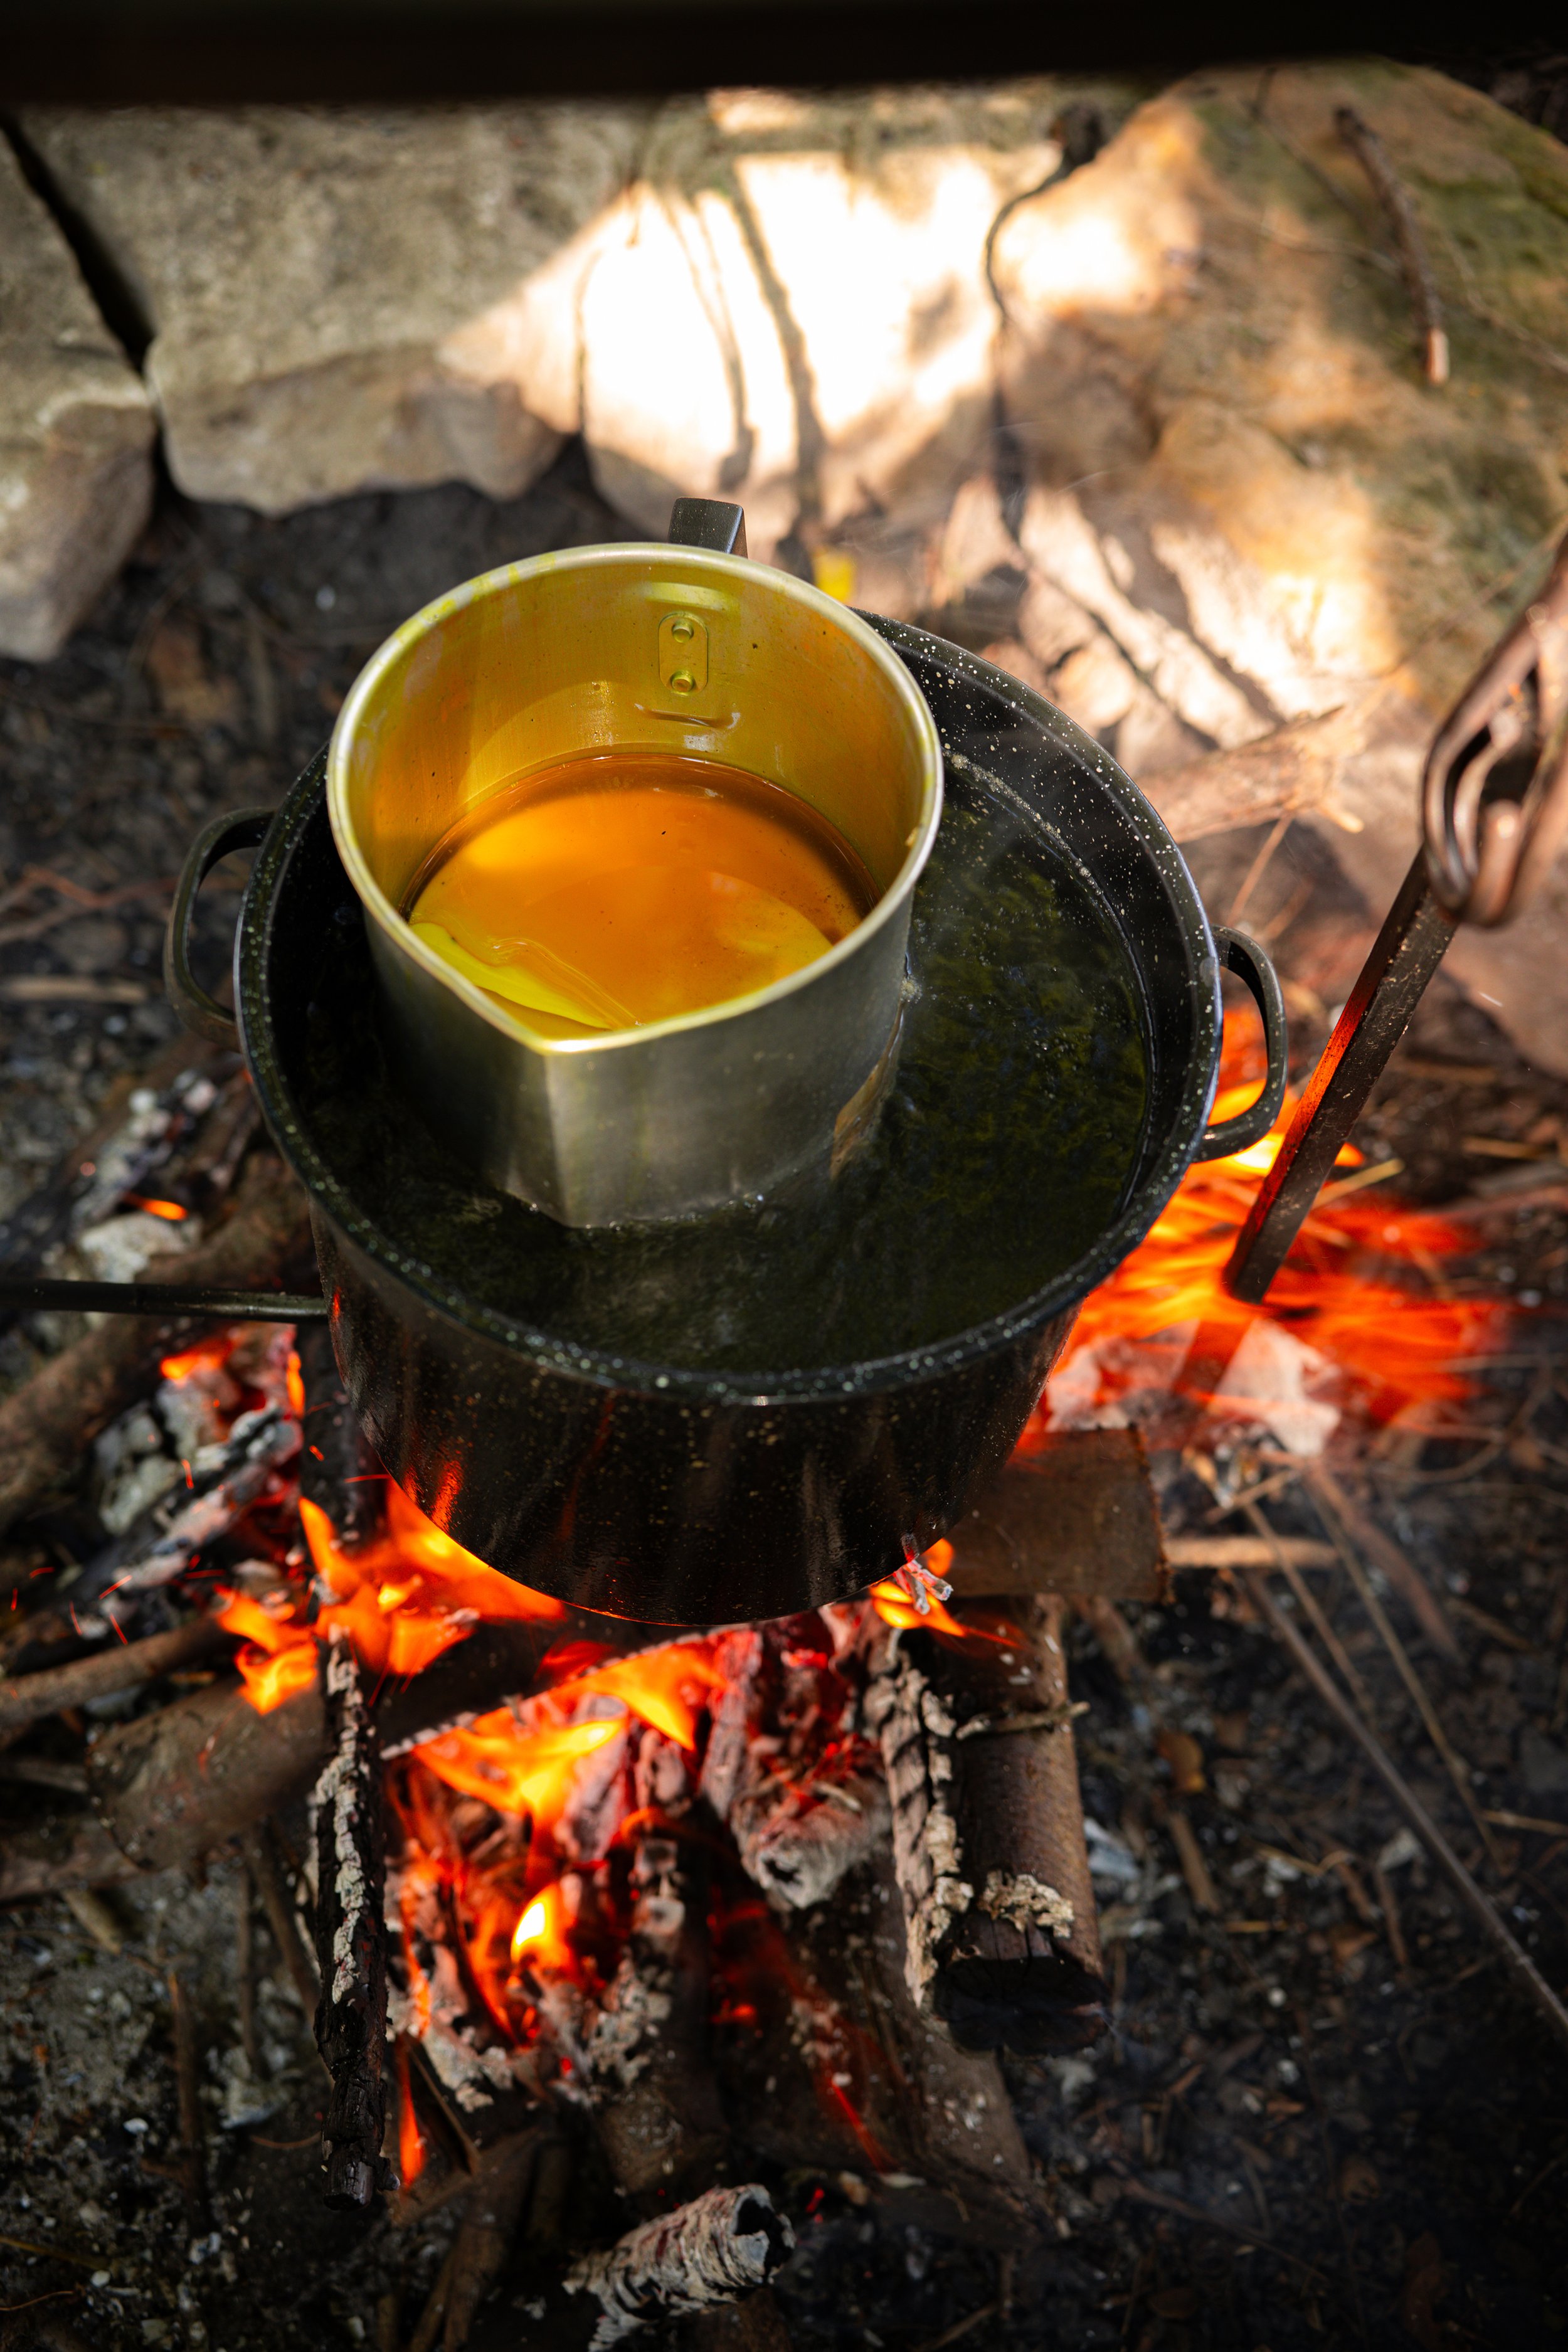
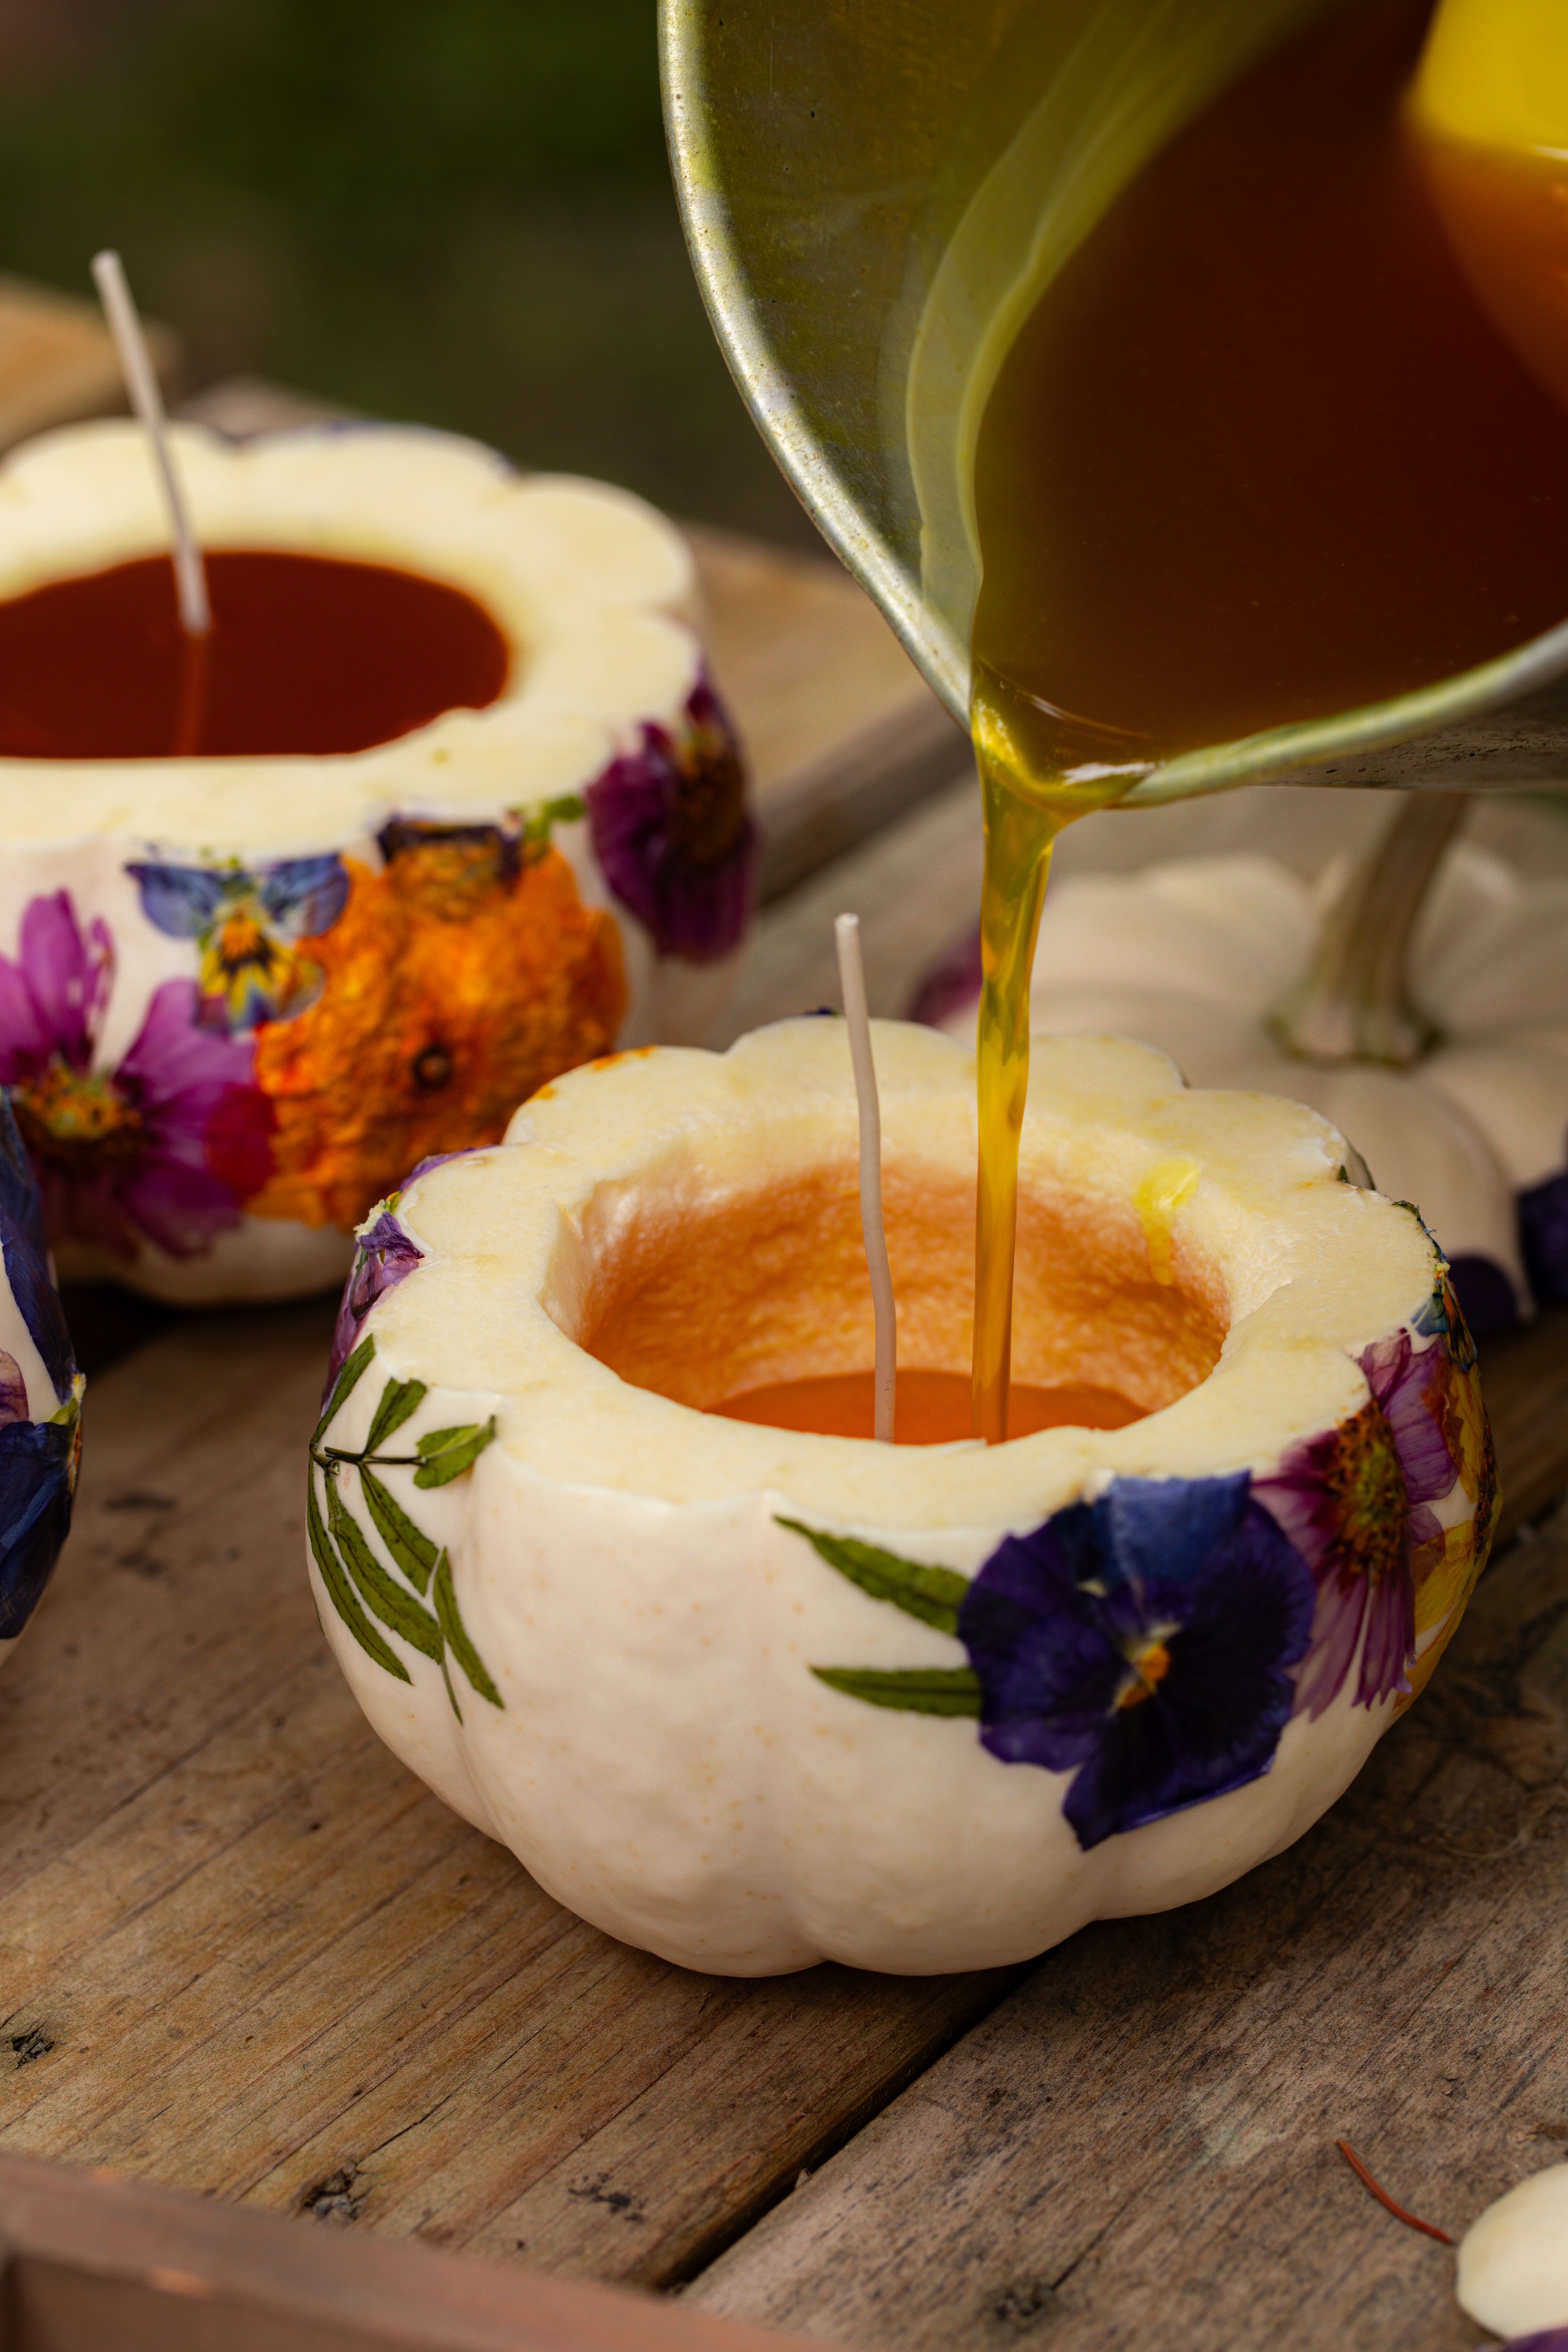
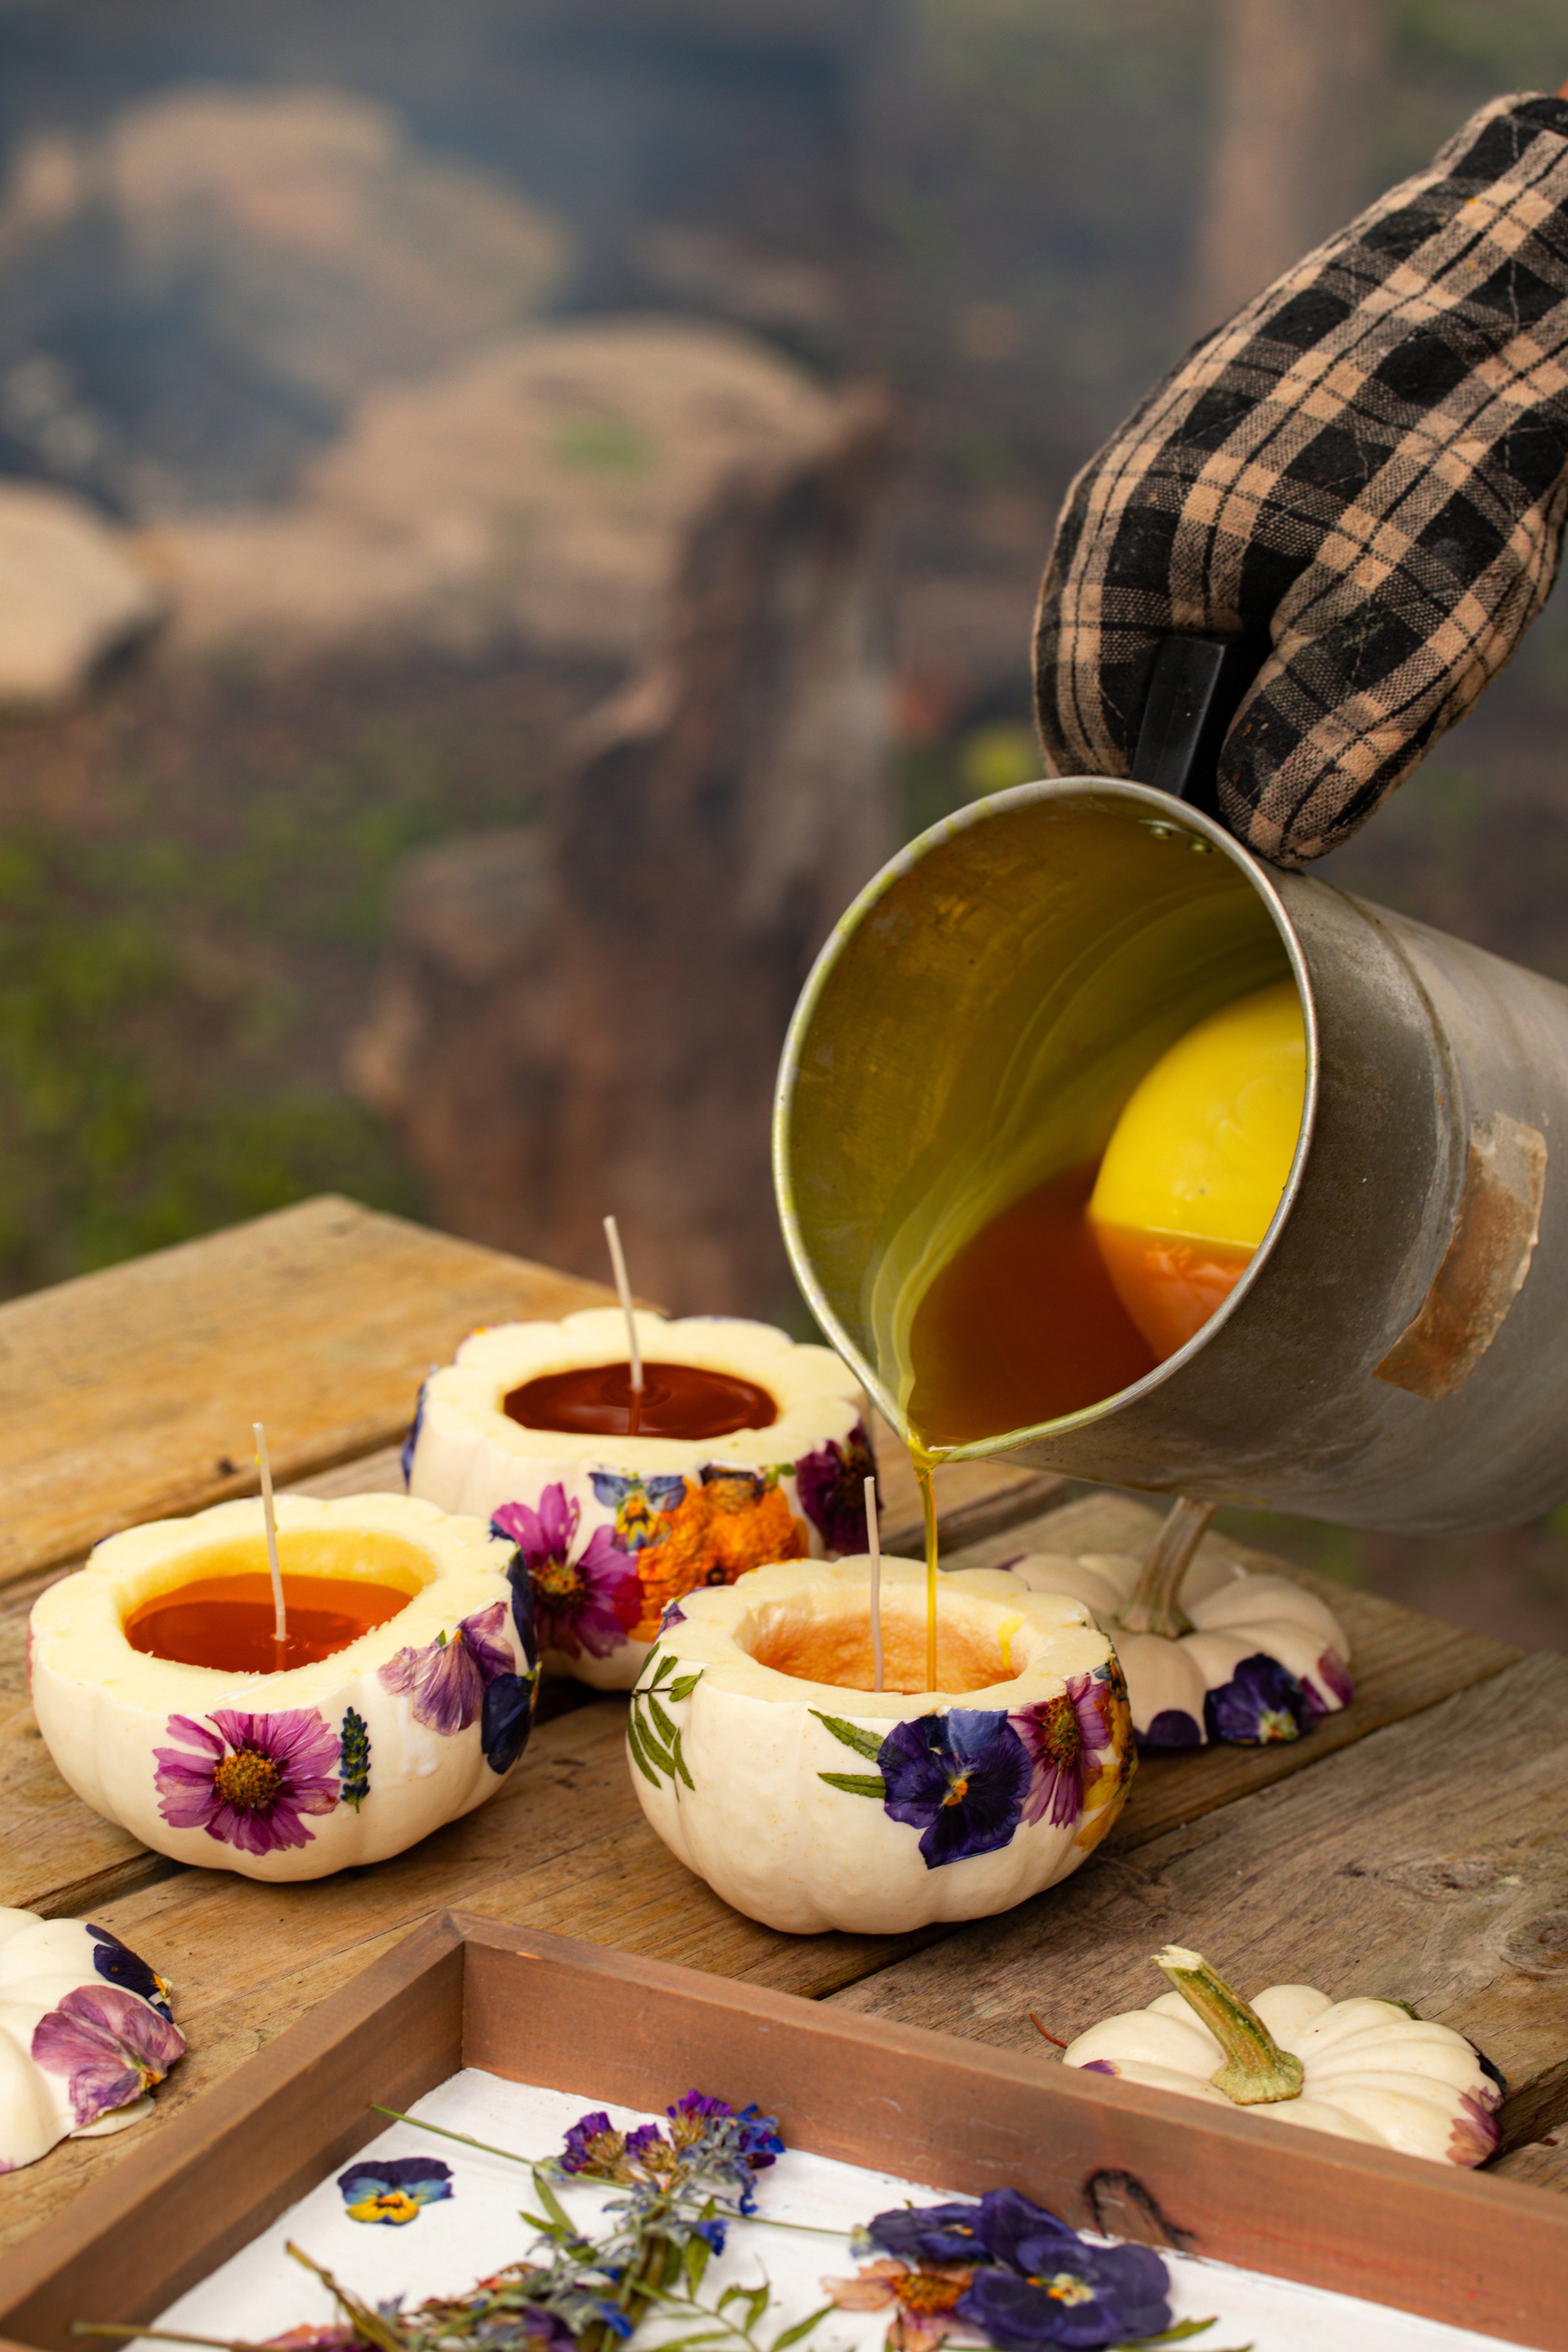
STEP THREE: Melt the beeswax. We chose to make these outdoors by the campfire, but you can easily melt your wax indoors. Simply place the wax into a bowl that you will use only for wax melting, and then place the bowl into a pot of simmering water. The wax will melt in about 10 minutes.
STEP FOUR: Dip the metal ends of the candle wicking into the wax. Then, gently press the metal wicking to the bottom center of the hollowed out pumpkin. It might not stick perfectly, but it will help keep the wick from falling over.
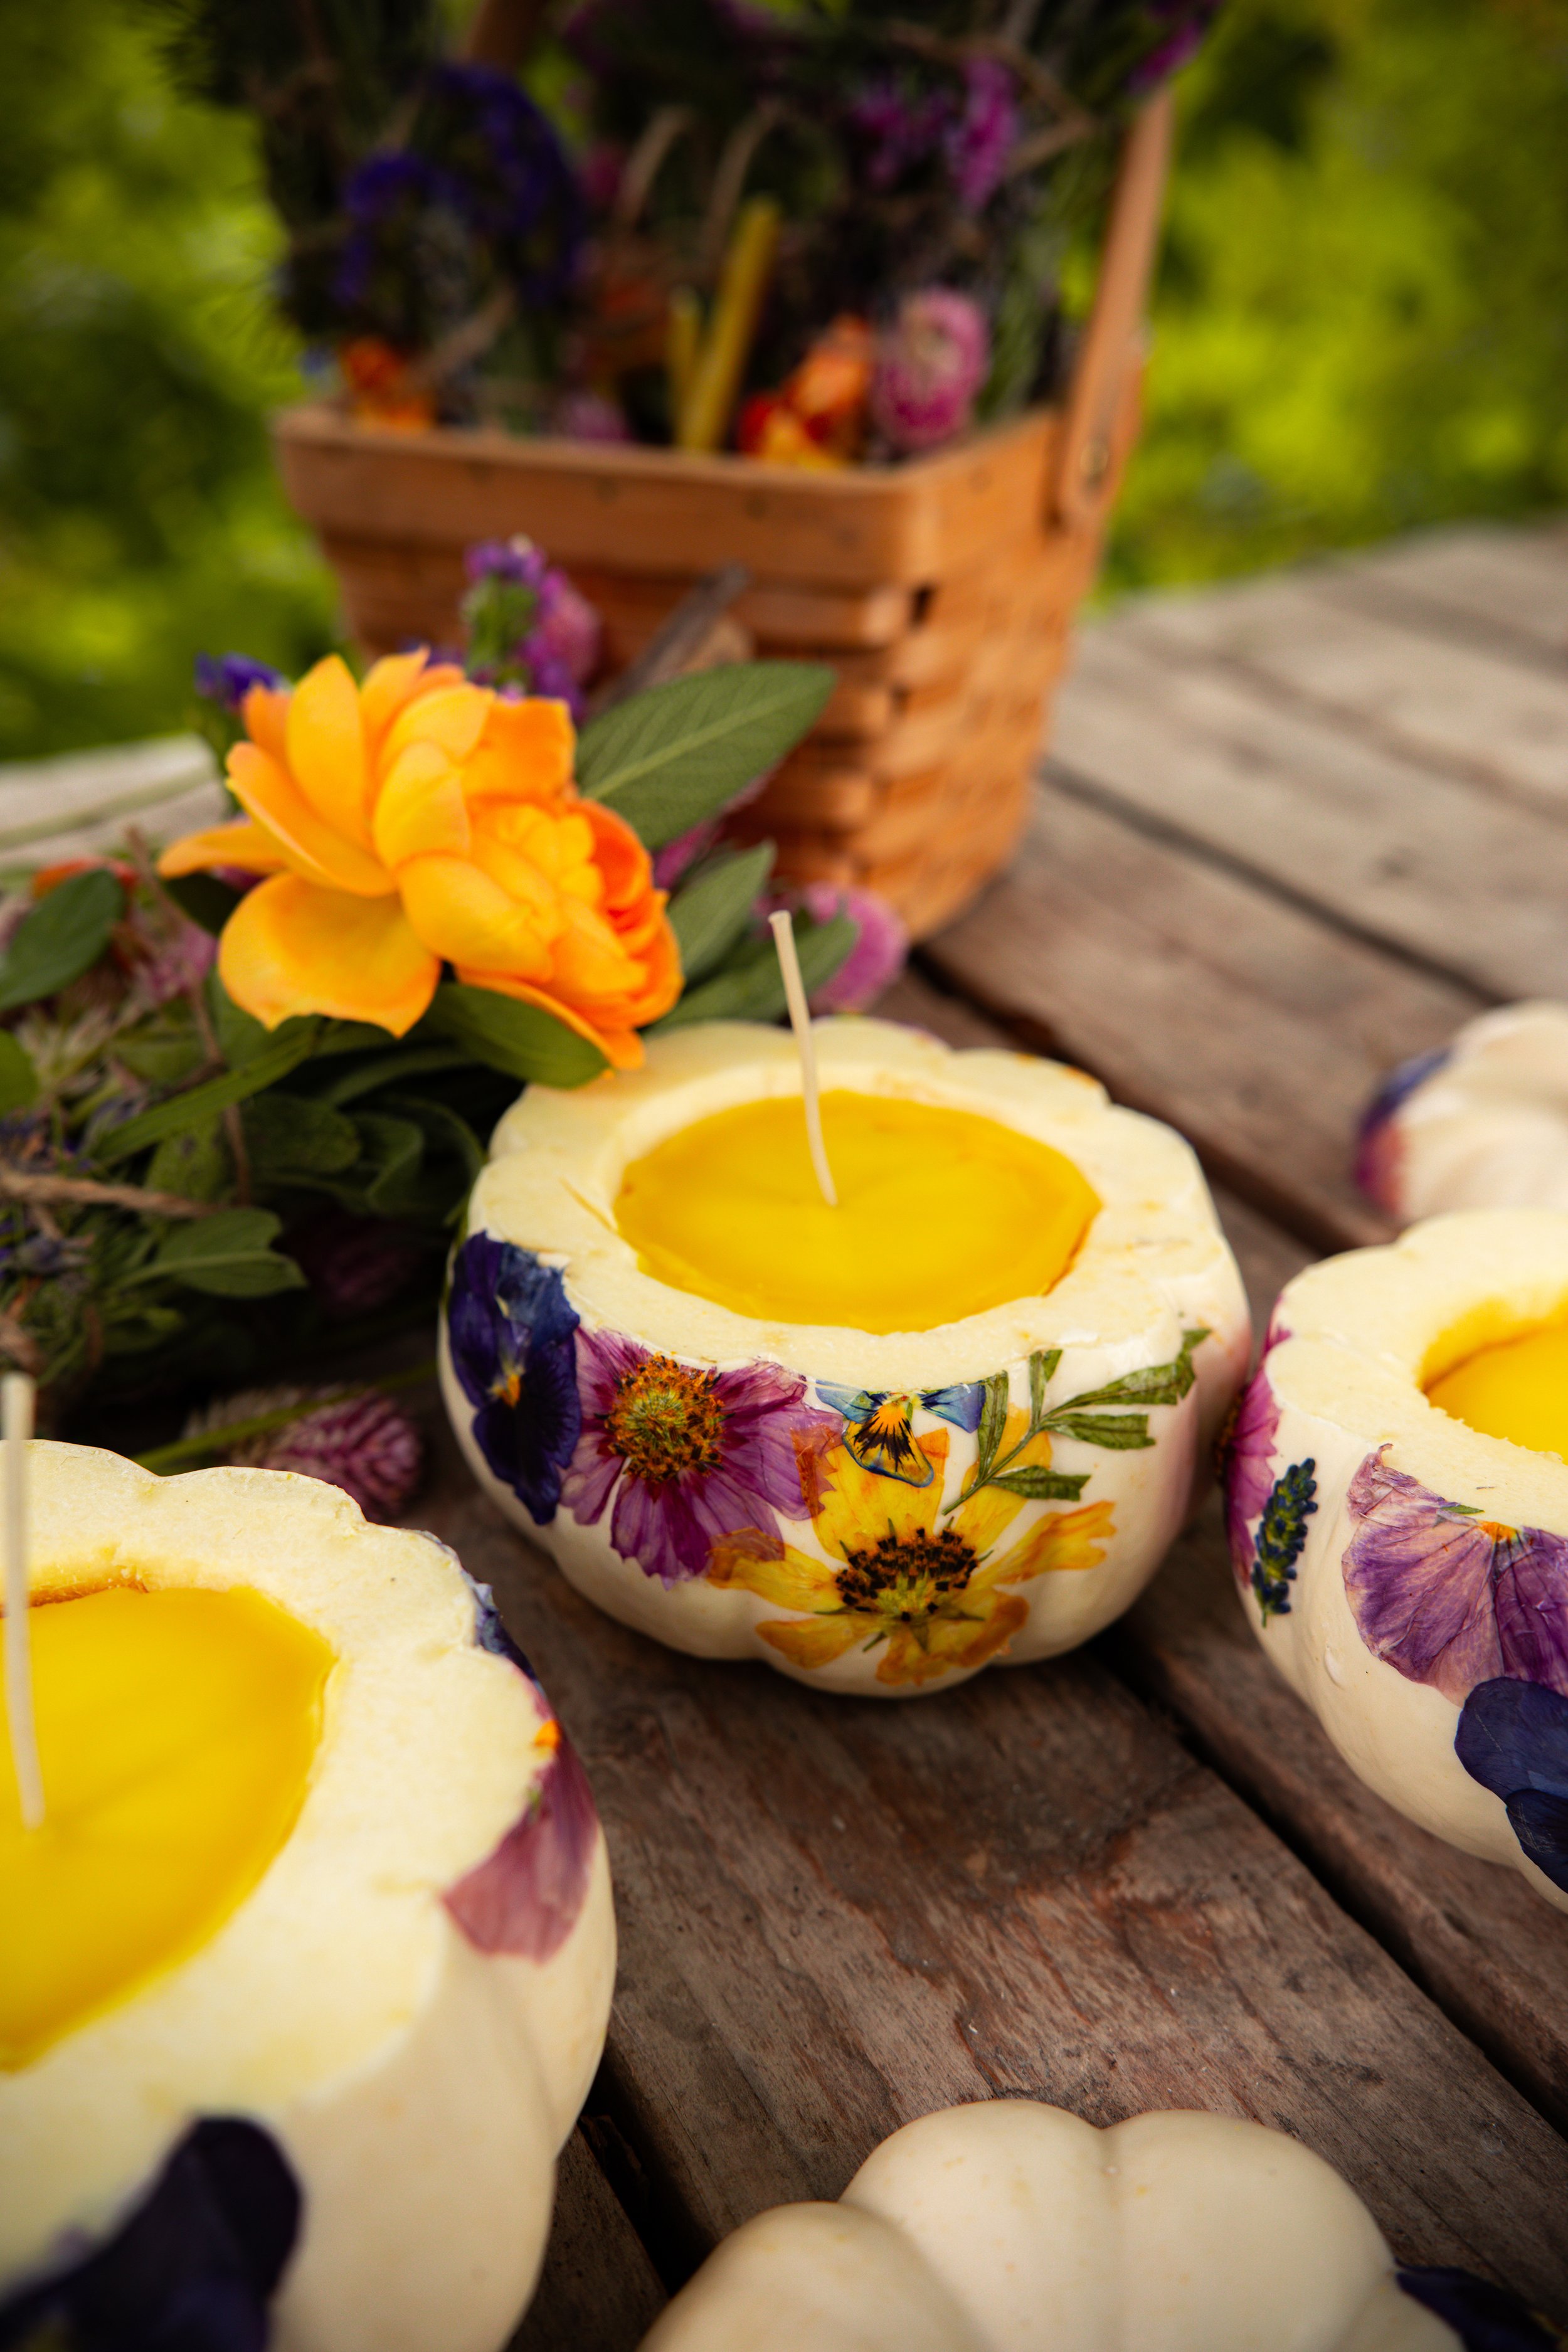
STEP FIVE: Slowly pour the wax into the pumpkin, leaving about 1/2-inch of headspace. Allow the candle to cure for at least 24 hours. Trim the wick and light your candle!
final thoughts:
Aren’t these just cute? They’re so simple, and I love that they are made with the beautiful nature growing around our farm. I learned a fun trick recently to press flowers with my clothes iron. It has made flower pressing a million times faster, and I can use them so much more often for crafting! Though, I still love the old-fashioned method of pressing them inside a beloved, heavy book. I always forget they are in there until I turn open the pages and see a sweet little memory peeking out.
Enjoy!
xx Jill