How to Press Flowers with a Flower Press: A Simple Historical Craft
A historical and treasured craft, the art of pressing flowers goes back thousands of years. This timeless art form is a cherished way to preserve memories in the form of a gift from your garden, a loved one, or even a special occasion. I love pressing flowers from our gardens to look back on what we grew and the trials and tribulations of each growing season. You can enjoyed pressed flowers in many ways as they make excellent pieces for decor or crafting!
preserving your garden:
I love preserving the flowers that we grow in our garden. While there are not many flowers currently growing right now, the beautiful perennials have already started to show signs that they will be blooming soon. The peonies have popped up a foot out of the ground already, the apple trees have buds that are about to open, and the lilacs have started to form their lovely purple buds as well.
I am looking forward to recording the flower names and the dates they were pressed this year as I would love to record our garden in a journal. This is something that I mean to do every year, and I seem to forget once we get into the thick of the season. I feel that by pressing flowers, I will have a bit more motivation to record my notes because I’ll have a fun little decorative prize at the end!

gathering supplies to press flowers:
To begin your journey to pressing flowers with a flower press, there are a few supplies that you will want to gather. Of course, this is not the only method for pressing flowers. You can also easily do this with a heavy book, a clothes iron, or even a microwave. However, I personally enjoy using a flower press for its aesthetic purposes, and I’m not in a hurry to have the flowers ready immediately upon pressing them.
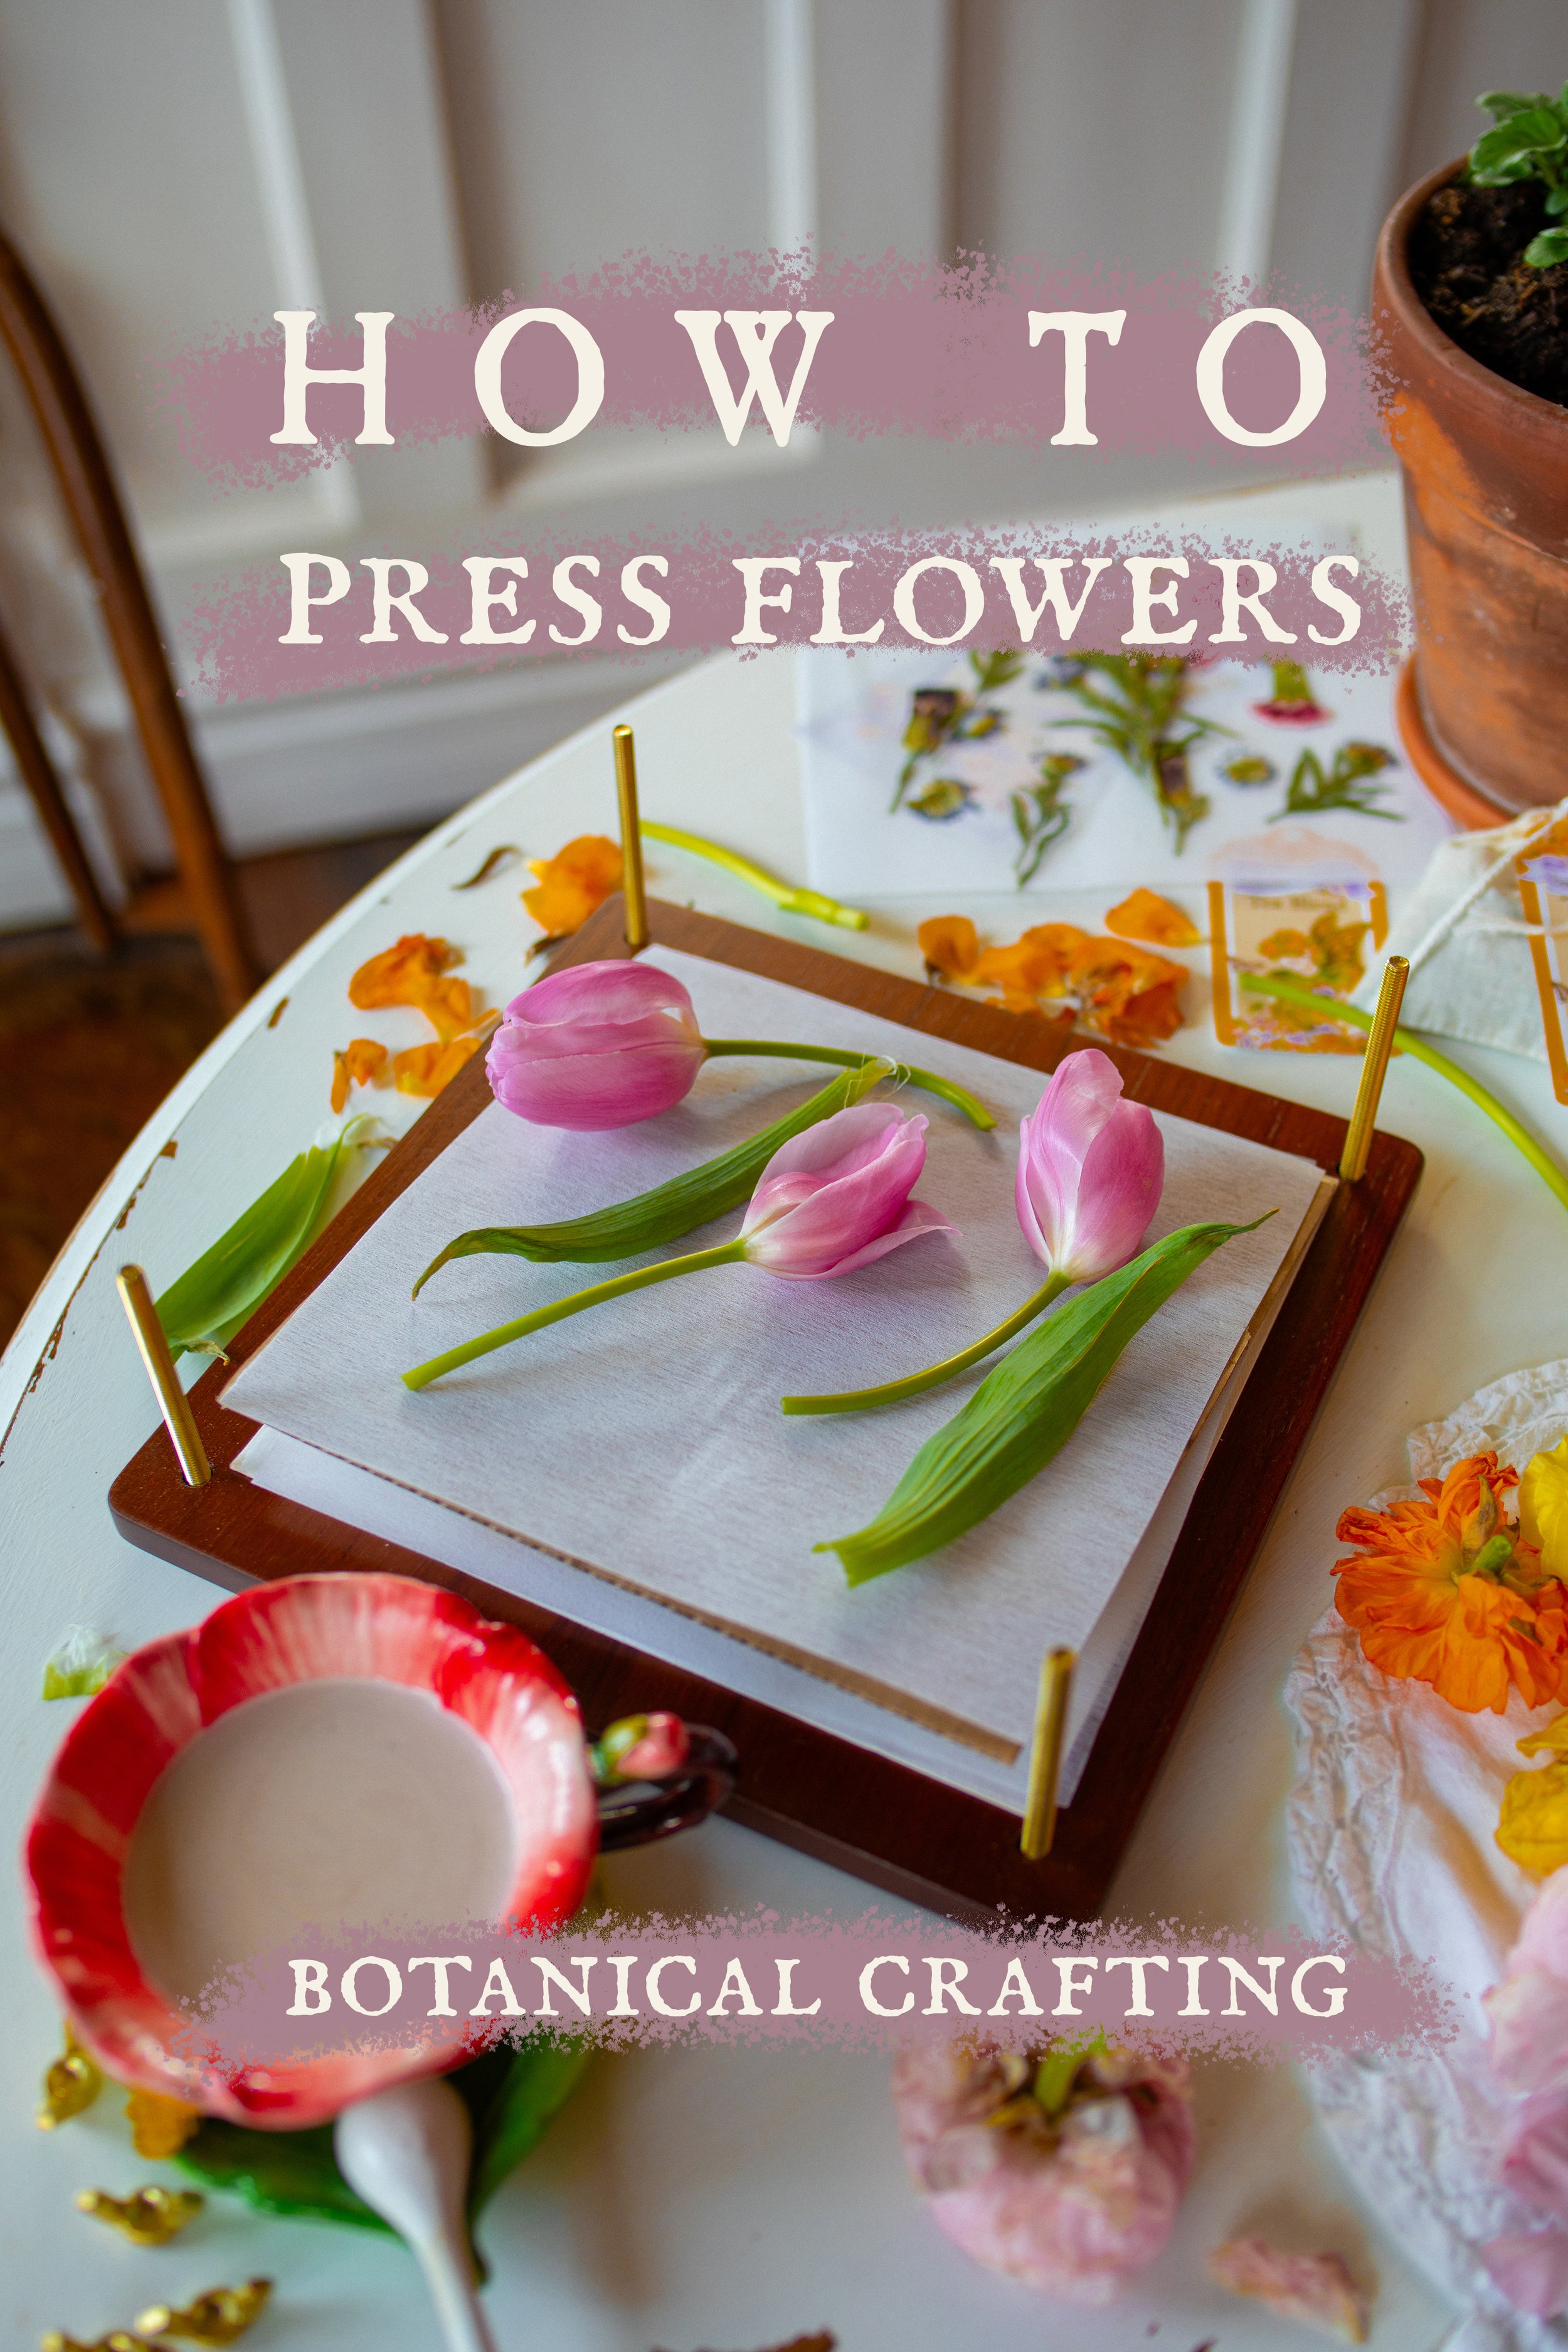
Flower Press. This is the flower press that I have, and it actually comes with all of the tools that you might need to get started pressing flowers for the first time! But there are several other lovely flower presses on the market. I love this one too!
Tweezers.
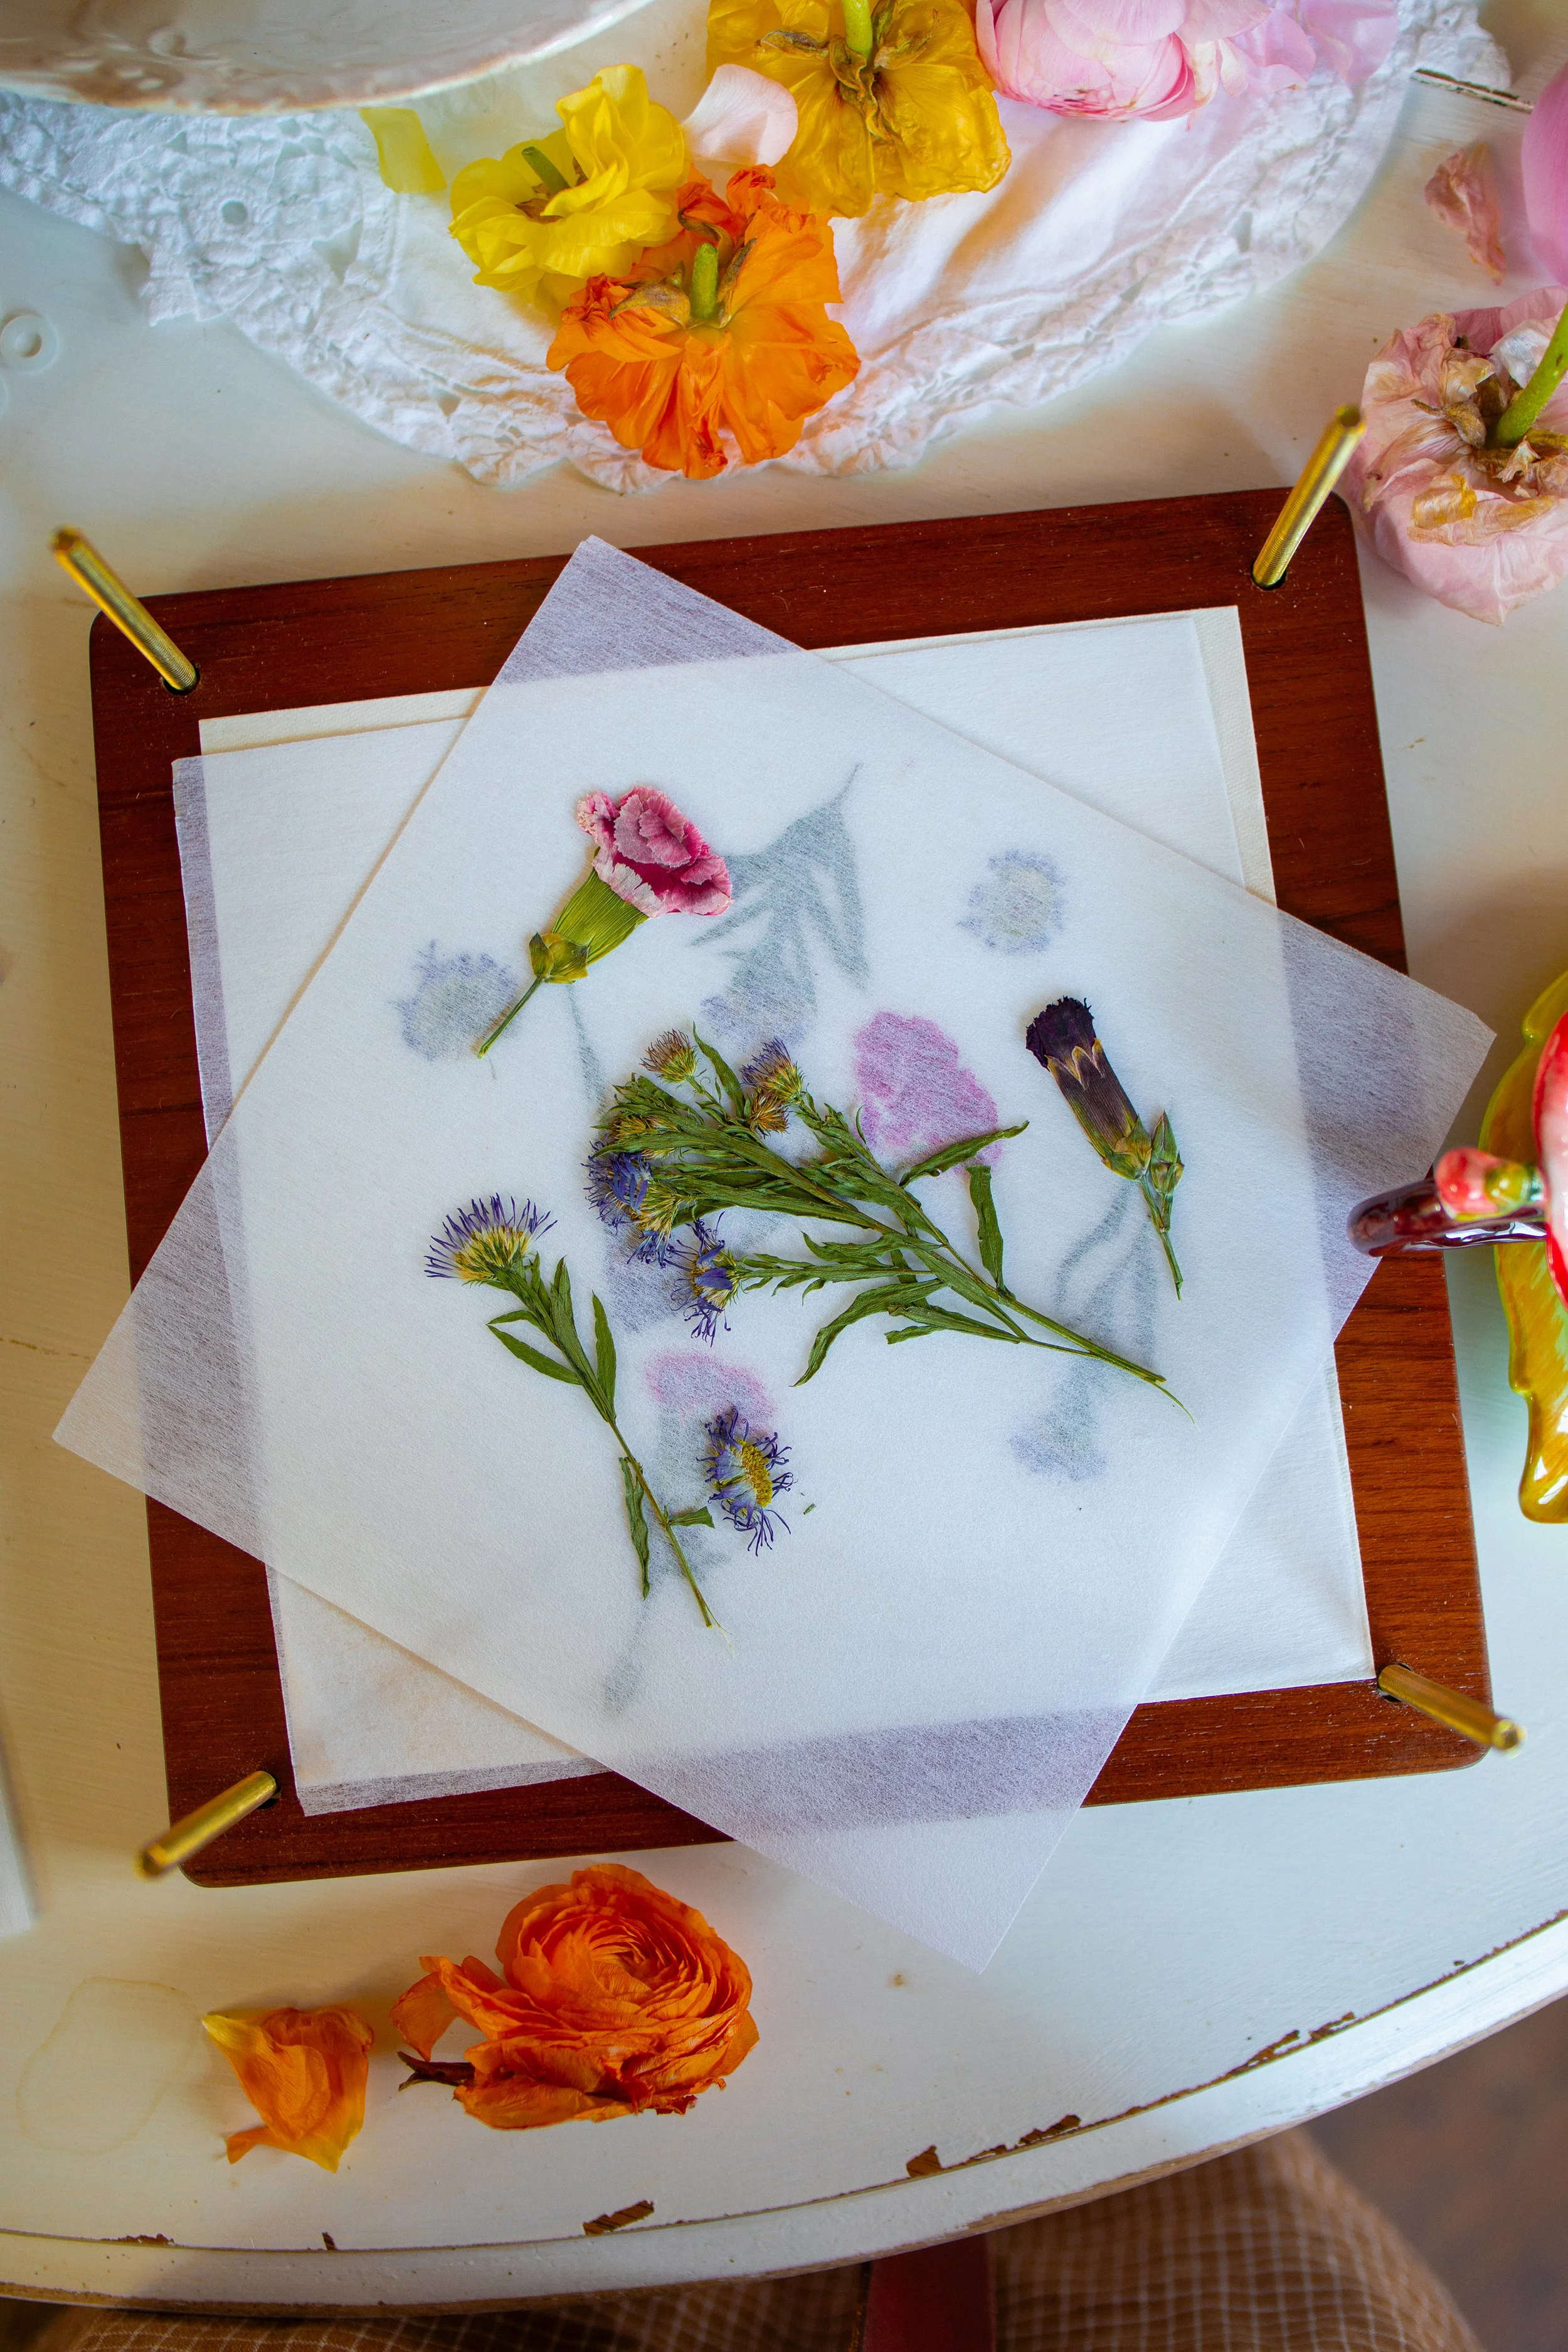
Drying Plates. This is what will be in direct contact with the flowers. You can also use wax or parchment paper, but these drying sheets work the best. They are made of an absorbent paper that helps to wick away moisture from the flowers and dry out more quickly without losing color.
Lining Paper.
Plastic Bag.
how to press flowers:
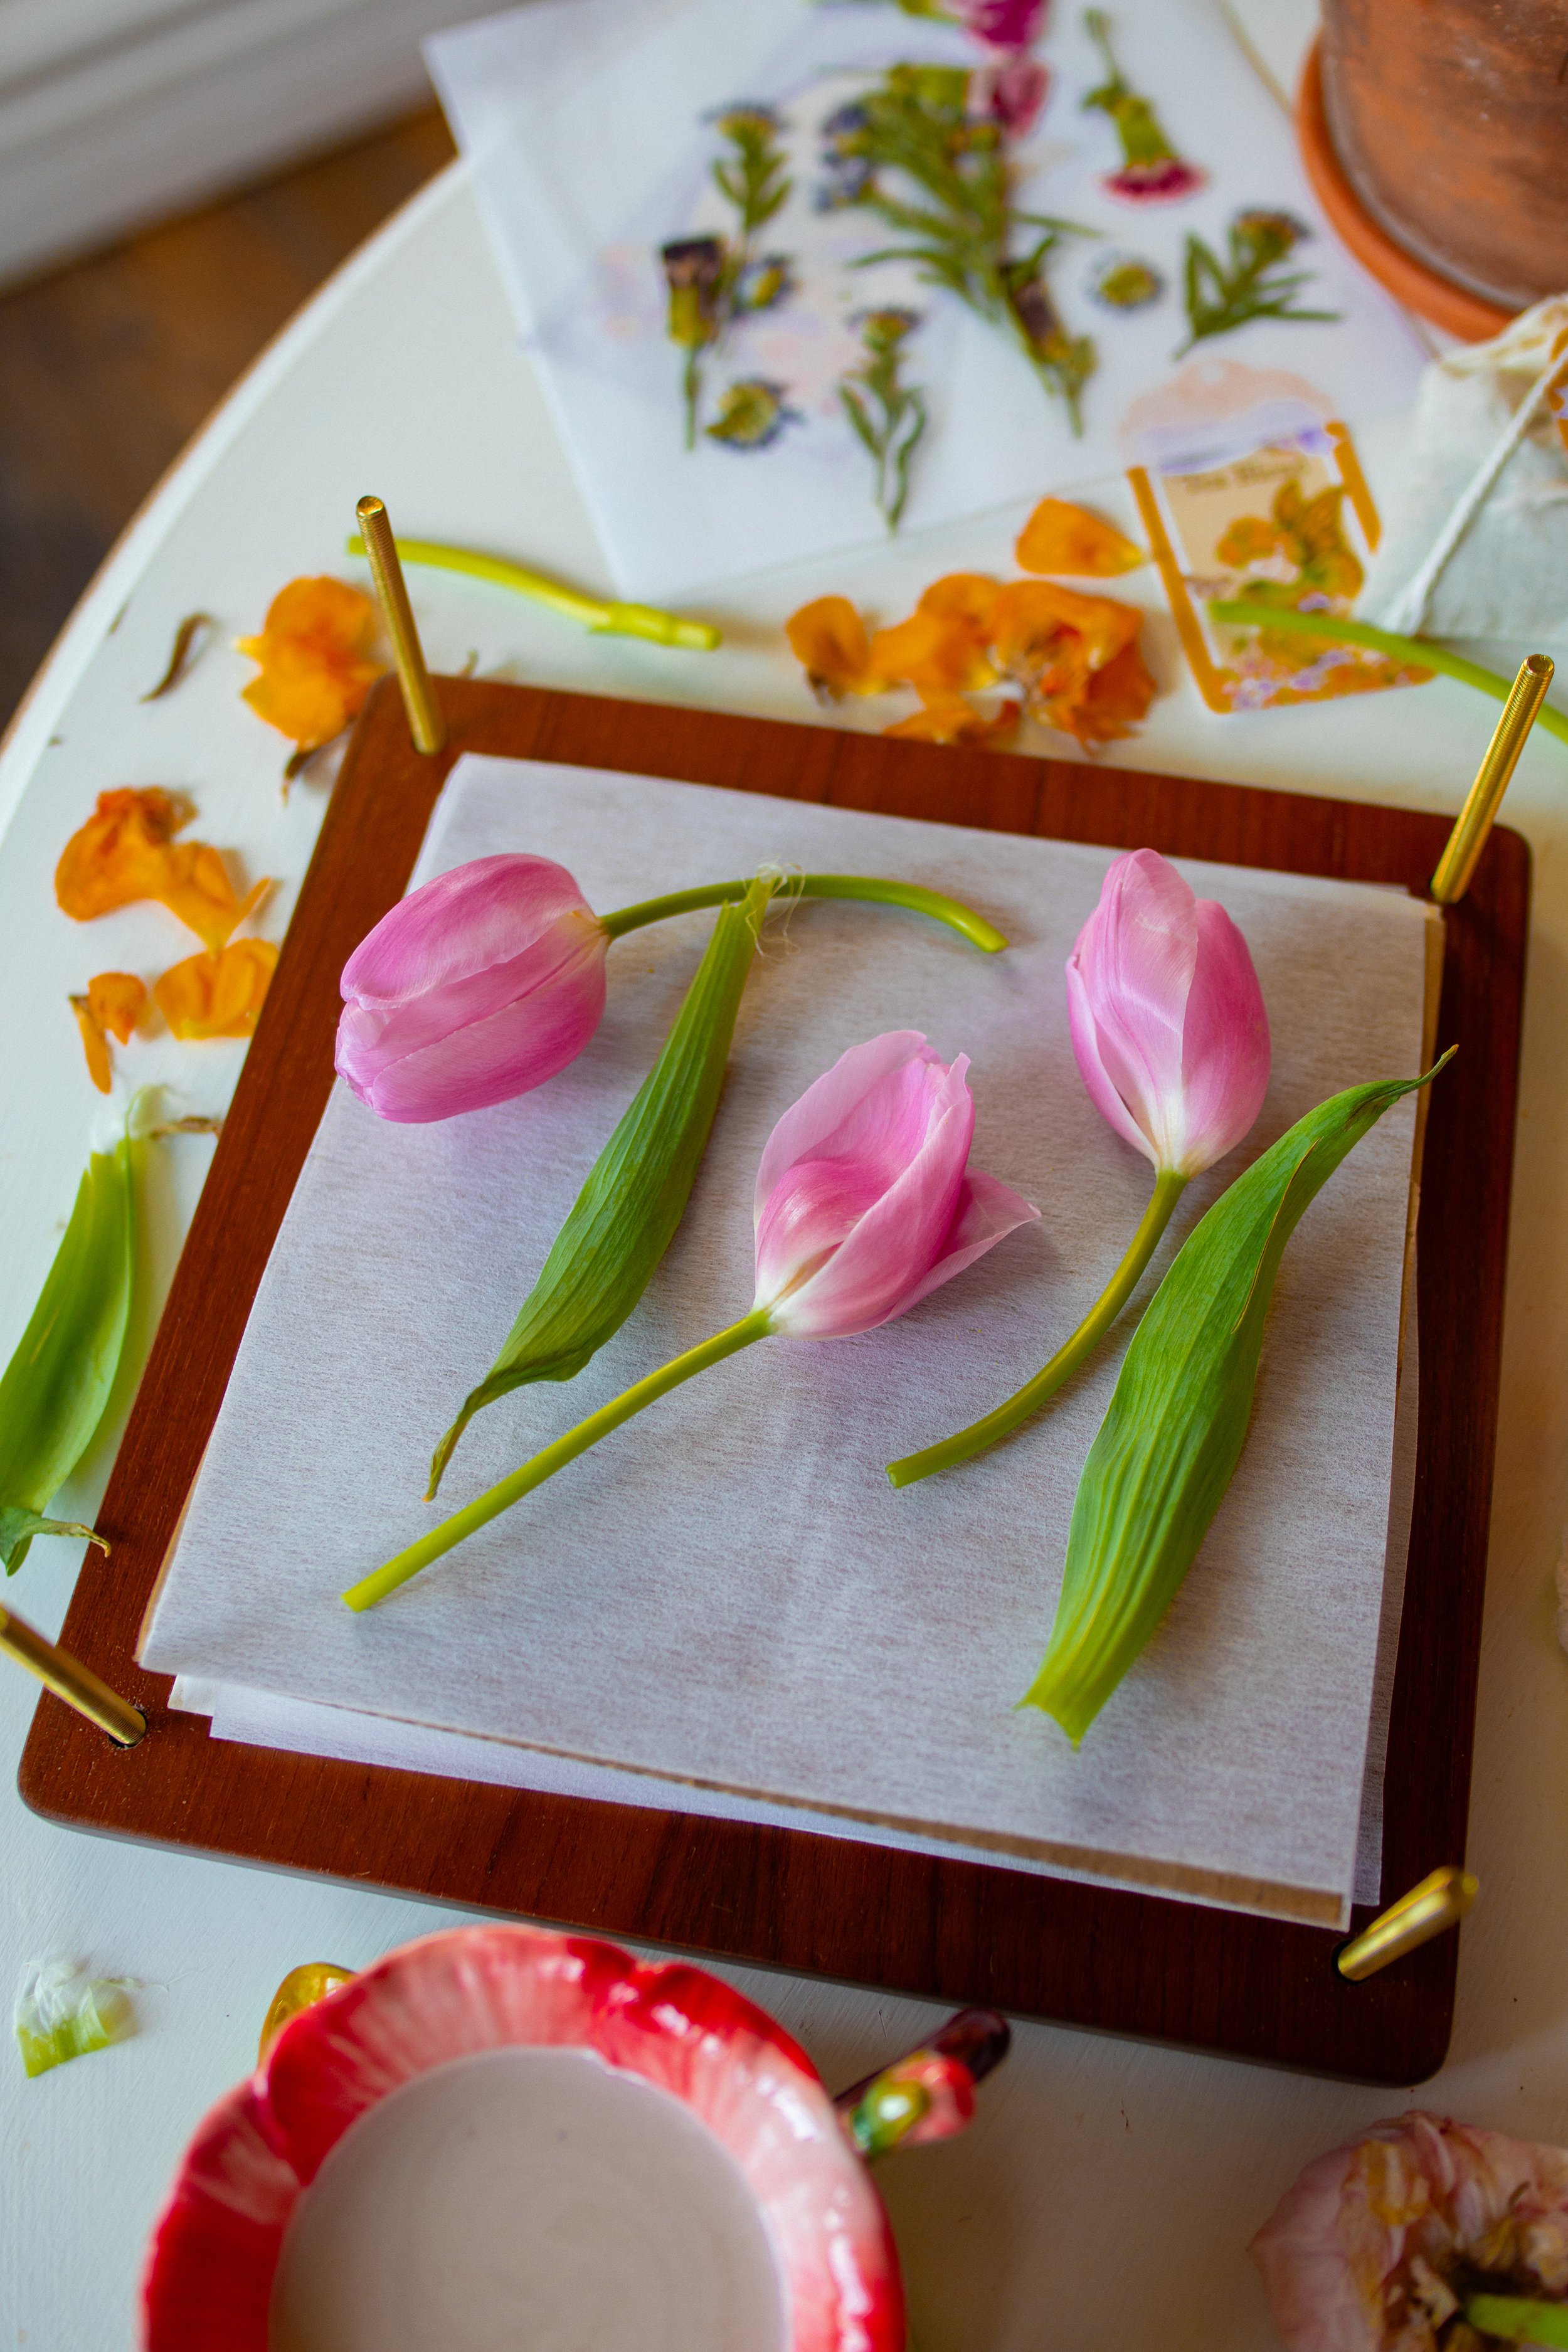
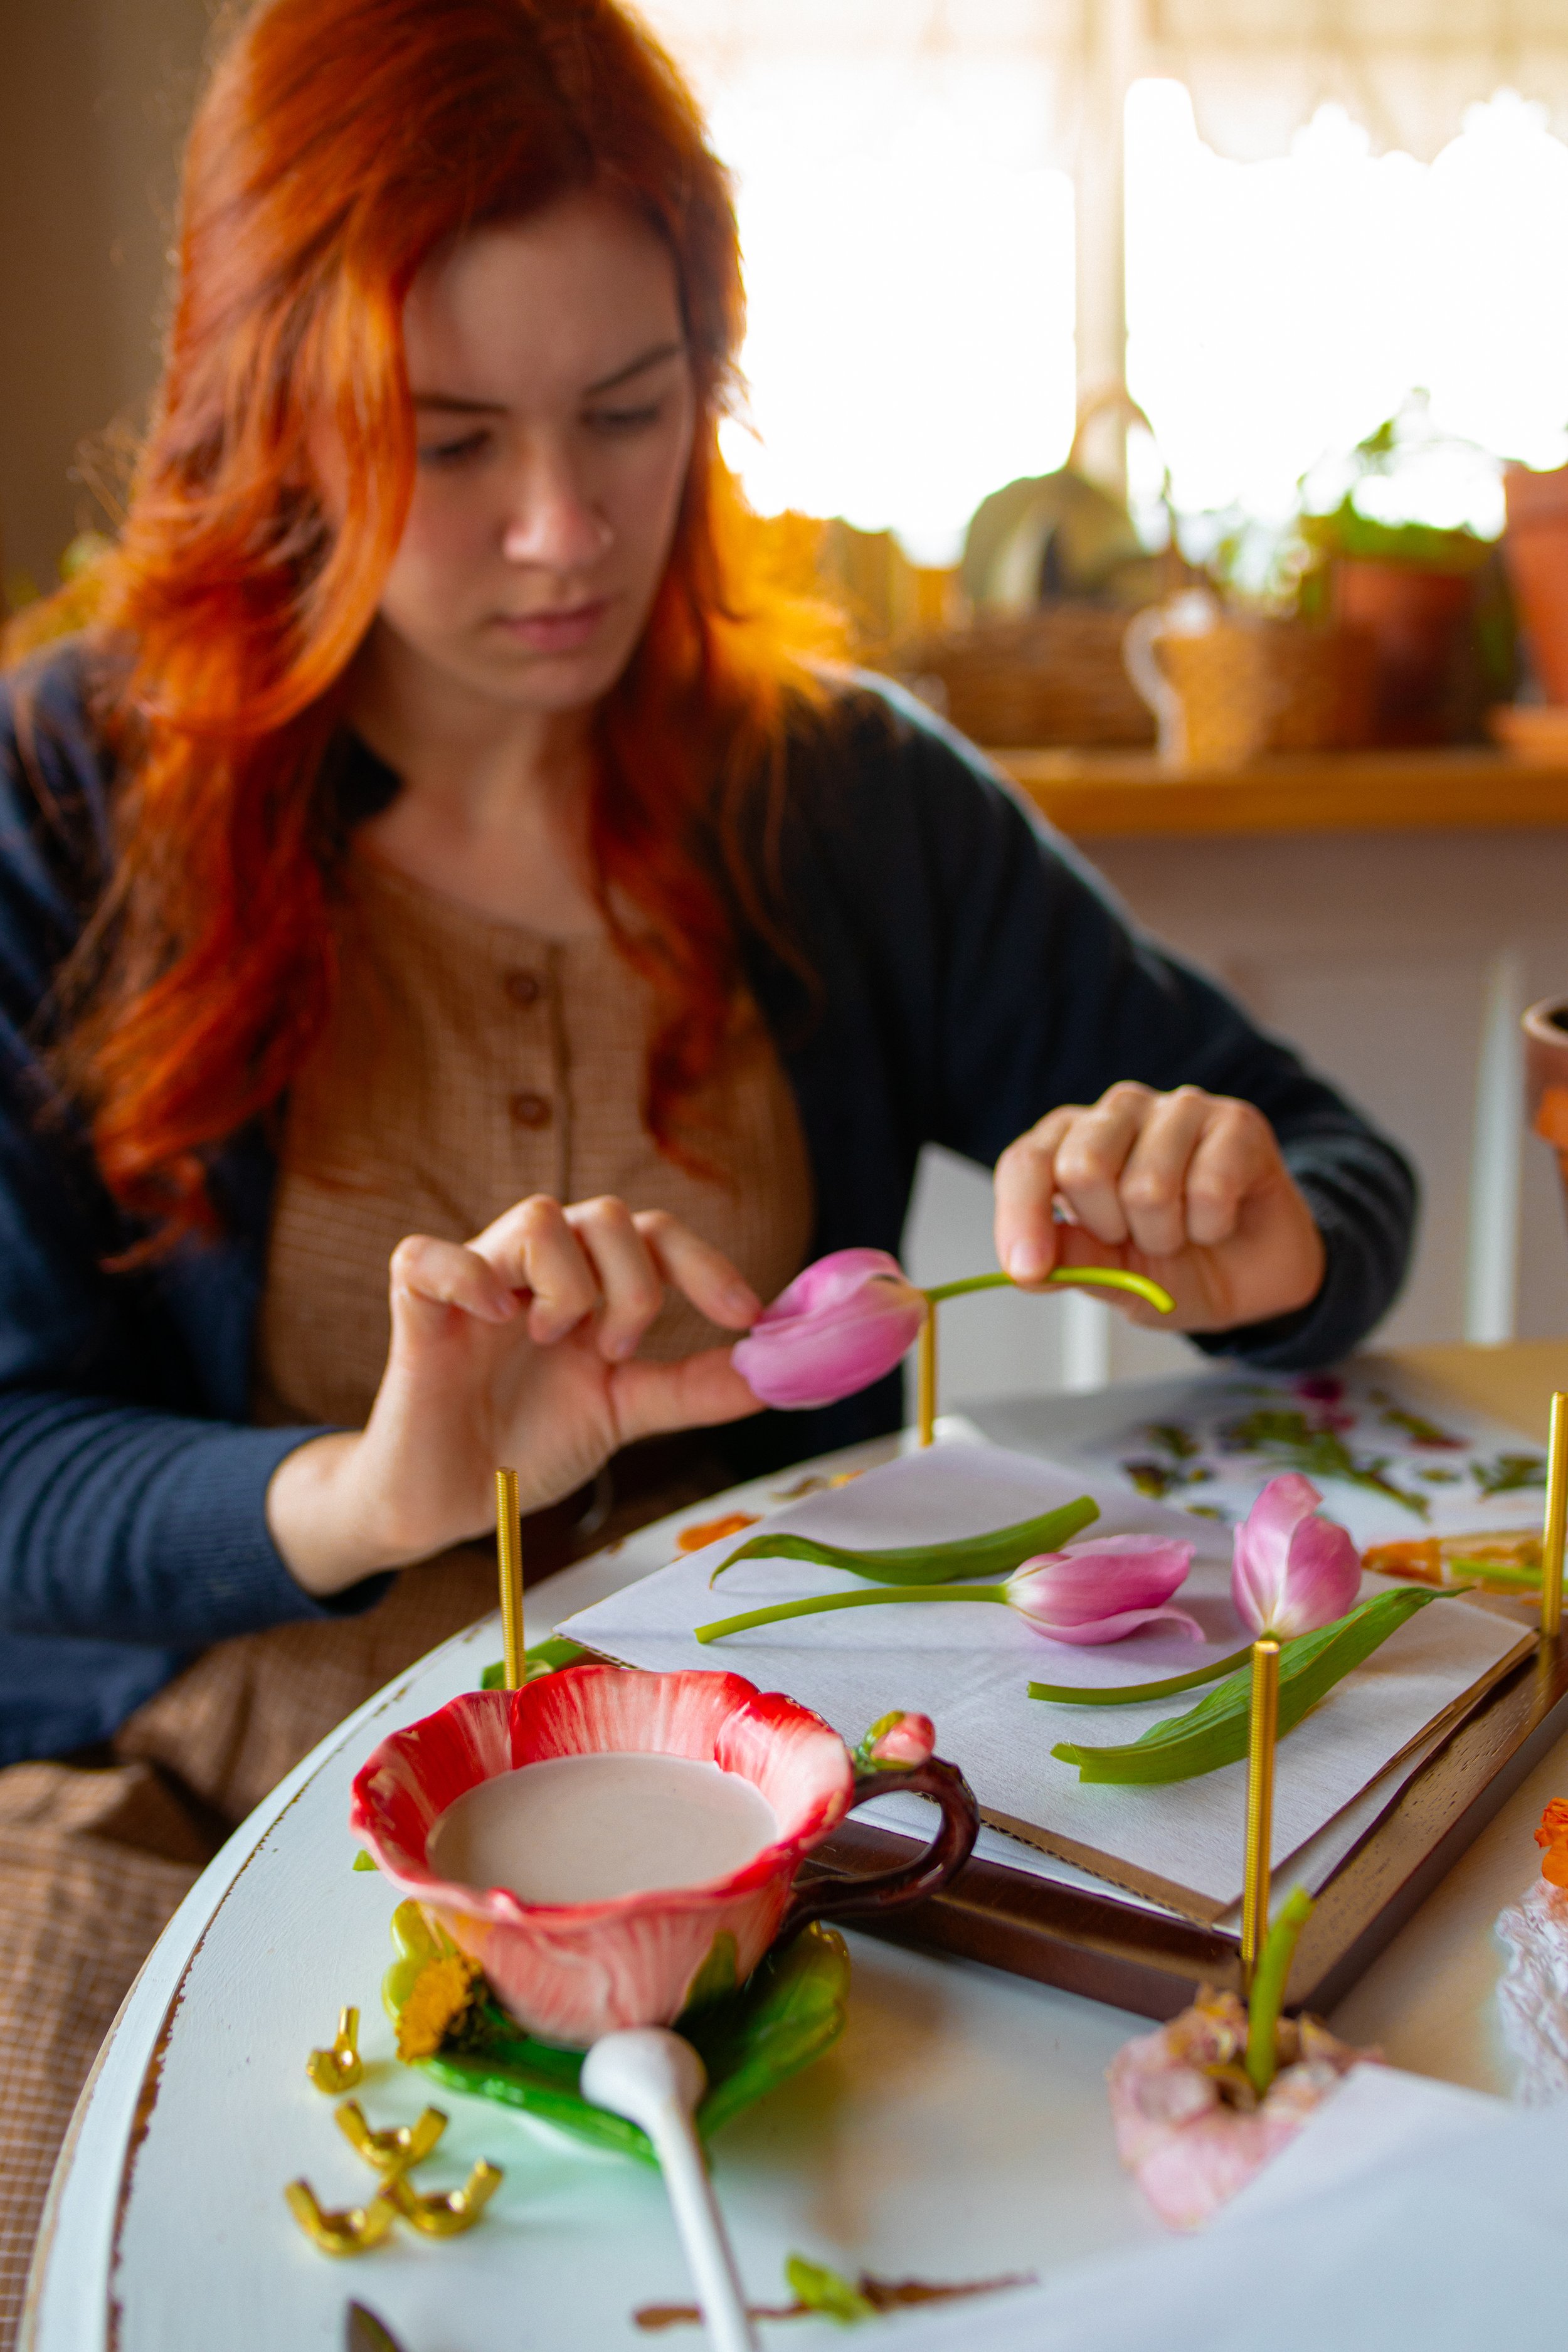
Step One: Cut down your flowers so that they will fit in your press. You may also want to cut them to the shape that you prefer for your final look. The best types of flowers for pressing are those with a single layer of petals like a cosmo, daisy, or snapdragon. Flowers with thick layers like a rose, carnation, or peony are more difficult to press but not impossible! Use freshly cut flowers to press so that they are their peak color and condition.
Step Two: Place down a piece of cardboard sheeting followed by a drying plate. You may also lay down a piece of lining paper, such as tissue or wax paper over the drying plate.
Step Three: Then, arrange your flowers on top of the drying plate however you are hoping they will remain. The tweezers and garden shears or scissors come in handy here. You can manipulate the flower to lay in any position that you like, though this can be a bit difficult to master. For a thicker flower, you may want to dissect it before pressing, such as cutting it in half to display the stamen and pistols or removing them altogether.
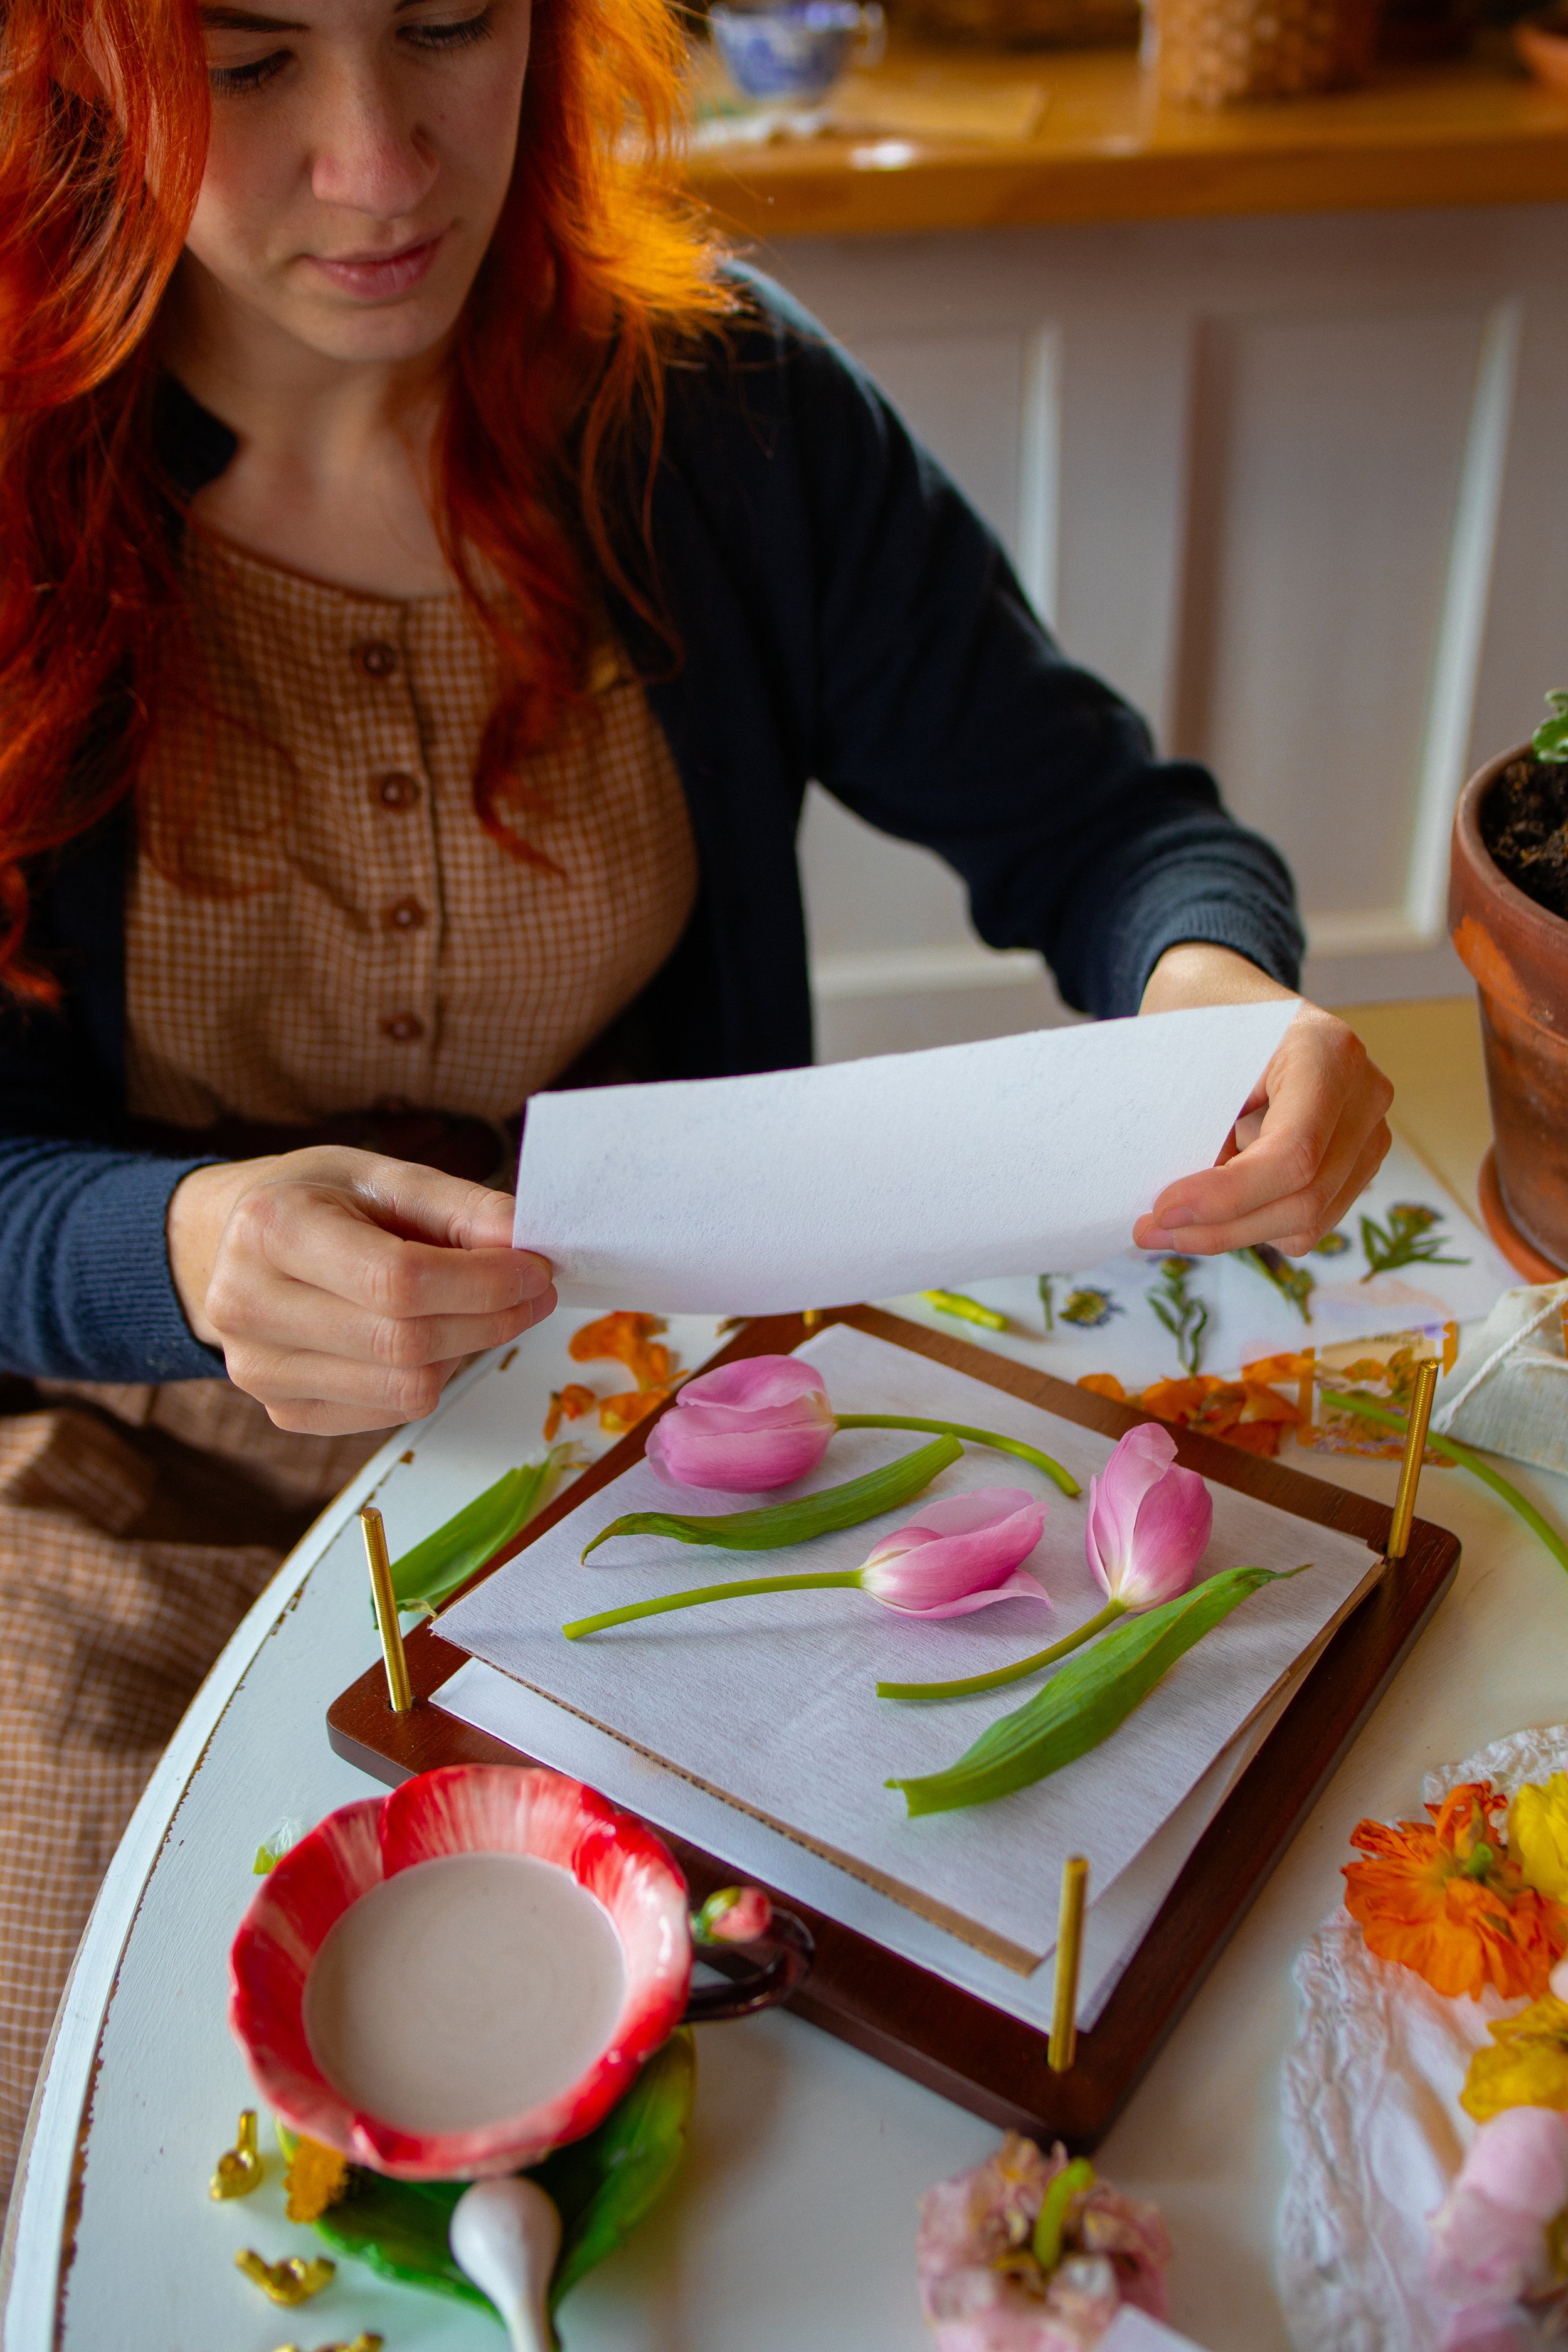
Step Four: Lay a second piece of lining paper and/or drying plate on top of the flowers. Do not press with your hands.
Step Five: Place a final layer cardboard sheeting on top of the drying plate. If you are wanting to dry several layers of flowers, you will simply continue to add these pieces as more layers until you have run out of supplies, depending on the height of your flower press.
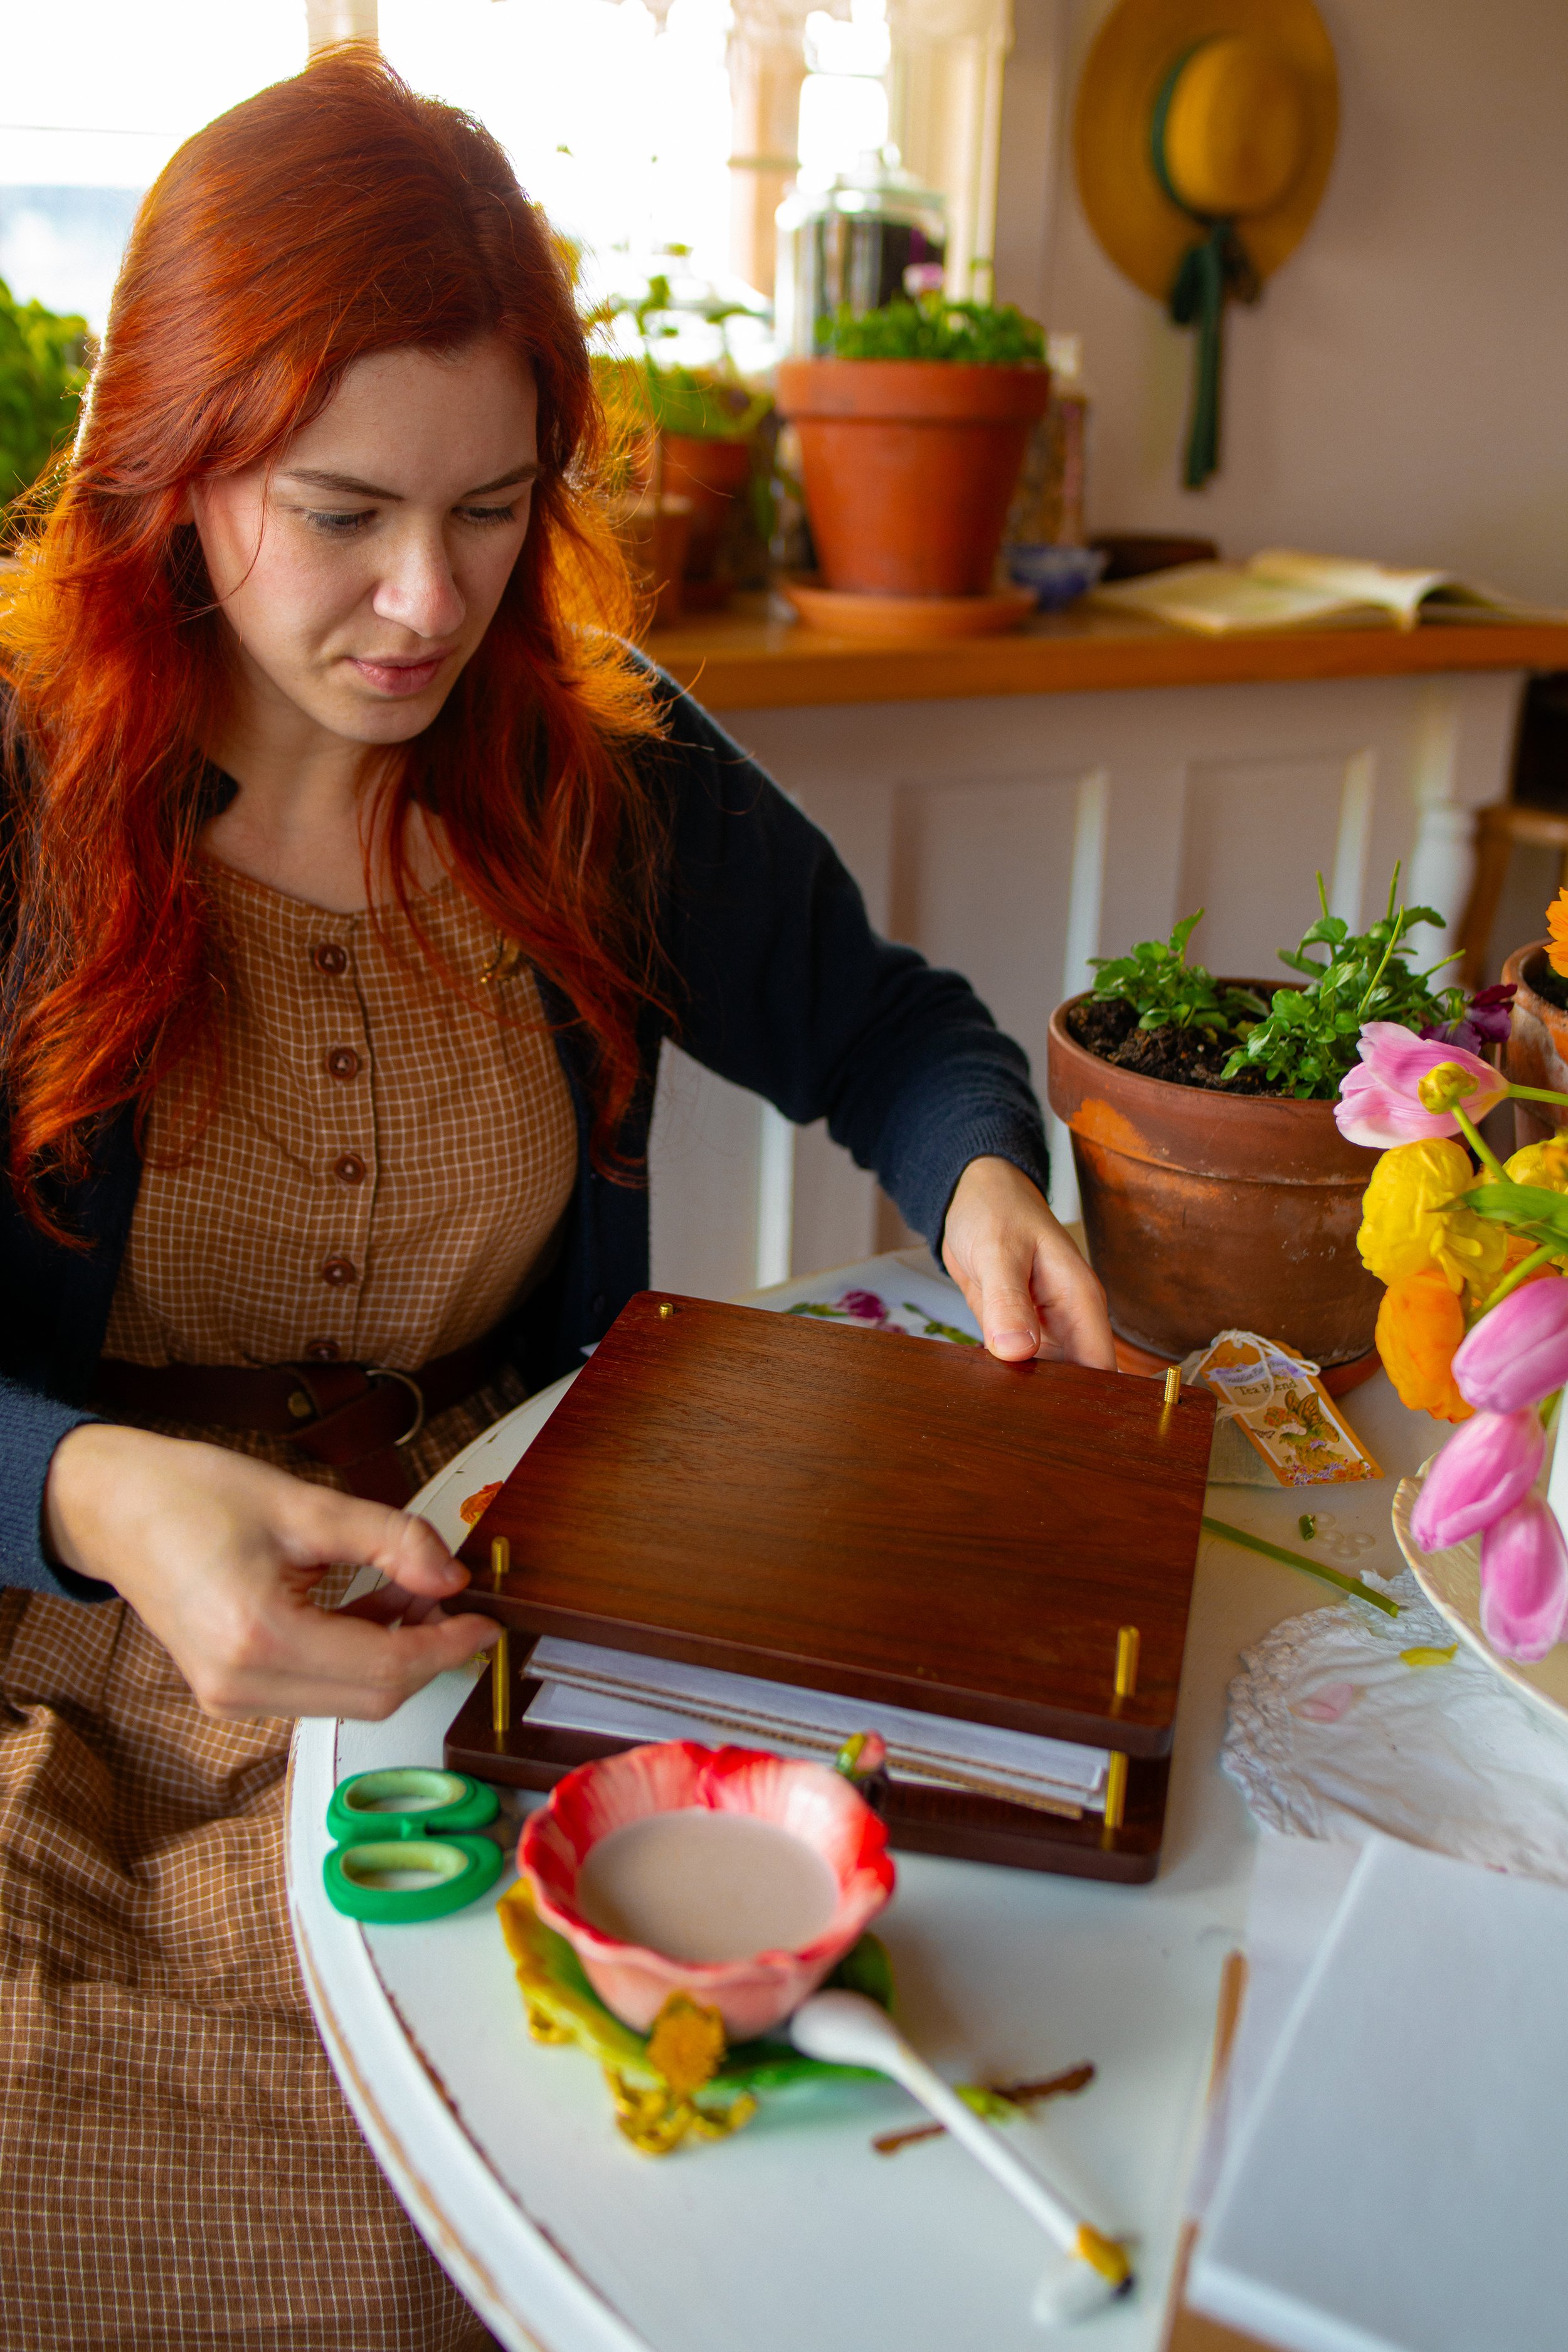
Step Five: When you are satisfied with your flowers, finish with a layer of cardboard sheeting. Then, place the top wooden piece of the press on top of everything. Begin to screw on the washers while pressing firmly on the top of the press. You will want to watch around the sides to make sure that the press is level.
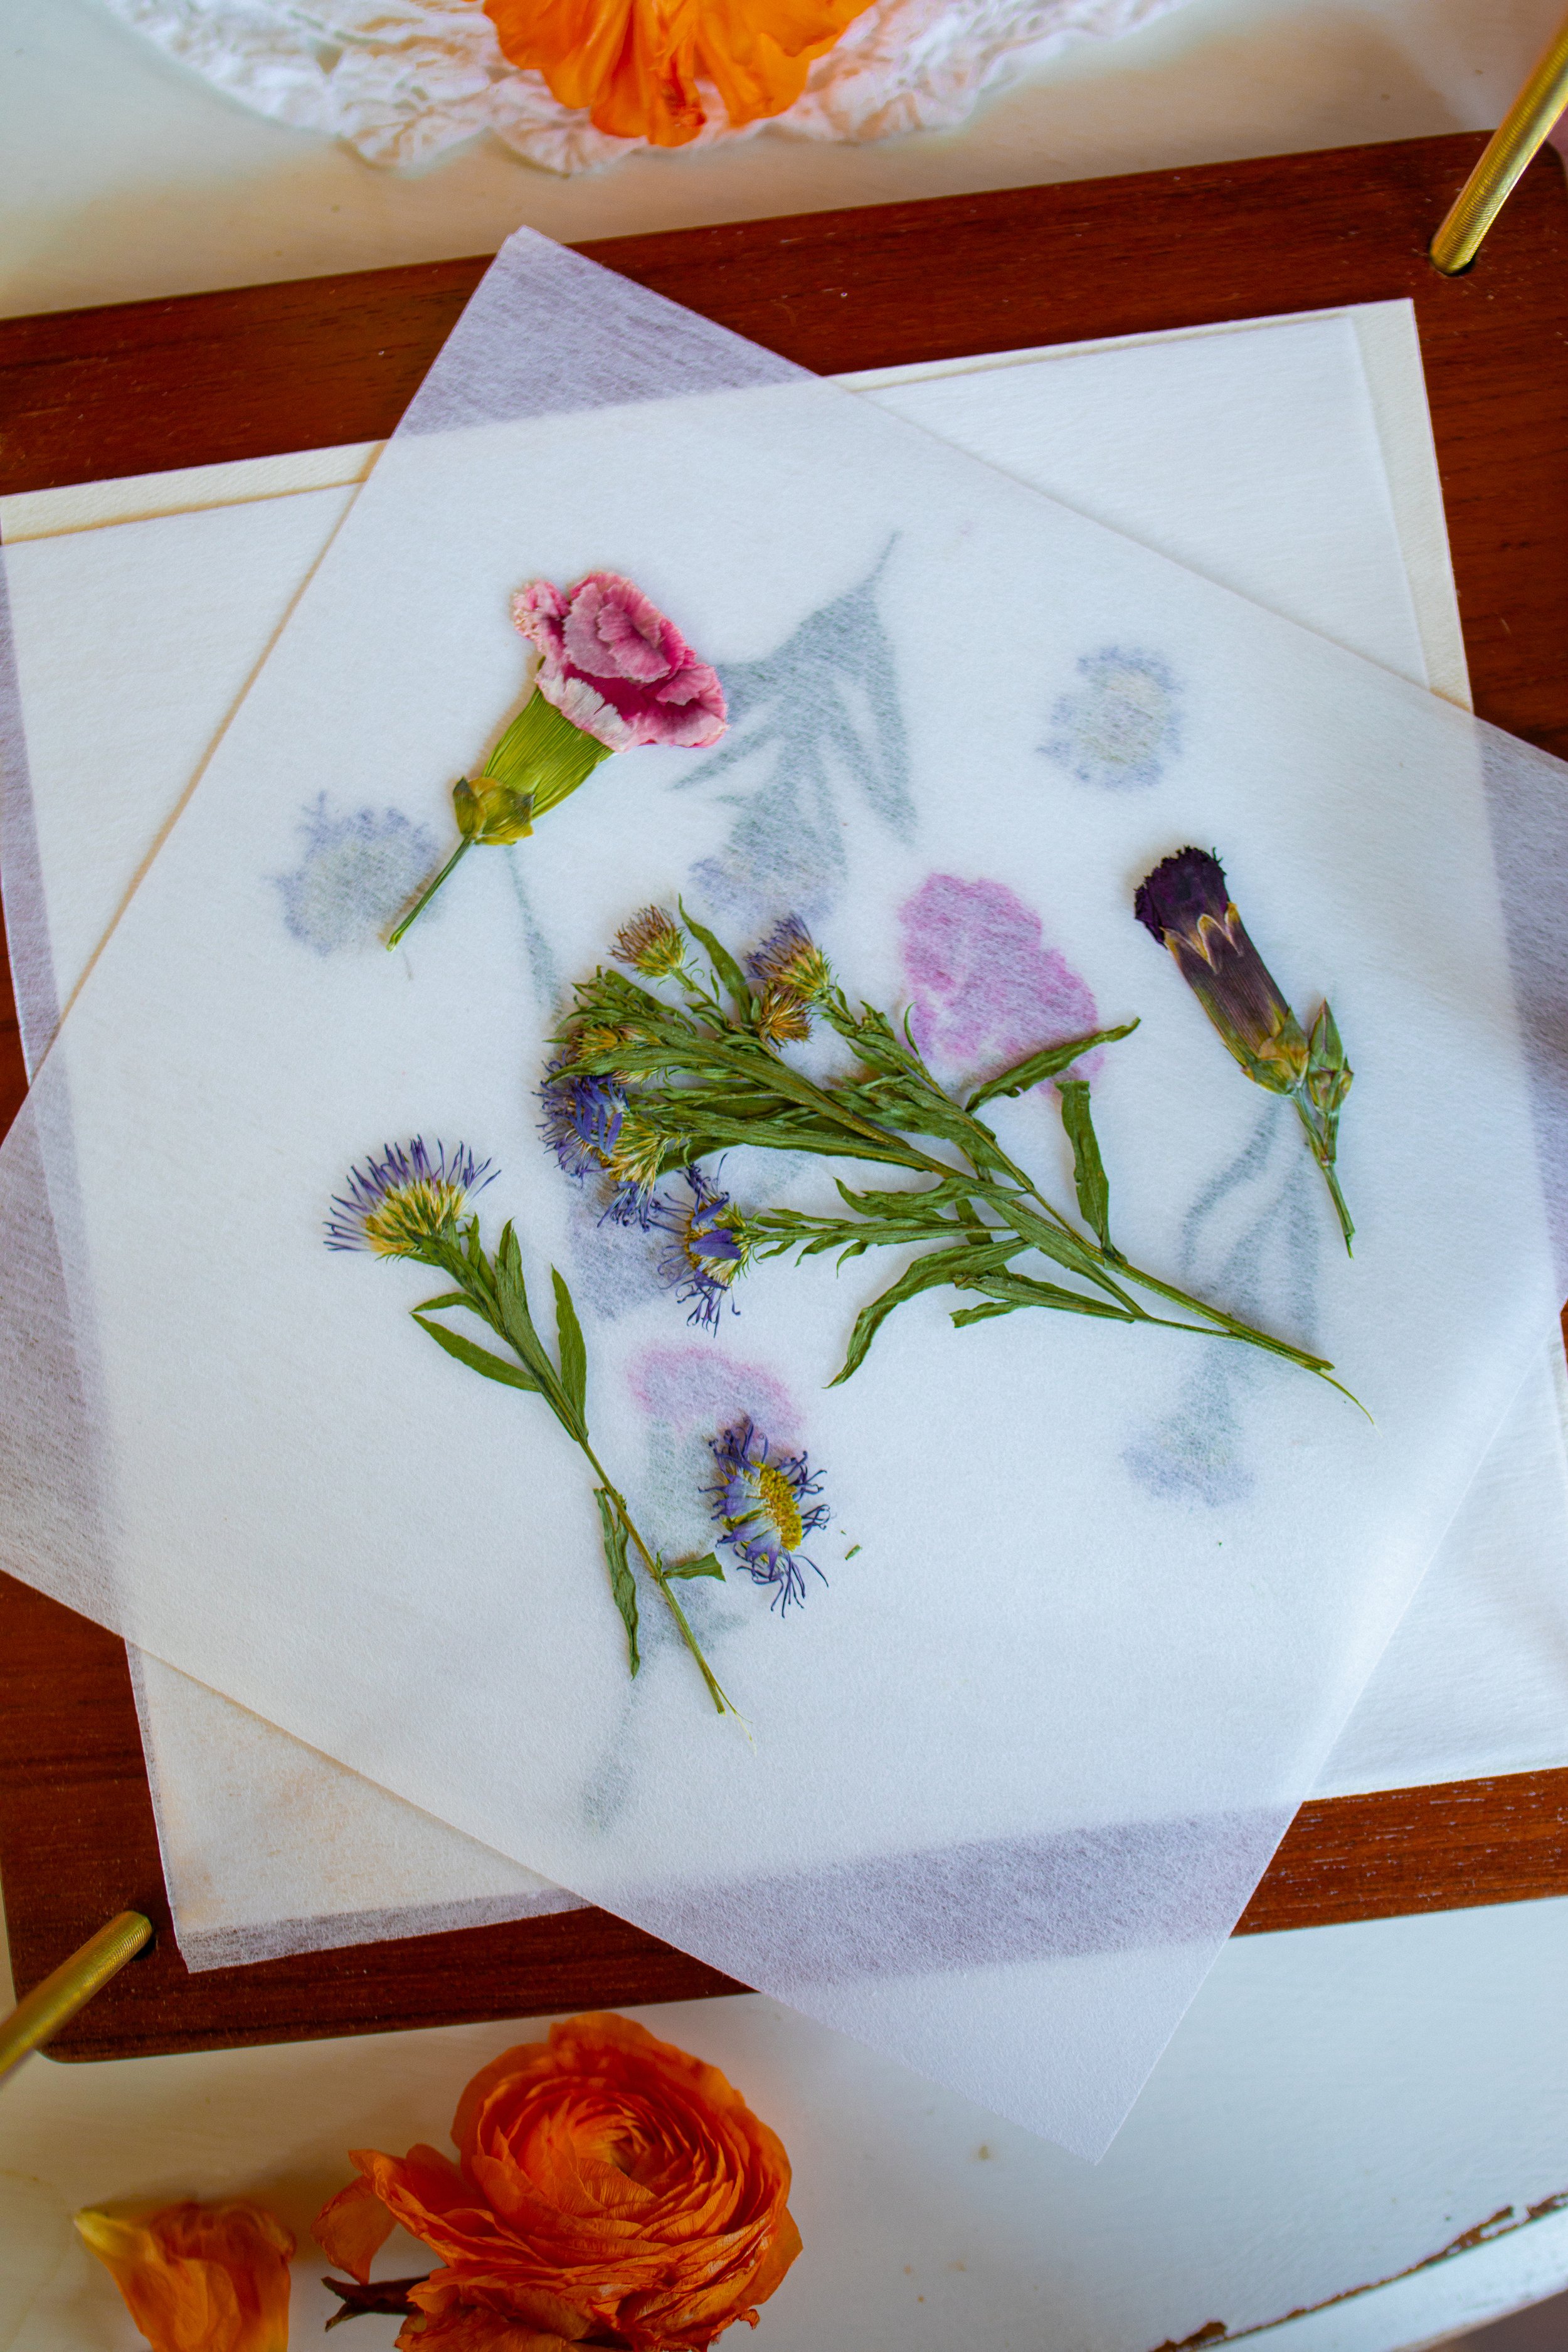
Step Six: Place your press in a spot that is out of direct sunlight and has good ventilation. If it placed somewhere humid, the flowers may begin to mold. Though, I have read it is good to store the press in a plastic bag! This can help to preserve the color and shape of the flowers. I personally do not do this. Continue to check your flowers every now and then and close the press more tightly as they shrink and dehydrate. It usually takes about 2 to 3 weeks for flowers to fully dry.
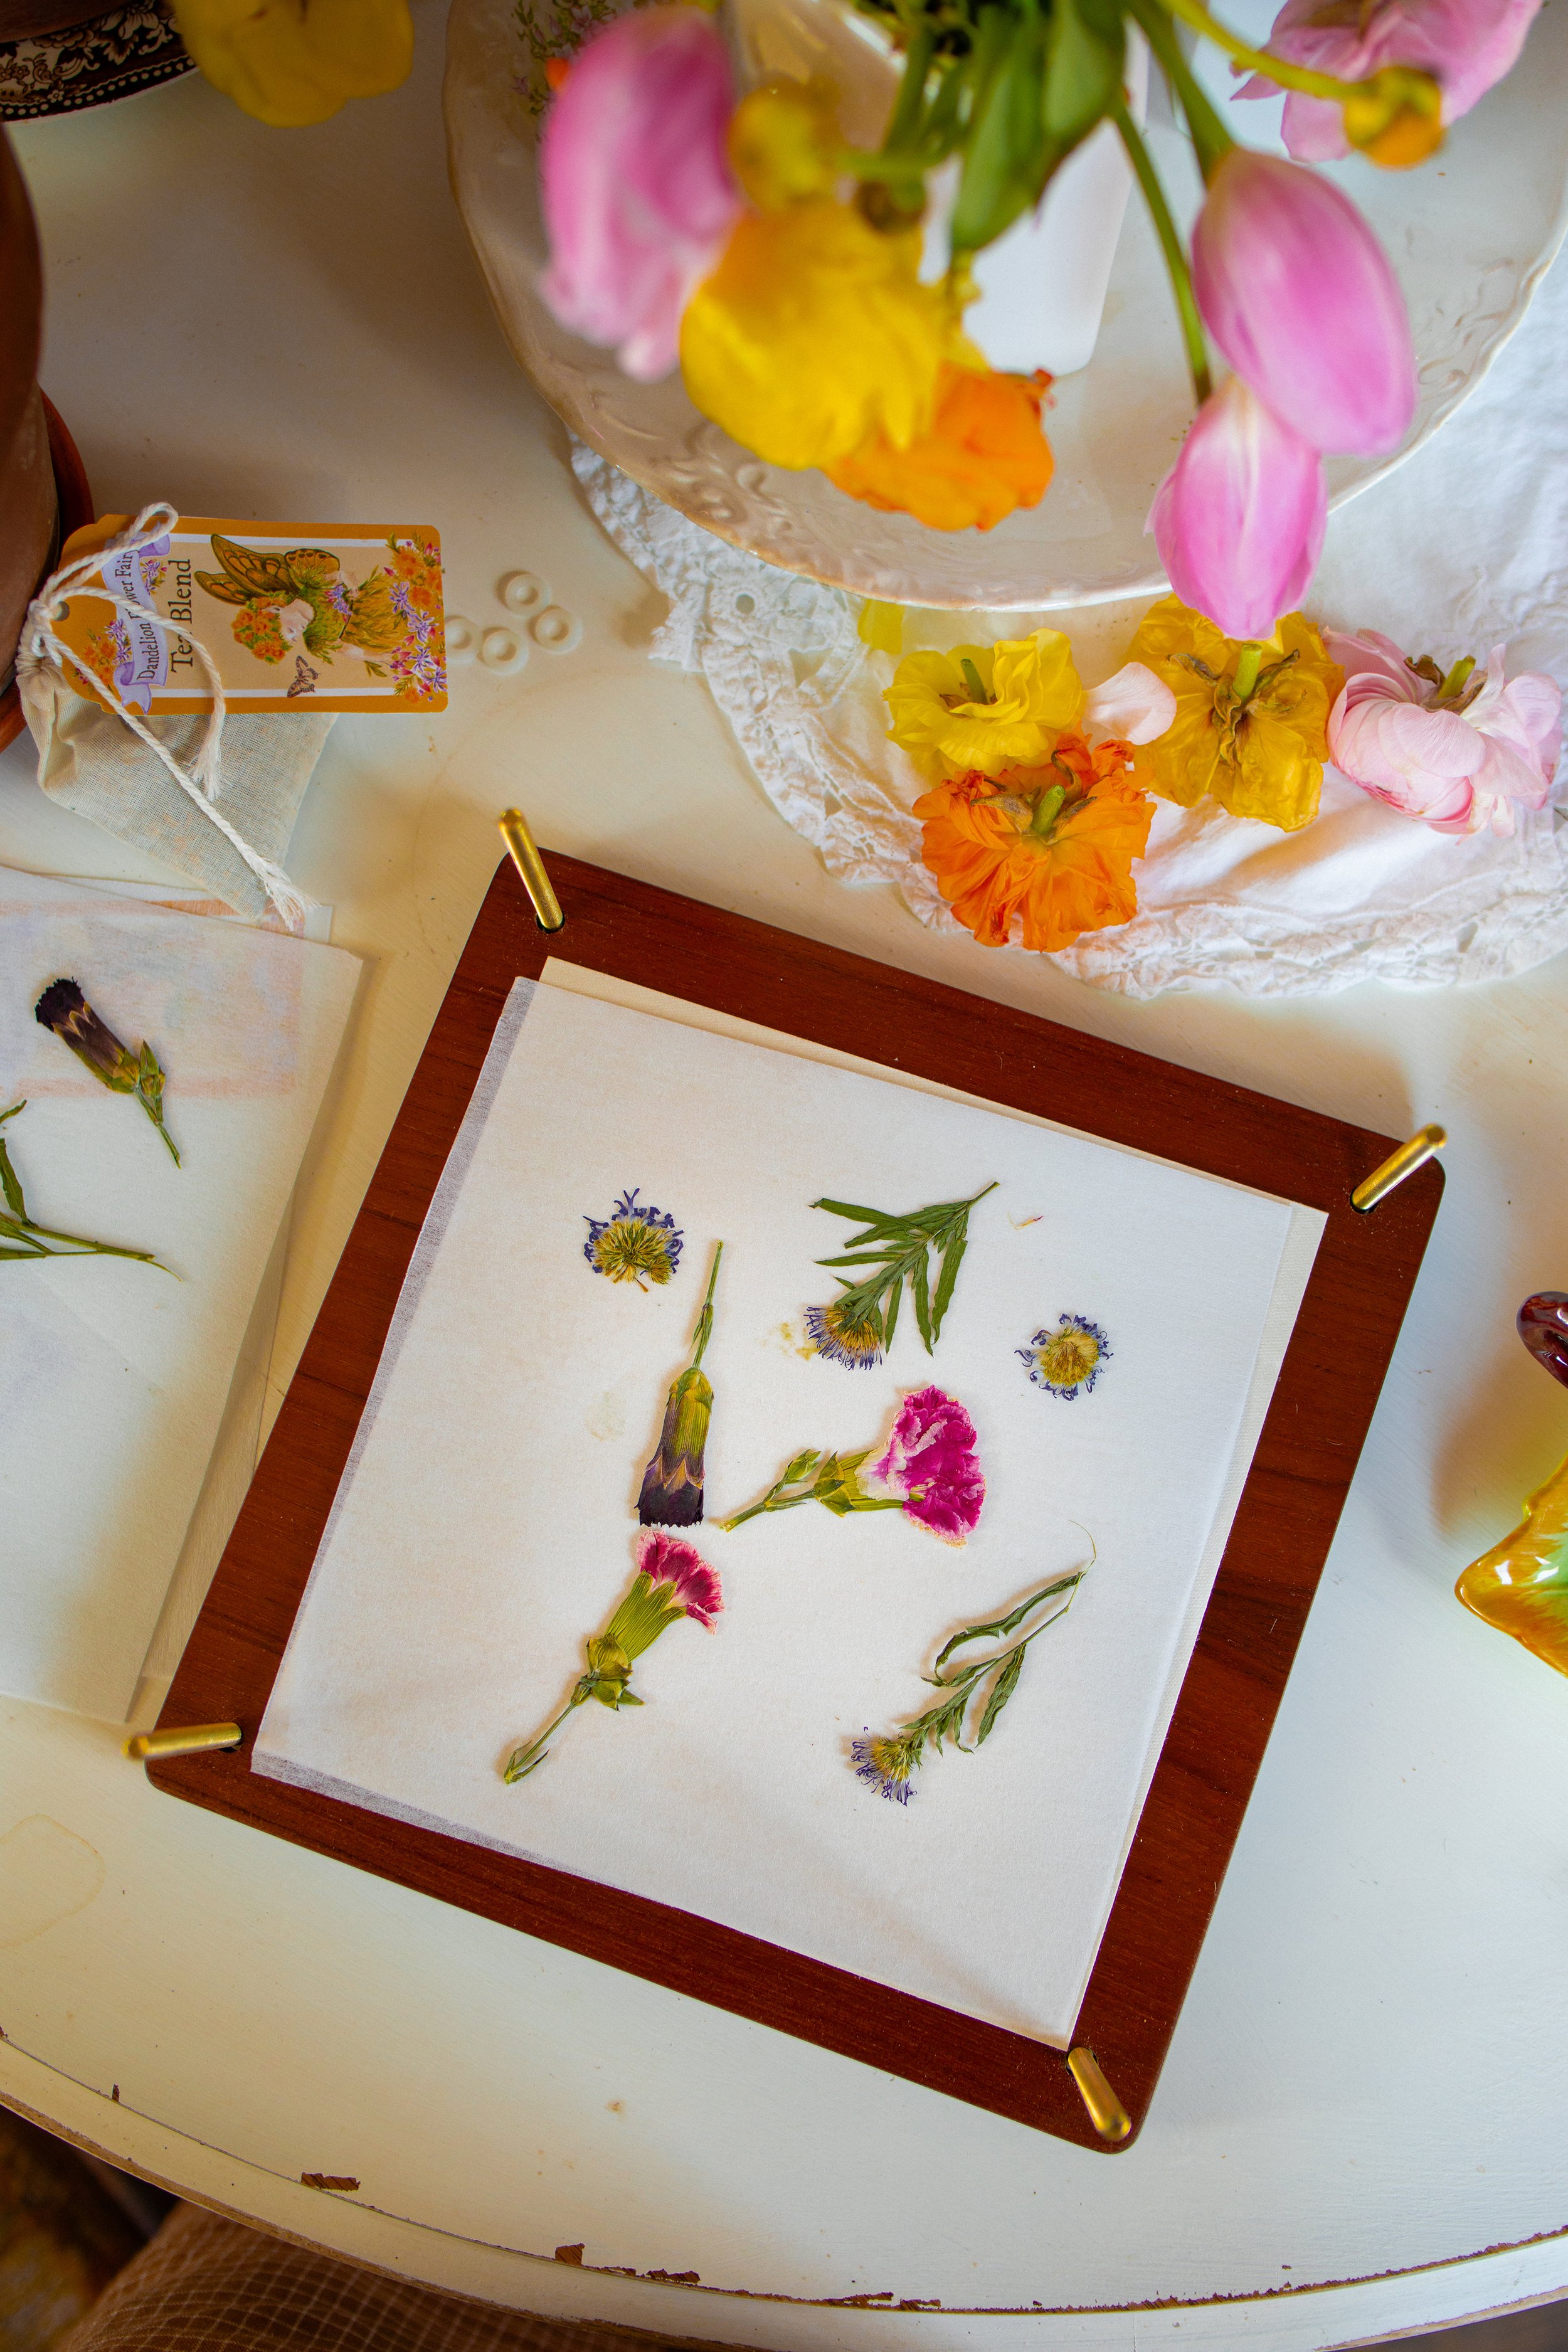
how to use pressed flowers in your home:
There are so many wonderful ways that you can incorporate your beautiful dried flowers into your home! From crafts to decor to even unique art pieces, the options and creative ideas are endless. You will love to how easy it is to press flowers and create something beautiful and unique to you. Here are some of my favorite ideas for ways to use your dried flowers:
Wreaths
Framed Pressed Flower Art
Valentine’s Day Cards or other cards
Potpourri
Candles
Handmade Soaps
Coasters
Jewelry
final thoughts:
It was so fun to share with you how to press flowers so they last forever. Isn’t it wonderful to preserve memories and love in such a unique way? I believe that this lost art form needs a resurgence! I hope that this inspired you to giving pressing flowers a try. With these expert flower pressing tips, you are sure to become a pro in little time. Then you can turn this simple craft into a beautiful art piece!
xoxo Kayla