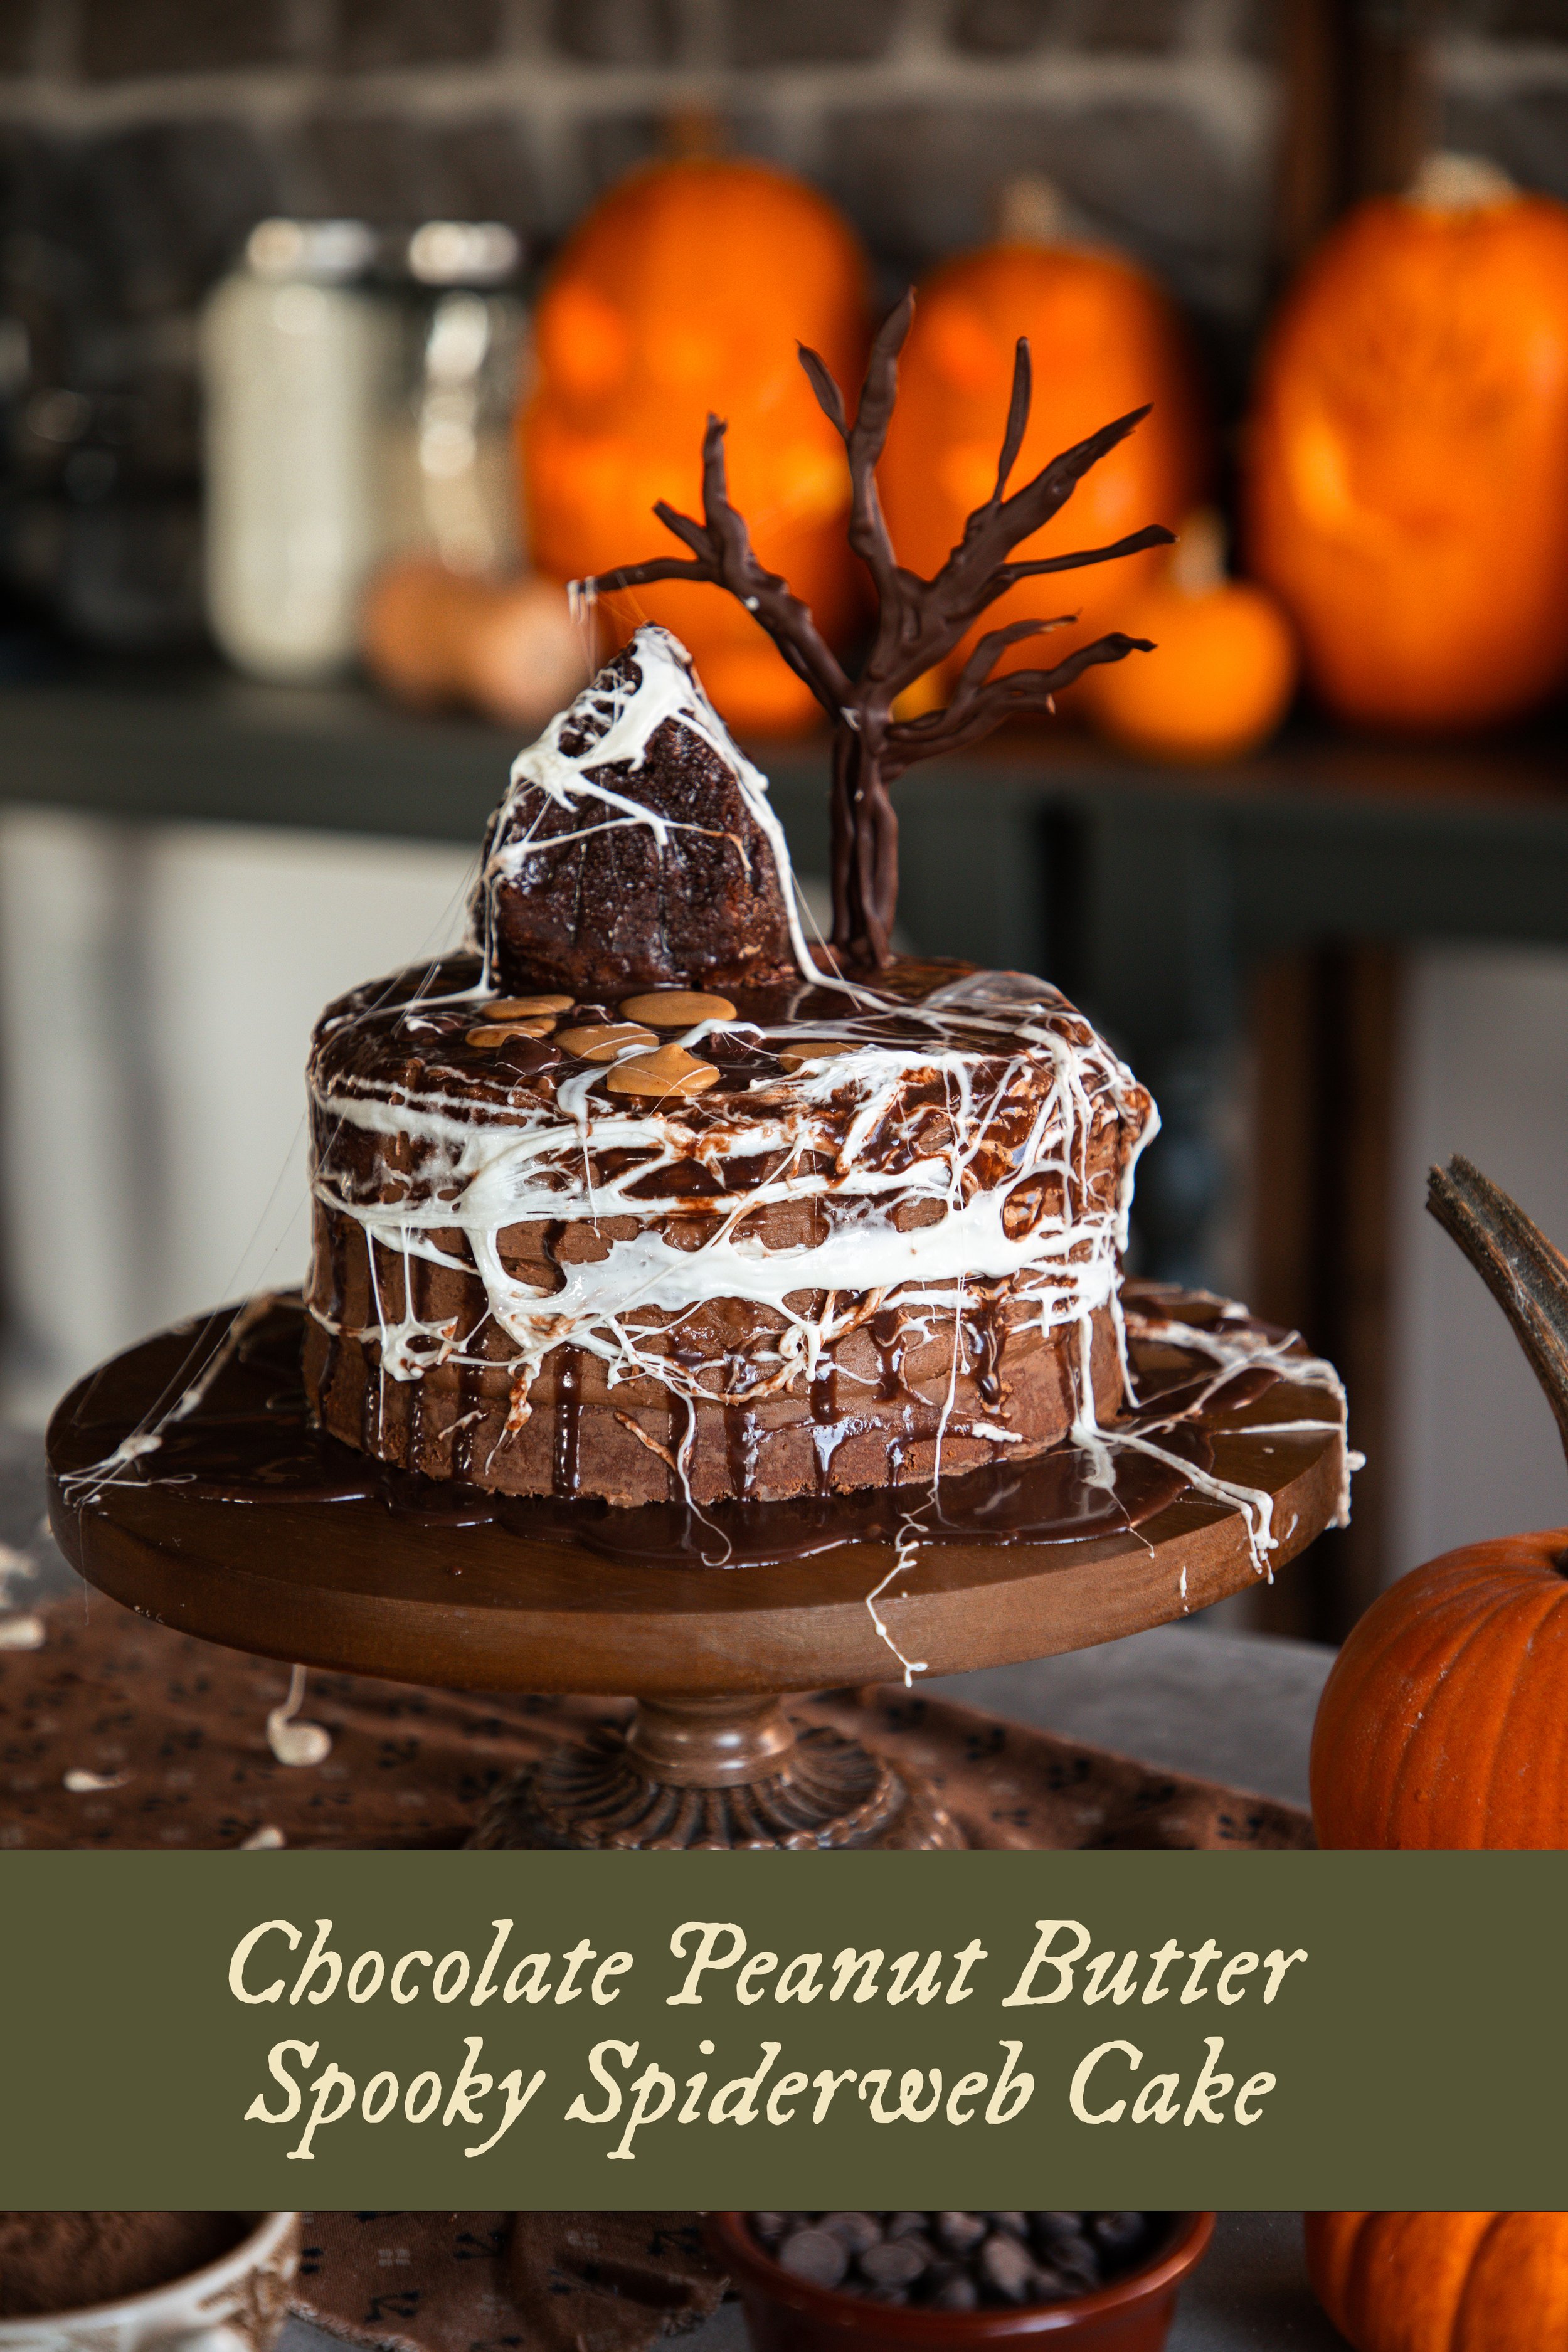
Chocolate Peanut Butter Spooky Spiderweb Cake
Happy Halloween! Part of me cannot believe we made it to this time of the year already. That means tomorrow will be Christmas, I am fairly certain. Oof! It is going by fast.
Jill and I had a blast the other day making a very spooky cake to share with our family, and the kids were so excited when we brought it out to the table. We are still not the world’s best cake decorators… but we try! Ha ha!
We spent the evening eating chocolate peanut butter cake and carving pumpkins. The results of our pumpkin carving skills were hilarious. I made a Jack Skellington style pumpkin, Tad had very unique face designs all of his own creation including a pumpkin with arms and legs, my dad’s pumpkin looked like something out of a 1910s horror film, and Kyle spent an exceedingly long amount of time carving out a face that left a layer of thin pumpkin flesh in the background. All of his hard work was put to waste, though, as the chickens happily ate the entire face off the next day on our porch. We were crying we were laughing so hard.


the details:
This cake is made with layers of chocolate sour cream cake that is so soft and delicious, and then topped with a chocolate peanut butter cream cheese frosting. It tastes like a peanut butter cup, and it is so yummy!
We made the little house using this “Cozy Village” Cake Pan, which is by Nordic Ware. It is meant to be a Christmas pan, but we thought it would be fun to use it as a spooky house on top of our layered cake!
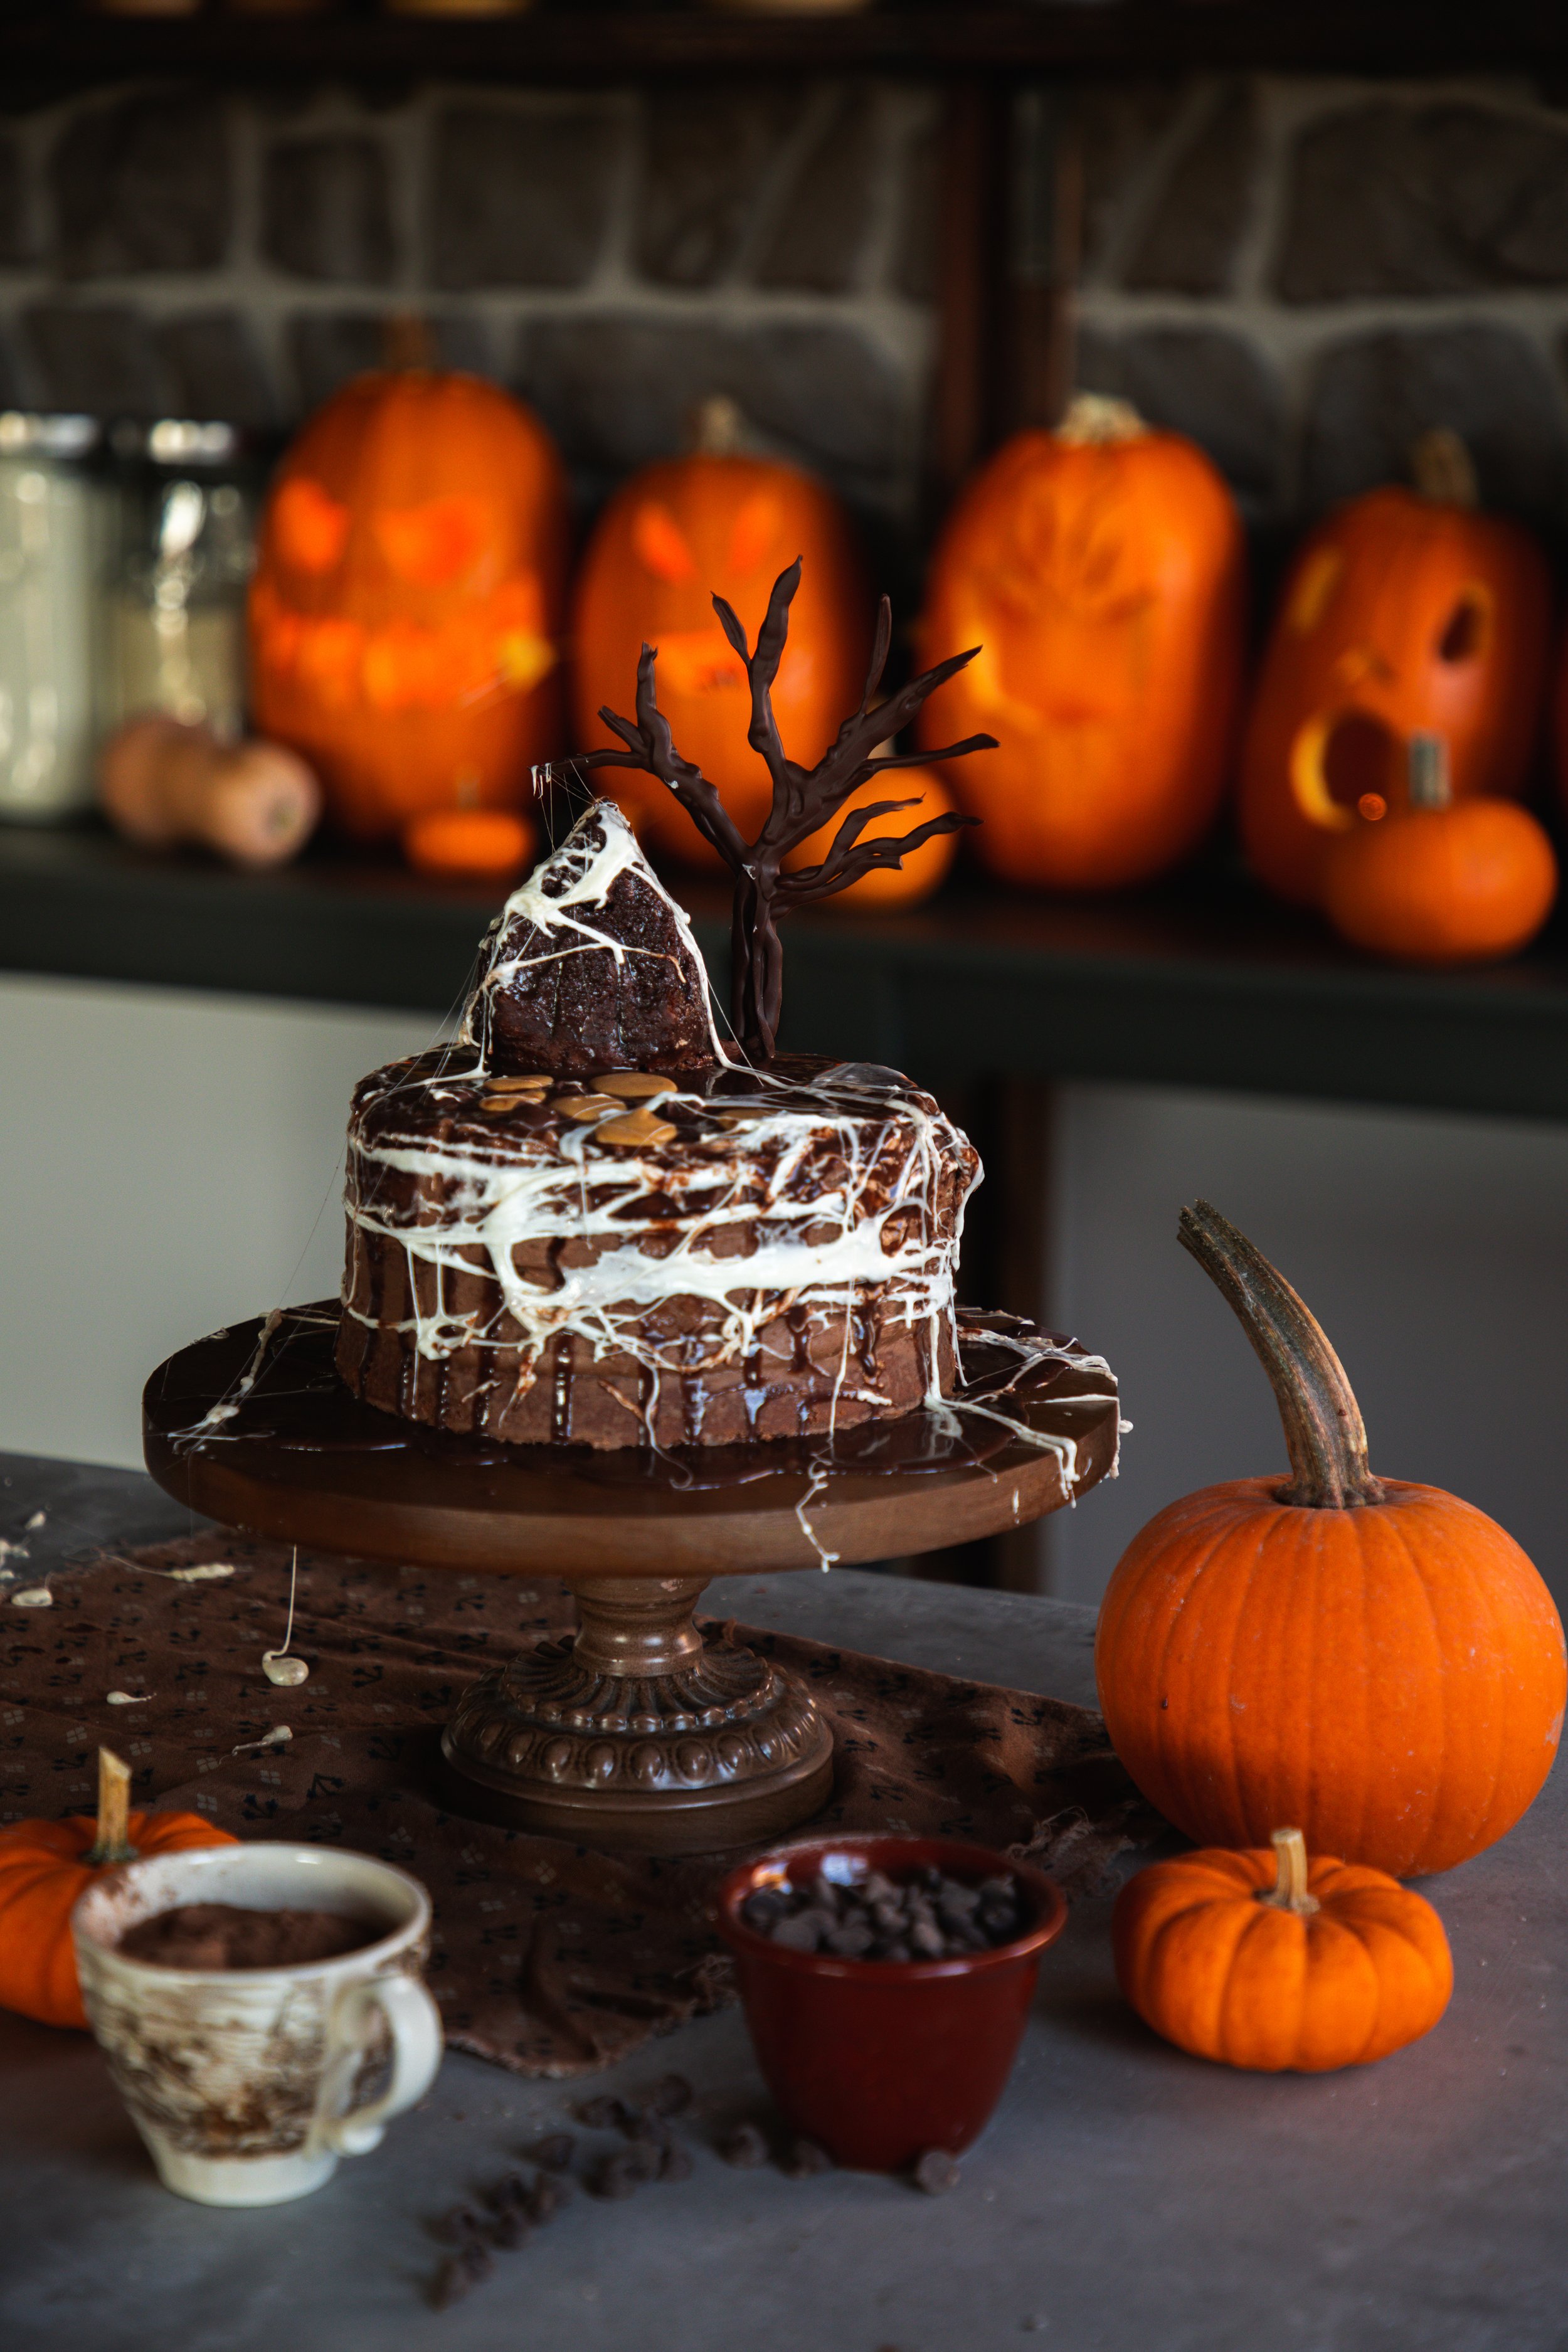

The chocolate tree was made by melting baker’s chocolate down and putting it into a disposable piping bag. We laid out a piece of parchment paper and piped out the tree. It was then left to harden, which was made easier by placing it in the fridge for about 10 minutes. It simply peeled away and was able to easily push into the cake.
The stepping stones were made in a similar fashion.
To make the marshmallow webs, we melted down some jumbo marshmallows in the microwave. When they felt warm enough to handle with our fingers, we stretch them apart and laid them over the cake. I must admit - this was a bit more difficult than we anticipated! I need more practice.


I hope you all have a wonderfully spooky Halloween!
What are you dressing up as this year? I am not sure I will have the time to dress up myself, but maybe I can throw something together at the last minute before we head out trick-or-treating.
xoxo Kayla
Chocolate Peanut Butter Spooky Cake

Ingredients
- 3 cups all-purpose flour
- 1/2 cup unsweetened cocoa powder
- 2 cups granulated sugar
- 1 tbsp baking powder
- 1/2 tsp kosher salt
- 1/2 cup salted butter, softened
- 3 large eggs
- 2 tsp vanilla extract
- 1/2 cup sour cream
- 1/4 cup strong black coffee
- 3/4 cup buttermilk
- 6 ounces cream cheese, softened
- 1/3 cup creamy peanut butter
- 1/2 cup cocoa powder
- 4-5 cups powdered sugar, sifted
- pinch of salt
- 1 tsp vanilla extract
- 1 tbsp heavy cream
- 1 cup semisweet chocolate chips
- 1/2 cup heavy cream
- 1/2 cup jumbo marshmallows
- Melting chocolate for decorations
Instructions
- Preheat the oven to 350° F. Grease and flour 3 9-inch cake pans. If making a spooky house cake, grease and flour a shaped pan.
- In a large bowl, sift together the flour, cocoa powder, sugar, baking powder, and salt. Set this aside.
- In the bowl of a standing electric mixer fitted with a paddle attachment, cream the butter until smooth. Add the eggs, one at a time, beating until they incorporate into the butter. Whip in the vanilla, sour cream, and coffee. It may look a bit separated.
- Begin to incorporate the dry ingredients along with the buttermilk, switching between each, beginning and ending with the dry ingredients. Mix until everything is combined, beating on high speed for about 3-4 minutes. Scrape the sides of the bowl and mix again.
- Divide the batters evenly between the pans and tap them lightly on the counter to remove air bubbles. Bake the cakes for about 30-35 minutes or until a toothpick inserted in the center comes out clean. Let the cakes cool in their pans for about 15 minutes before removing them and placing on a wire cooling rack. Let the cakes cool completely before assembling the final cake.
- In the bowl of a standing electric mixer fitted with a paddle attachment, beat the cream cheese and peanut butter until smooth.
- Begin to add the cocoa powder, powdered sugar, and salt. As the mixture becomes too thick to handle any more powdered sugar, add the vanilla and heavy cream.
- Continue to incorporate as much of the powdered sugar as possible until a stiff frosting forms that can stand up on its own.
- In a small saucepan, warm and chocolate chips and cream. Warm until the chocolate has melted and the cream has not yet started to simmer. Do not boil. Stir well to fully mix the cream and chocolate.
- Remove the pan from heat and let it come to room temperature. This can take a couple of hours, so it may be best to make the ganache ahead of time.
- The ganache is ready when it has cooled and thickened and coats the back of a spoon.
- Begin by spreading a tablespoon or two of frosting on the bottom of your cake platter or cake stand. This will be to help hold the cake in place.
- With a serrated knife, slice off the domes of each of the cakes. Lay one layer of cake with the top side down on the cake platter, over the spread frosting. Spread about 1/4 of the frosting on top, leaving 1/2-inch of space around the edge.
- Layer the remaining cakes in a similar fashion. When the final cake is on top, spread the frosting over the top and down the sides. You may fully frost the cake or leave it semi-naked.
- If you baked a small house cake, dip this in the ganache. Set it aside to dry for a bit. Spread the ganache over the top of the frosted cake and let it drip down the sides.
- To decorate the cake, top with the ganache dipped house. You may choose to add a melted chocolate tree, a chocolate stepping stone path, and spiderwebs.
- To make the marshmallow spiderwebs, melt the marshmallows in the microwave or over very low heat. Stretch them with your fingers and wrap them around the cake.